用python生成词云图 --- 新手练手
类似生成各种形状的云图,我也会啦!
其实也就是针对新手吧,我估计老手分分钟,哈哈哈,我怕我忘了,随手记录下~
四个步骤吧:
- 读文件
- 分词
- 生成词云图
- 显示词云图
1. 读文件
使用了下 codecs 库,读取内容更方便。
import codecs
def get_file_content(filePath):
  with codecs.open(filePath, 'r', 'utf-8') as f:
      txt = f.read()
  return txt
2. 分词
jieba是一个分词库,可以将一段文本分割成词语。cut 是将文本精确切分开,不存在冗余词语。比如颜酱是一个厉害的厨师,会变成['颜酱', '厉害', '厨师']。 Counter是一个计数器,可以统计词语出现的次数,most_common 是取出最常用的词语。
import jieba
from collections import Counter
def get_words(txt):
    # 先分词,得到词语数组
    seg_list = jieba.cut(txt)
    # 开始计数
    c = Counter()
    for x in seg_list:
        if len(x)>1 and x != '\r\n':
            c[x] += 1
    word_list = []
    print('常用词频度统计结果')
     # 统计前99个词
    for (k,v) in c.most_common(99):
        word_list.append(str(k))
    # 将词语生成文本文件
    file = open("./dist/out_words.txt", 'w').close()
    with open("./dist/out_words.txt",'a+',encoding='utf-8') as writeFile:
        for (k,v) in c.most_common(99):    # 统计前99个词
            writeFile.write(str(k))
            writeFile.write(str(v))
            writeFile.write('\n')
    print(word_list)
    # ['发展','平安']
    return word_list
3. 生成云图
wordcloud 是一个词云库,可以将词语生成词云图片。
import wordcloud;
def generate_cloud_image(file_path, shape_image_path):
  word_list = get_words(get_file_content(file_path))
  string = ' '.join(word_list)
  # 读取词云形状图片
  image = imageio.v2.imread(shape_image_path)
  # 先实例化一个词云对象
  wc = wordcloud.WordCloud(width=image.shape[0],     # 词云图宽度同原图片宽度
                          height=image.shape[1],
                          background_color='white',  # 背景颜色白色
                          font_path='Arial Unicode.ttf',    # 指定字体路径,微软雅黑,可从自带的字体库中找
                          mask=image,   # mask 指定词云形状图片,默认为矩形
                          scale=3)      # 默认为1,越大越清晰
  # 生成词云
  wc.generate(string)
  # 保存成文件,output_wordcloud.png,词云图
  wc.to_file('dist/output_wordcloud.png')
  # 弹出图片显示
  alert_image('dist/output_wordcloud.png')
4. 显示词云图
matplotlib是一个绘图库,可以将图片显示出来,plt 用于显示图片,mpimg 用于读取图片。
#
# plt用于显示图片
import matplotlib.pyplot as plt
# mpimg 用于读取图片
import matplotlib.image as mpimg
def alert_image(image_path):
  # 这里是让词云图弹出来显示
  lena = mpimg.imread(image_path) # 读取和代码处于同一目录下的 lena.png
  # 此时 lena 就已经是一个 np.array 了,可以对它进行任意处理
  lena.shape #(512, 512, 3)
  plt.imshow(lena) # 显示图片
  plt.axis('off') # 不显示坐标轴
  plt.show()
这就可以了!
其他文件
准备好文件实验:
input.txt
cloud.jpg
generate_cloud_image.py
generate_cloud_image.py:
import codecs
import jieba
import imageio
import wordcloud
import matplotlib.pyplot as plt
import matplotlib.image as mpimg
from collections import Counter
# def get_words(txt):...
# def get_file_content:...
# def alert_image(image_path):...
# def generate_cloud_image(file_path, shape_image_path):...
generate_cloud_image('input.txt', 'cloud.jpg')
完整版:
import codecs
import jieba
import imageio
import wordcloud
import matplotlib.pyplot as plt
import matplotlib.image as mpimg
from collections import Counter
#  get_words函数用于统计词频,生成out.txt,展示词语和词频 如发展218 坚持170
def get_words(txt):
    seg_list = jieba.cut(txt)
    c = Counter()
    for x in seg_list:
        if len(x)>1 and x != '\r\n':
            c[x] += 1
    word_list = []
    print('常用词频度统计结果')
     # 统计前99个词
    for (k,v) in c.most_common(99):
        word_list.append(str(k))

    file = open("./out_words.txt", 'w').close()
    with open("./out_words.txt",'a+',encoding='utf-8') as writeFile:
        for (k,v) in c.most_common(99):    # 统计前99个词
            writeFile.write(str(k))
            writeFile.write(str(v))
            writeFile.write('\n')
    print(word_list)
    # ['发展','平安']
    return word_list

def get_file_content(filePath):
    with codecs.open(filePath, 'r', 'utf-8') as f:
        txt = f.read()
    return txt
def alert_image(image_path):
    # 这里是让词云图弹出来显示
    lena = mpimg.imread(image_path) # 读取和代码处于同一目录下的 lena.png
    # 此时 lena 就已经是一个 np.array 了,可以对它进行任意处理
    lena.shape #(512, 512, 3)
    plt.imshow(lena) # 显示图片
    plt.axis('off') # 不显示坐标轴
    plt.show()

# 根据文件生成词云图,file_path是文本文件路径,shape_image_path是词云图的图片途径
def generate_cloud_image(file_path, shape_image_path):
    word_list = get_words(get_file_content(file_path))
    string = ' '.join(word_list)
    # 读取词云形状图片
    image = imageio.v2.imread(shape_image_path)
    # 生成词云图片,先实例化一个词云对象
    wc = wordcloud.WordCloud(width=image.shape[0],     # 词云图宽度同原图片宽度
                            height=image.shape[1],
                            background_color='white',  # 背景颜色白色
                            font_path='Arial Unicode.ttf',    # 指定字体路径,微软雅黑,可从win自带的字体库中找
                            mask=image,   # mask 指定词云形状图片,默认为矩形
                            scale=3)      # 默认为1,越大越清晰
    # 再给词云
    wc.generate(string)
    # 保存成文件,output_wordcloud.png,词云图
    wc.to_file('output_wordcloud.png')
    alert_image('output_wordcloud.png')

generate_cloud_image('input.txt', 'cloud.jpg')
运行
记得先pip3 install jieba imageio wordcloud matplotlib
然后python3 generate_cloud_image.py
📢:文件在同一目录,进到这个目录下运行命令
题外话
感兴趣的小伙伴,赠送全套Python学习资料,包含面试题、简历资料等具体看下方。
👉CSDN大礼包🎁:全网最全《Python学习资料》免费赠送🆓!(安全链接,放心点击)
一、Python所有方向的学习路线
Python所有方向的技术点做的整理,形成各个领域的知识点汇总,它的用处就在于,你可以按照下面的知识点去找对应的学习资源,保证自己学得较为全面。
二、Python兼职渠道推荐*
学的同时助你创收,每天花1-2小时兼职,轻松稿定生活费.
三、最新Python学习笔记
当我学到一定基础,有自己的理解能力的时候,会去阅读一些前辈整理的书籍或者手写的笔记资料,这些笔记详细记载了他们对一些技术点的理解,这些理解是比较独到,可以学到不一样的思路。
四、实战案例
纸上得来终觉浅,要学会跟着视频一起敲,要动手实操,才能将自己的所学运用到实际当中去,这时候可以搞点实战案例来学习。
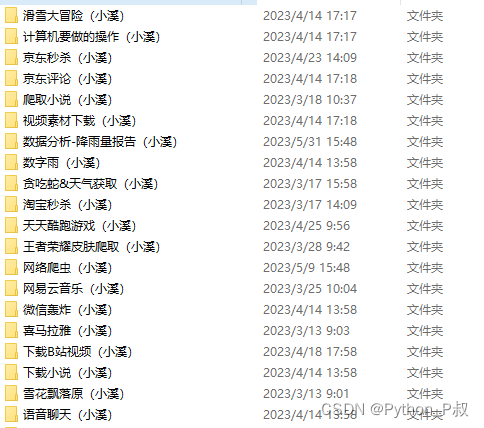
👉CSDN大礼包🎁:全网最全《Python学习资料》免费赠送🆓!(安全链接,放心点击)
若有侵权,请联系删除