Oracle:RHEL7.5安装Oracle19C单实例(图形界面版)
作者 | 夜说
个人公众号 | 夜说的数据库笔记
原文链接 | Oracle:RHEL7.5安装Oracle19C单实例(图形界面版)
目录
01前言
本文基于红帽7.5系统安装Oracle19C单实例,使用图形界面进行安装。
02安装说明
一、系统版本(带GUI安装)
[root@oracle19c ~]# cat /etc/redhat-release
Red Hat Enterprise Linux Server release 7.5 (Maipo)

二、磁盘大小
[root@oracle19c ~]# df -Th
Filesystem            Type      Size  Used Avail Use% Mounted on
/dev/mapper/rhel-root xfs        71G  3.4G   68G   5% /
devtmpfs              devtmpfs  1.9G     0  1.9G   0% /dev
tmpfs                 tmpfs     1.9G     0  1.9G   0% /dev/shm
tmpfs                 tmpfs     1.9G   13M  1.9G   1% /run
tmpfs                 tmpfs     1.9G     0  1.9G   0% /sys/fs/cgroup
/dev/sda1             xfs      1014M  170M  845M  17% /boot
tmpfs                 tmpfs     378M  8.0K  378M   1% /run/user/42
tmpfs                 tmpfs     378M     0  378M   0% /run/user/0

三、内存大小
[root@oracle19c ~]# free -g
              total        used        free      shared  buff/cache   available
Mem:              3           0           2           0           0           2
Swap:             7           0           7

四、cpu信息
[root@oracle19c ~]# cat /proc/cpuinfo
processor       : 0
vendor_id       : GenuineIntel
cpu family      : 6
model           : 151
model name      : 12th Gen Intel(R) Core(TM) i5-12400F

五、数据库安装包
[root@oracle19c ~]# ll LINUX.X64_193000_db_home.zip
-rw-r--r--. 1 root root 3059705302 May 14 16:00 LINUX.X64_193000_db_home.zip
03安装前配置
3.1关闭防火墙和SELINUX
一、关闭防火墙
[root@oracle19c ~]# systemctl stop firewalld.service
[root@oracle19c ~]# systemctl disable firewalld.service
Removed symlink /etc/systemd/system/multi-user.target.wants/firewalld.service.
Removed symlink /etc/systemd/system/dbus-org.fedoraproject.FirewallD1.service.

二、关闭SELINUX
永久关闭,需要重启生效
[root@oracle19c ~]# cat /etc/selinux/config

# This file controls the state of SELinux on the system.
# SELINUX= can take one of these three values:
#     enforcing - SELinux security policy is enforced.
#     permissive - SELinux prints warnings instead of enforcing.
#     disabled - No SELinux policy is loaded.
SELINUX=disabled
# SELINUXTYPE= can take one of three two values:
#     targeted - Targeted processes are protected,
#     minimum - Modification of targeted policy. Only selected processes are protected.
#     mls - Multi Level Security protection.
SELINUXTYPE=targeted

[root@oracle19c ~]# getenforce
Disabled


临时关闭
[root@oracle19c ~]# setenforce 0
[root@oracle19c ~]# getenforce
Permissive
3.2禁用numa和透明大页
在GRUB_CMDLINE_LINUX后面添加numa=off transparent_hugepage=never
[root@oracle19c ~]# vi /etc/default/grub
[root@oracle19c ~]# cat /etc/default/grub
GRUB_TIMEOUT=5
GRUB_DISTRIBUTOR="$(sed 's, release .*$,,g' /etc/system-release)"
GRUB_DEFAULT=saved
GRUB_DISABLE_SUBMENU=true
GRUB_TERMINAL_OUTPUT="console"
GRUB_CMDLINE_LINUX="crashkernel=auto rd.lvm.lv=rhel/root rd.lvm.lv=rhel/swap rhgb quiet numa=off transparent_hugepage=never"
GRUB_DISABLE_RECOVERY="true"
[root@oracle19c ~]# grub2-mkconfig -o /etc/grub2.cfg
Generating grub configuration file ...
Found linux image: /boot/vmlinuz-3.10.0-862.el7.x86_64
Found initrd image: /boot/initramfs-3.10.0-862.el7.x86_64.img
Found linux image: /boot/vmlinuz-0-rescue-c6551ab80cdd44498638640c6faf4445
Found initrd image: /boot/initramfs-0-rescue-c6551ab80cdd44498638640c6faf4445.img
done
[root@oracle19c ~]#

重启生效

检查numa是否关闭
[root@oracle19c ~]# dmesg | grep -i numa
[    0.000000] Command line: BOOT_IMAGE=/vmlinuz-3.10.0-862.el7.x86_64 root=/dev/mapper/rhel-root ro crashkernel=auto rd.lvm.lv=rhel/root rd.lvm.lv=rhel/swap rhgb quiet numa=off transparent_hugepage=never
[    0.000000] NUMA turned off
[    0.000000] Kernel command line: BOOT_IMAGE=/vmlinuz-3.10.0-862.el7.x86_64 root=/dev/mapper/rhel-root ro crashkernel=auto rd.lvm.lv=rhel/root rd.lvm.lv=rhel/swap rhgb quiet numa=off transparent_hugepage=never

检查透明大页是否关闭
[root@oracle19c ~]# grep AnonHugePages /proc/meminfo
AnonHugePages:         0 kB
3.3修改hosts文件
[root@oracle19c ~]# vi /etc/hosts
[root@oracle19c ~]# cat /etc/hosts
127.0.0.1   localhost localhost.localdomain localhost4 localhost4.localdomain4
::1         localhost localhost.localdomain localhost6 localhost6.localdomain6

192.168.26.5 oracle19c
3.4修改login文件
[root@oracle19c ~]# vi /etc/pam.d/login
[root@oracle19c ~]# cat /etc/pam.d/login |grep pam_limit
session    required     pam_limits.so
3.5创建用户和用户组
[root@oracle19c ~]# groupadd -g 54321 oinstall
[root@oracle19c ~]# groupadd -g 54322 dba
[root@oracle19c ~]# groupadd -g 54323 oper
[root@oracle19c ~]# groupadd -g 54324 backupdba
[root@oracle19c ~]# groupadd -g 54325 dgdba
[root@oracle19c ~]# groupadd -g 54326 kmdba
[root@oracle19c ~]# groupadd -g 54327 racdba
[root@oracle19c ~]# useradd -u 54321 -g oinstall -G dba,oper,backupdba,dgdba,kmdba,racdba oracle
[root@oracle19c ~]# echo '123456'|passwd --stdin oracle
Changing password for user oracle.
passwd: all authentication tokens updated successfully.
[root@oracle19c ~]# id oracle
uid=54321(oracle) gid=54321(oinstall) groups=54321(oinstall),54322(dba),54323(oper),54324(backupdba),54325(dgdba),54326(kmdba),54327(racdba)
3.6创建数据库软件目录和数据文件目录
一、创建软件目录并授权
[root@oracle19c ~]# mkdir -p /oracle/app/oracle/product/19.3.0/db_1
[root@oracle19c ~]# chown -R oracle:oinstall /oracle/
[root@oracle19c ~]# chmod -R 775 /oracle/

二、创建数据文件目录并授权
[root@oracle19c ~]# mkdir -p /data
[root@oracle19c ~]# chown -R oracle:oinstall /data/
3.7修改用户限制
[root@oracle19c ~]# cat >>/etc/security/limits.conf <<EOF
> oracle soft nproc 2047
> oracle hard nproc 16384
> oracle soft nofile 1024
> oracle hard nofile 65536
> oracle soft stack 10240
> oracle hard stack 32768
> EOF
3.8修改内核参数
[root@oracle19c ~]# cat >>/etc/sysctl.conf <<EOF
> fs.aio-max-nr = 1048576
> fs.file-max = 6815744
> kernel.shmall = 268435456
> kernel.shmmax = 549755813760
> kernel.shmmni = 4096
> kernel.sem = 250 32000 100 128
> net.ipv4.ip_local_port_range = 9000 65500
> net.core.rmem_default = 262144
> net.core.rmem_max = 4194304
> net.core.wmem_default = 262144
> net.core.wmem_max = 1048576
> EOF

使参数生效
[root@oracle19c ~]# sysctl -p
fs.aio-max-nr = 1048576
fs.file-max = 6815744
kernel.shmall = 268435456
kernel.shmmax = 549755813760
kernel.shmmni = 4096
kernel.sem = 250 32000 100 128
net.ipv4.ip_local_port_range = 9000 65500
net.core.rmem_default = 262144
net.core.rmem_max = 4194304
net.core.wmem_default = 262144
net.core.wmem_max = 1048576
3.9修改network文件
[root@oracle19c ~]# cat >>/etc/sysconfig/network <<EOF
> NOZEROCONF=yes
> EOF
3.10修改Oracle用户环境变量
[root@oracle19c ~]# su - oracle
[oracle@oracle19c ~]$ vi .bash_profile
[oracle@oracle19c ~]$ cat .bash_profile
# .bash_profile

# Get the aliases and functions
if [ -f ~/.bashrc ]; then
        . ~/.bashrc
fi

# User specific environment and startup programs

PATH=$PATH:$HOME/.local/bin:$HOME/bin

export PATH

export ORACLE_BASE=/oracle/app/oracle
export ORACLE_SID=yeshuo
export ORACLE_HOME=$ORACLE_BASE/product/19.3.0/db_1
export PATH=$ORACLE_HOME/bin:$PATH:$ORACLE_HOME/OPatch
export LD_LIBRARY_PATH=$ORACLE_HOME/lib:$LD_LIBRARY_PATH
[oracle@oracle19c ~]$

使环境变量生效
[oracle@oracle19c ~]$ source .bash_profile
3.11配置yum源
[root@oracle19c ~]# vi /etc/yum.repos.d/oracle.repo
[root@oracle19c ~]# cat /etc/yum.repos.d/oracle.repo
[oracle]
name=oracle
baseurl=file:///mnt/cdrom
gpgcheck=0
enabled=1
[root@oracle19c ~]# mkdir -p /mnt/cdrom
[root@oracle19c ~]# mount -o loop /root/rhel-server-7.5-x86_64-dvd.iso /mnt/cdrom/
mount: /dev/loop0 is write-protected, mounting read-only
3.12解压Oracle安装包
[root@oracle19c ~]# mv LINUX.X64_193000_db_home.zip /home/oracle/
[root@oracle19c ~]# chown oracle:oinstall /home/oracle/LINUX.X64_193000_db_home.zip
[root@oracle19c ~]# su - oracle
Last login: Sun May 14 16:29:18 CST 2023 on pts/0
[oracle@oracle19c ~]$ ll
total 2987996
-rw-r--r--. 1 oracle oinstall 3059705302 May 14 16:00 LINUX.X64_193000_db_home.zip
[oracle@oracle19c ~]$ unzip LINUX.X64_193000_db_home.zip -d $ORACLE_HOME
3.13补充安装以下rpm包
[root@oracle19c ~]# yum install -y ksh
[root@oracle19c ~]# yum install -y compat-libcap1
[root@oracle19c ~]# yum install -y libstdc++-devel
[root@oracle19c ~]# yum install -y gcc-c++-4.8.5*
说明:glibc-devel-2.17-222.el7.x86_64.rpm是gcc-c++-4.8.5-28.el7.x86_64.rpm的依赖包,所以上一条语句已包含安装
[root@oracle19c ~]# yum install -y libaio-devel
[root@oracle19c ~]# rpm -ivh compat-libstdc++-33-3.2.3-72.el7.x86_64.rpm
warning: compat-libstdc++-33-3.2.3-72.el7.x86_64.rpm: Header V3 RSA/SHA256 Signature, key ID ec551f03: NOKEY
Preparing...                          ################################# [100%]
Updating / installing...
   1:compat-libstdc++-33-3.2.3-72.el7 ################################# [100%]
04安装数据库软件
4.1打开xmanager调出图形化界面
打开以下程序

打开后会在桌面右下角看到以下内容

端口默认为0:0
4.2安装数据库软件
一、设置DISPLAY环境变量实现xmanager调出图形界面
[oracle@oracle19c ~]$ export DISPLAY=192.168.26.1:0.0
二、运行ORACLE_HOME下面的runInstaller后会跳出安装程序
[oracle@oracle19c ~]$ cd $ORACLE_HOME
[oracle@oracle19c db_1]$ ./runInstaller
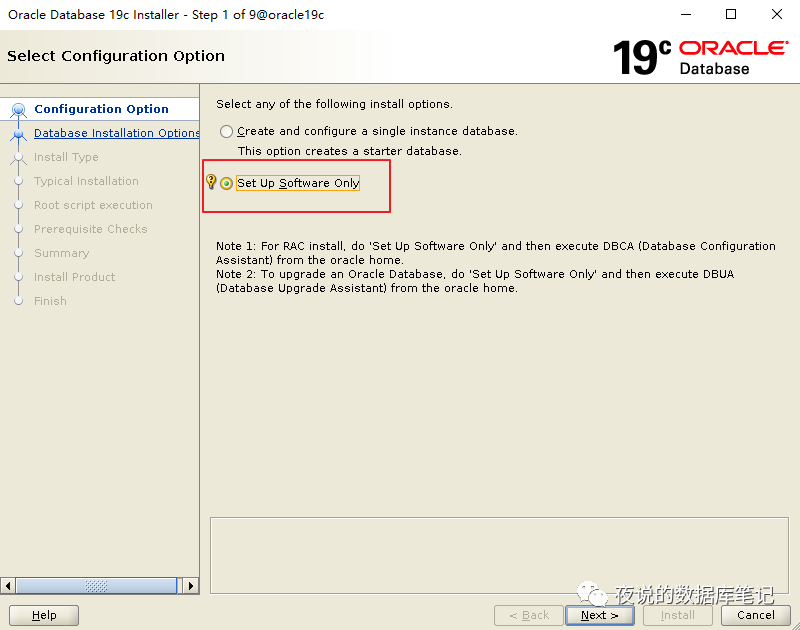
Launching Oracle Database Setup Wizard...选择只安装软件
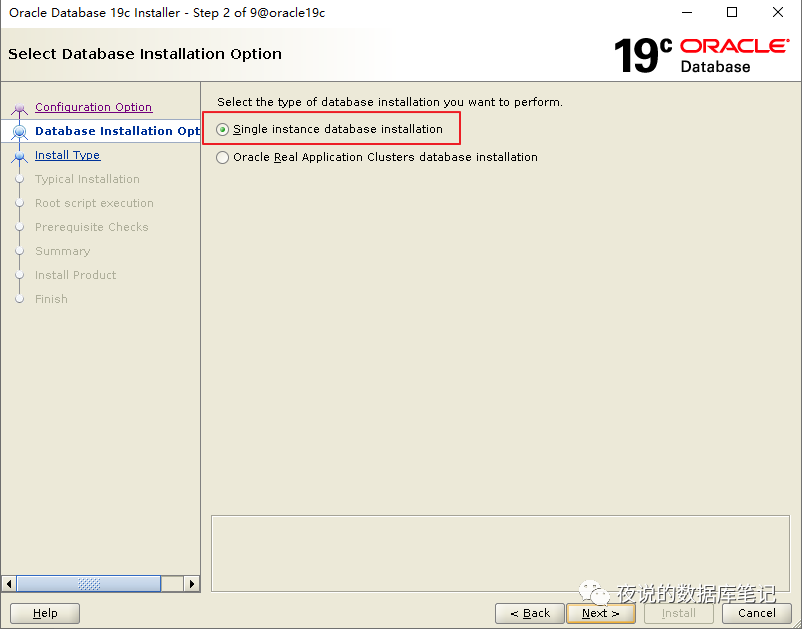
选择单实例数据库
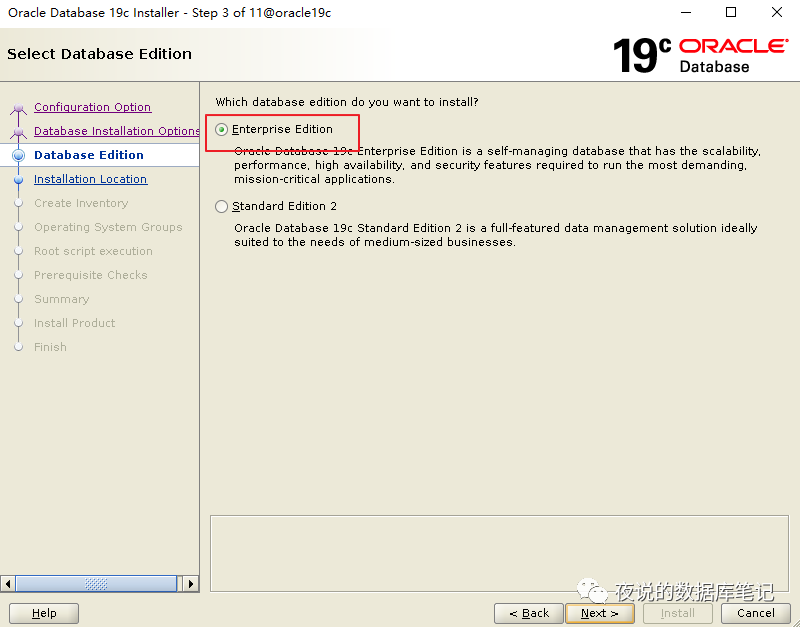
选择企业版
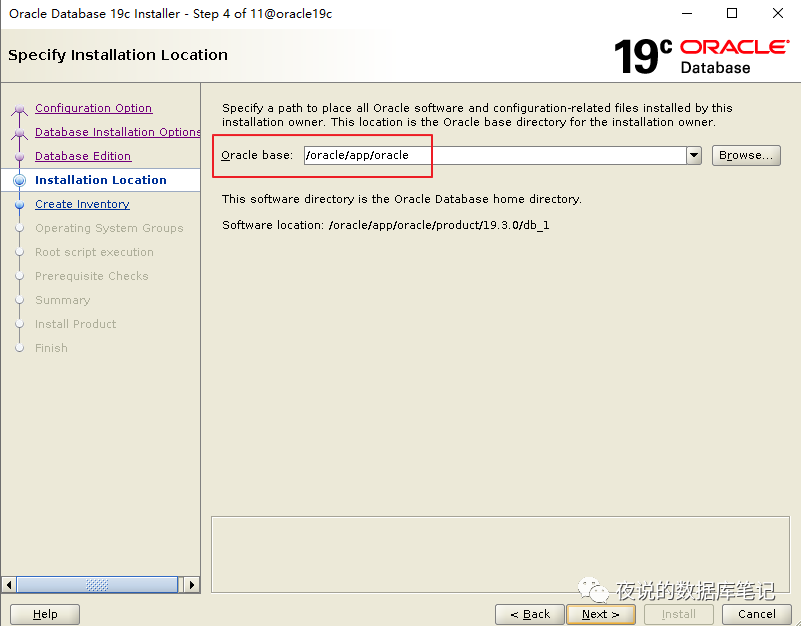
设置oracle base目录
设置inventory目录和组

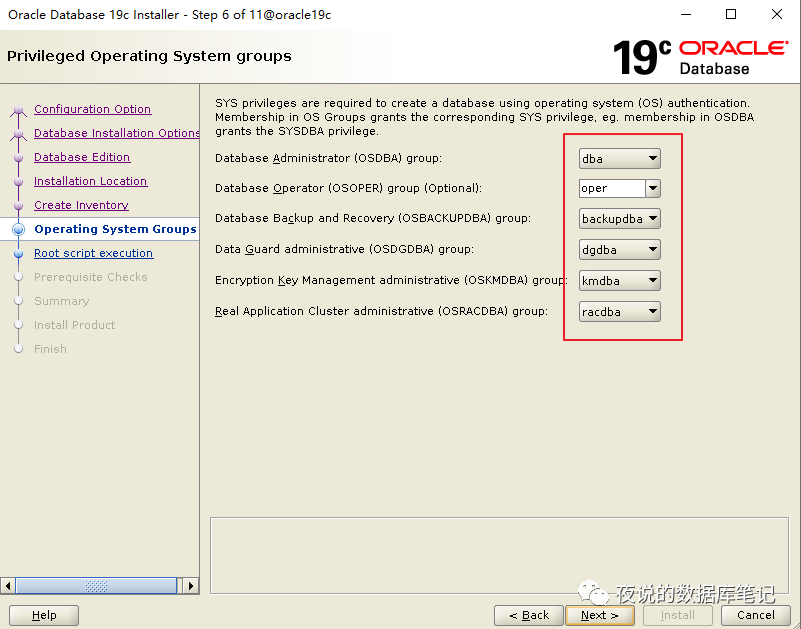
设置操作系统组(默认即可)
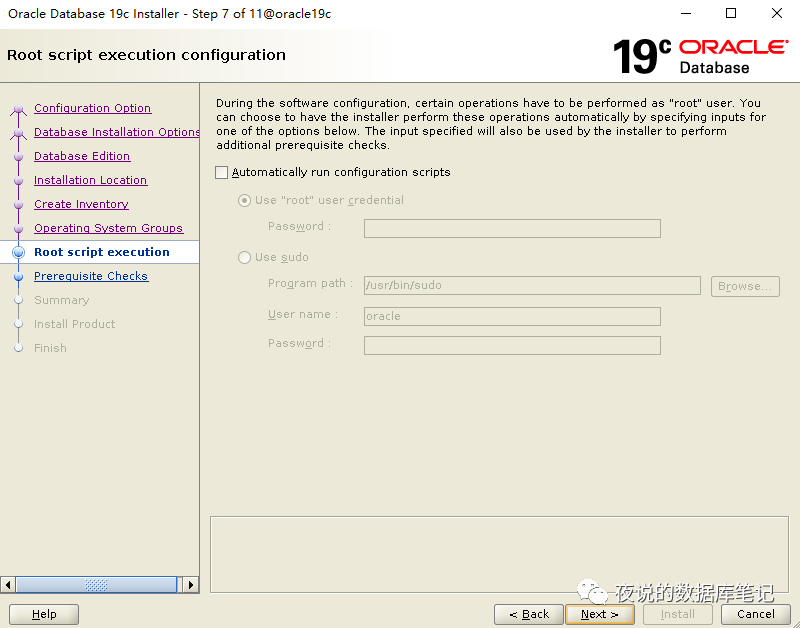
不自动跑root.sh,后面手动执行
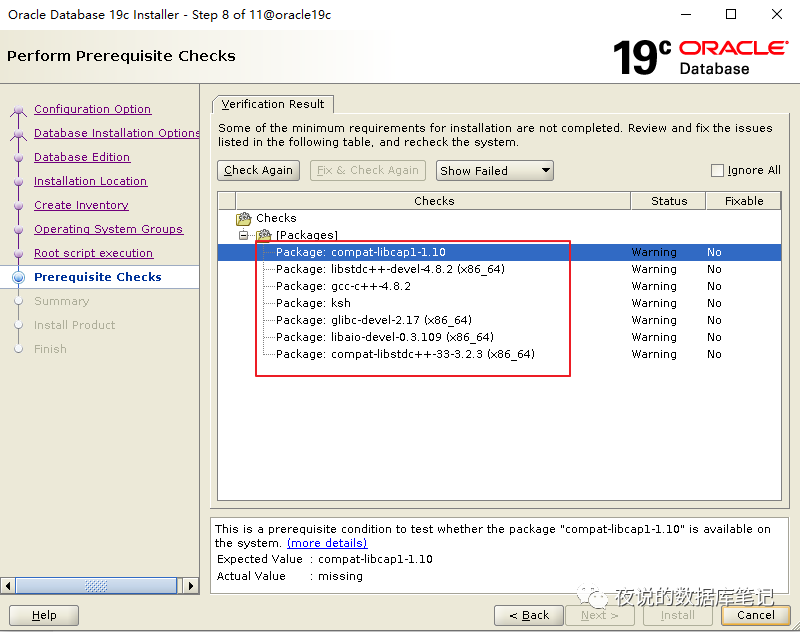
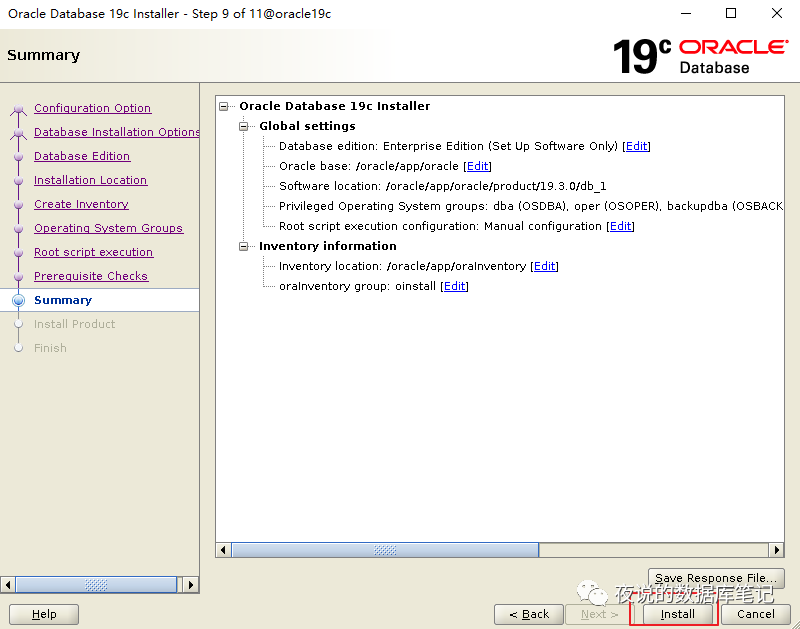
没有检查到问题,直接列出安装内容,点击安装
安装过程中提示需要用root用户执行以下两个脚本

[root@oracle19c ~]# /oracle/app/oraInventory/orainstRoot.sh
Changing permissions of /oracle/app/oraInventory.
Adding read,write permissions for group.
Removing read,write,execute permissions for world.
Changing groupname of /oracle/app/oraInventory to oinstall.
The execution of the script is complete.
[root@oracle19c ~]# /oracle/app/oracle/product/19.3.0/db_1/root.sh
Performing root user operation.
The following environment variables are set as:
ORACLE_OWNER= oracle
ORACLE_HOME= /oracle/app/oracle/product/19.3.0/db_1
Enter the full pathname of the local bin directory: [/usr/local/bin]:
Copying dbhome to /usr/local/bin ...
Copying oraenv to /usr/local/bin ...
Copying coraenv to /usr/local/bin ...
Creating /etc/oratab file...
Entries will be added to the /etc/oratab file as needed by
Database Configuration Assistant when a database is created
Finished running generic part of root script.
Now product-specific root actions will be performed.
Oracle Trace File Analyzer (TFA - Standalone Mode) is available at :
/oracle/app/oracle/product/19.3.0/db_1/bin/tfactl
Note :
1. tfactl will use TFA Service if that service is running and user has been granted access
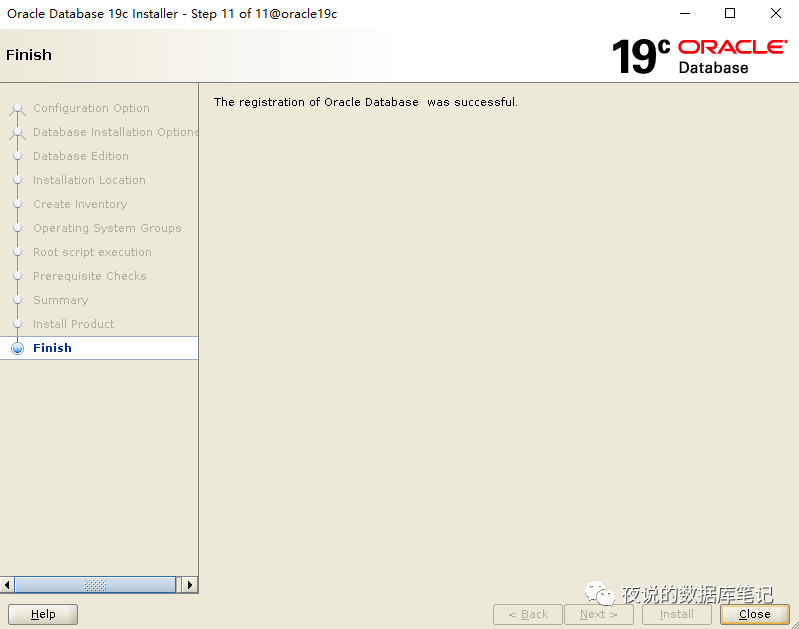
2. tfactl will configure TFA Standalone Mode only if user has no access to TFA Service or TFA is not installed执行完点击OK,继续安装。以下显示为软件安装已完成。
05安装数据库
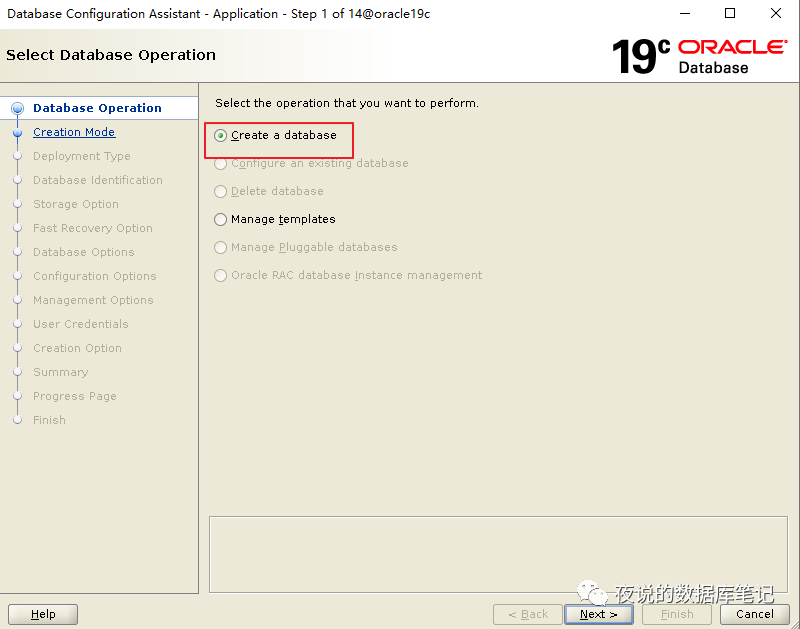
在原来安装软件的窗口执行dbca,调出图形界面
[oracle@oracle19c db_1]$ dbca选择创建数据库

选择高级安装
选择一般事务用途

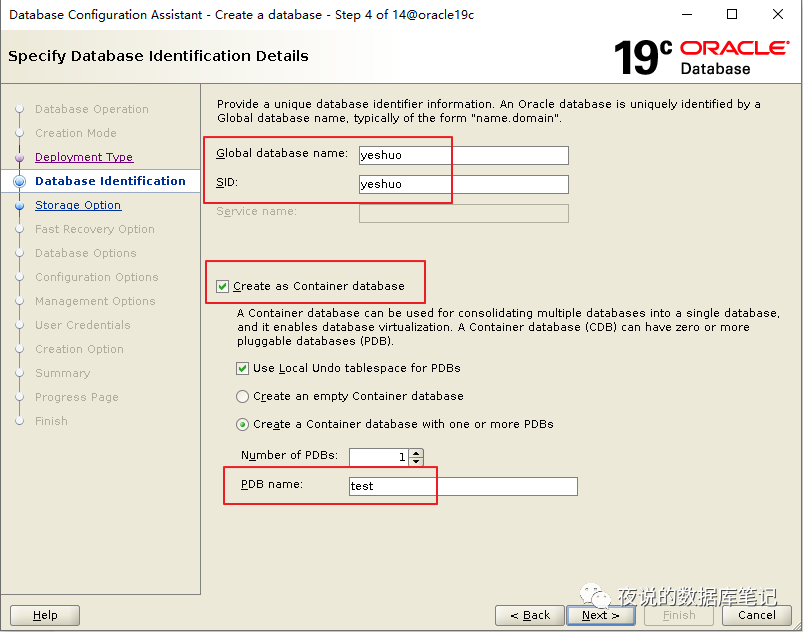
填写数据库名,创建cdb数据库,默认一个pdb
选择使用data作为数据文件目录,并启用omf

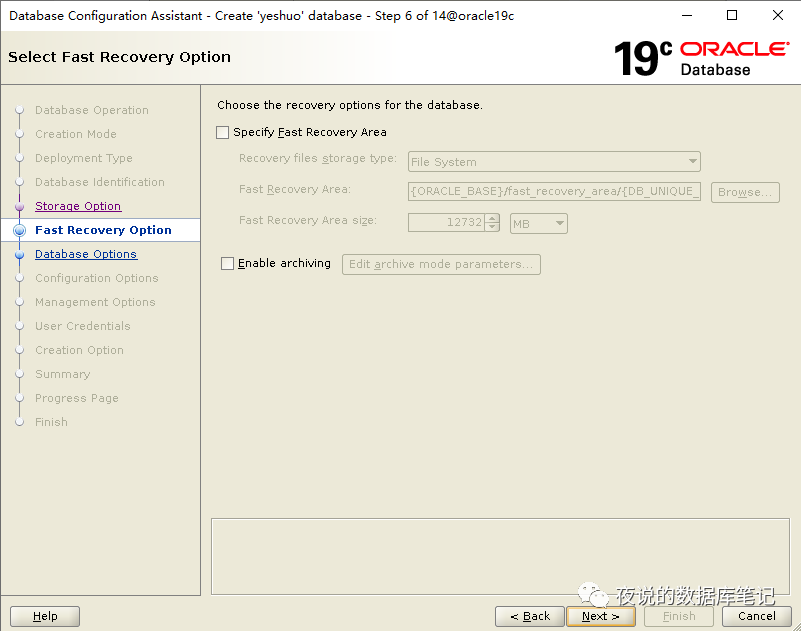
不开启FRA和ARCH
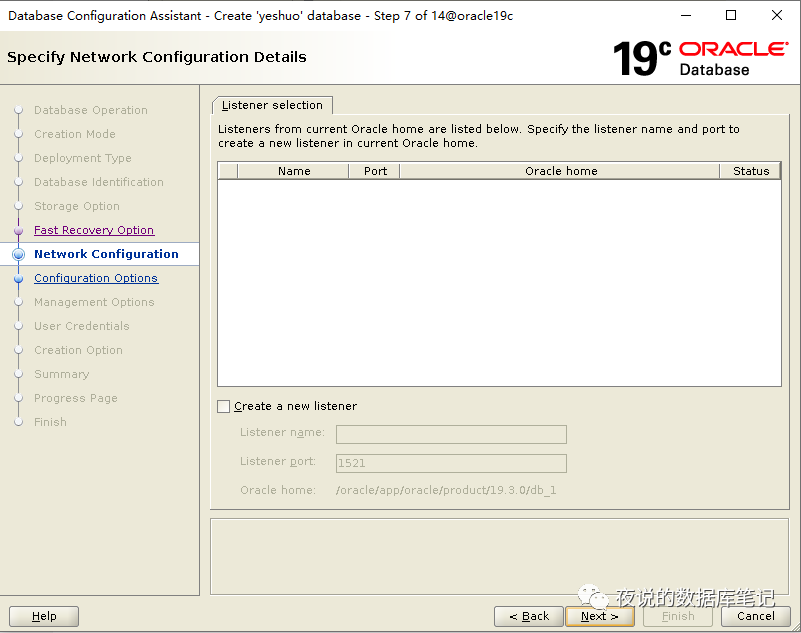
使用默认监听设置
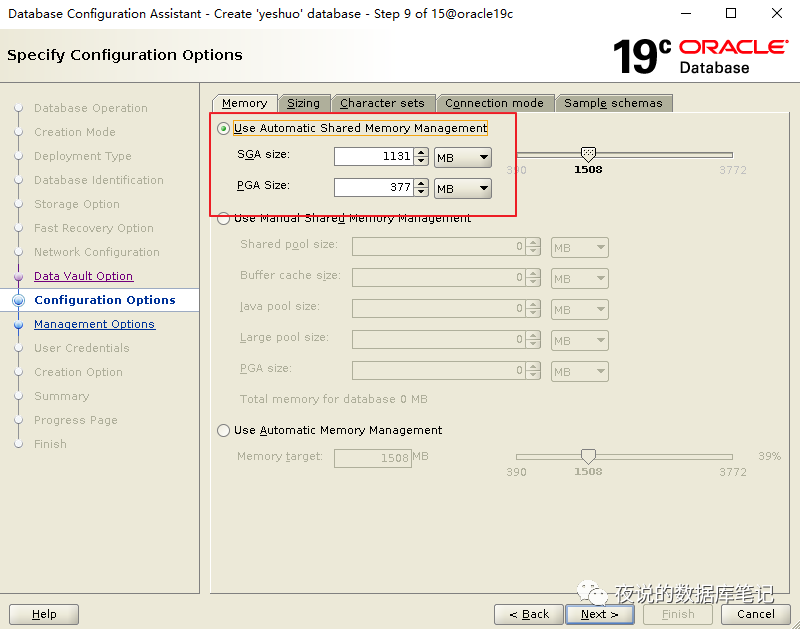
默认即可

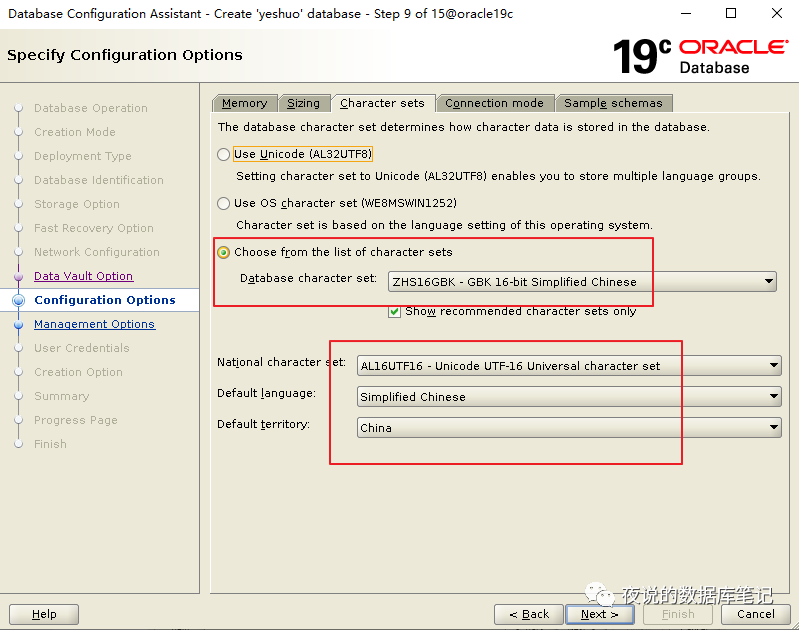
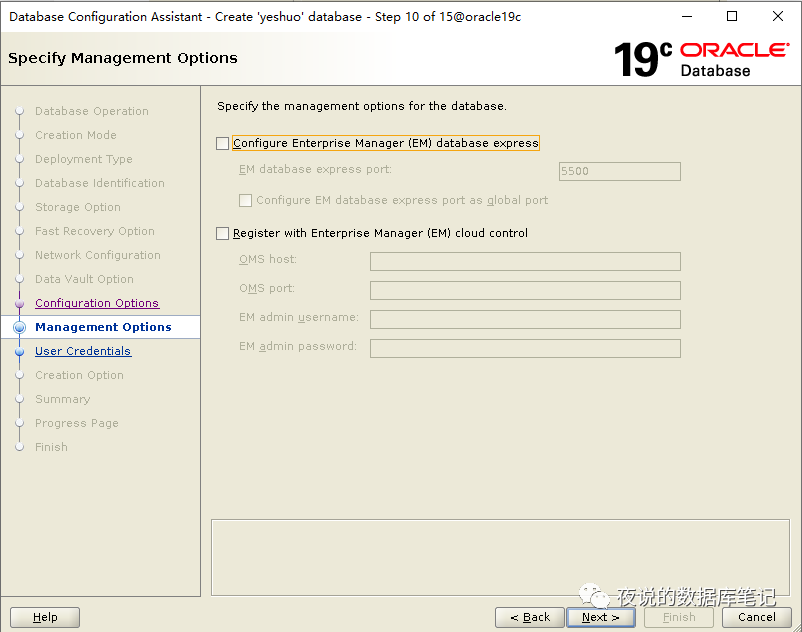
其他选项默认
统一密码为oracle(这里截图错误,不影响安装)

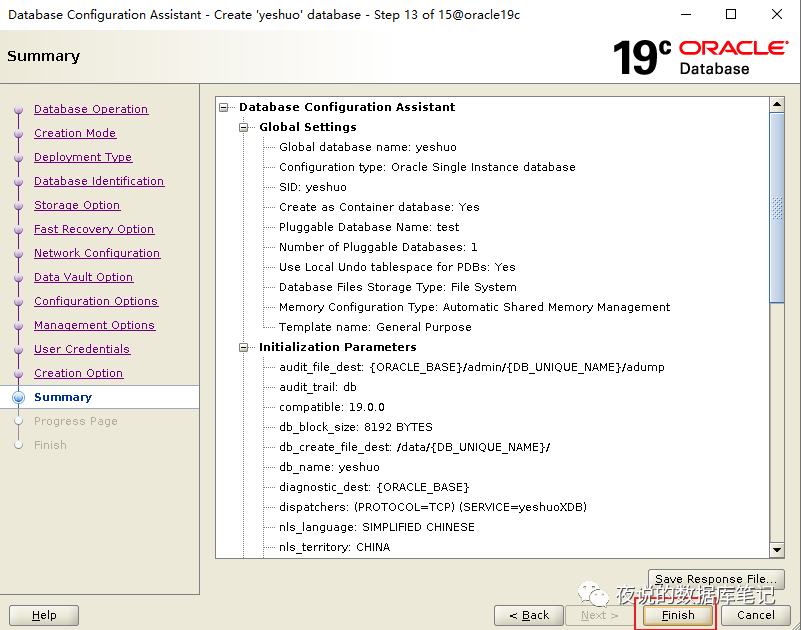
选择创建数据库,并确认初始化参数和存储设置

最后确认安装设置,点击finish开始安装
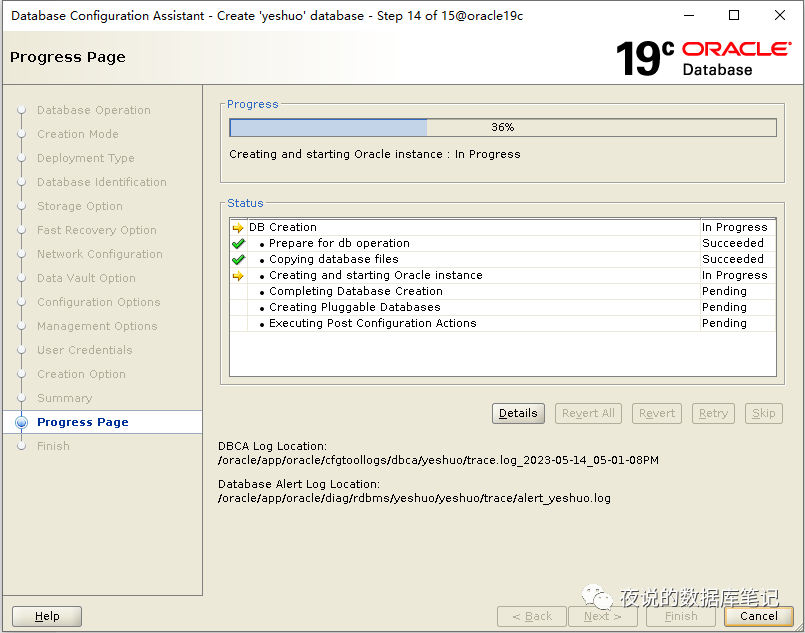
安装中
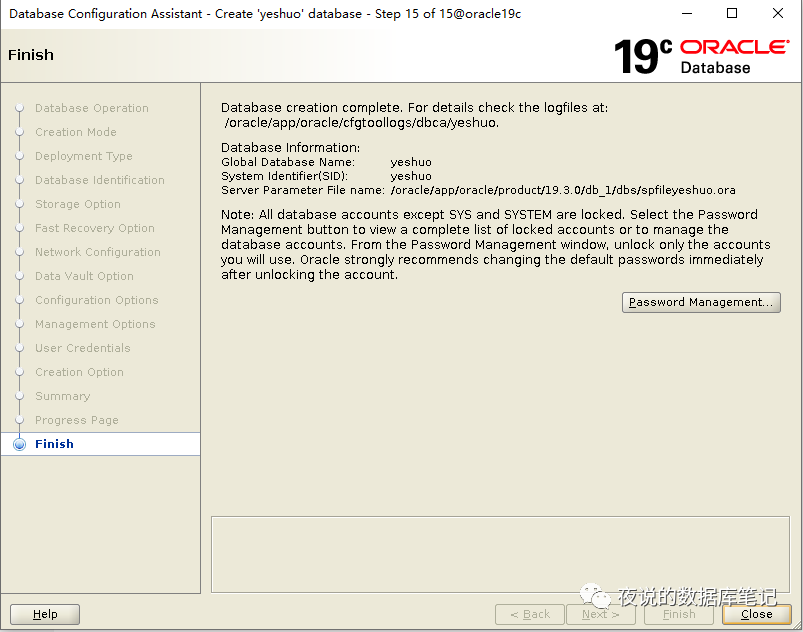
安装完成
06确认安装正常
[oracle@oracle19c db_1]$ sqlplus / as sysdba

SQL*Plus: Release 19.0.0.0.0 - Production on Sun May 14 17:26:59 2023
Version 19.3.0.0.0

Copyright (c) 1982, 2019, Oracle.  All rights reserved.


???:
Oracle Database 19c Enterprise Edition Release 19.0.0.0.0 - Production
Version 19.3.0.0.0

SQL> show pdbs

    CON_ID CON_NAME                       OPEN MODE  RESTRICTED
---------- ------------------------------ ---------- ----------
         2 PDB$SEED                       READ ONLY  NO
         3 TEST                           READ WRITE NO
SQL> select count(*) from dba_objects;

  COUNT(*)
----------
     72376
以上。