手写vue——简版Vue的实现1
MVVM的实现
MVVM框架的三要素:数据响应式、模版引擎及其渲染
数据响应式:监听数据变化并在视图中更新
- Object.defineProperty(),Vue2中的实现
- Proxy,Vue3中的实现
模版引擎:提供描述视图的模版语法
- 插值:{{}}
- 指令:v-bind, v-on, v-model, v-for, v-if
渲染:如何将模版转换成html
- 模版=> vdom => dom
代码实现
创建vue_simple项目
vue create vue_simple
项目目录
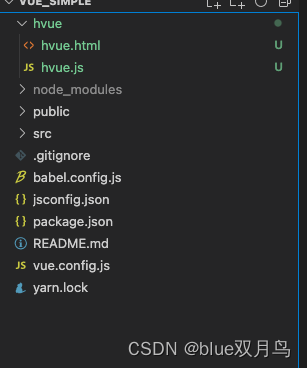
其中hvue.html是我们测试效果的代码,hvue.js就是我要写的简版vue的代码。
编写过程
测试代码 hvue.html
<!DOCTYPE html>
<html lang="en">
<head>
    <meta charset="UTF-8">
    <meta http-equiv="X-UA-Compatible" content="IE=edge">
    <meta name="viewport" content="width=device-width, initial-scale=1.0">
    <title>简版vue的实现</title>
</head>
<body>
    <div id="app">
        <p>{{counter}}
        	<span>{{sum}}</span>
        </p>
    </div>
</body>
<script src="../node_modules/vue/dist/vue.js"></script>
<script>
    const app = new Vue({
        el:'#app',
        data:{
            counter:1,
            sum:1
        }
    })
</script>
</html>
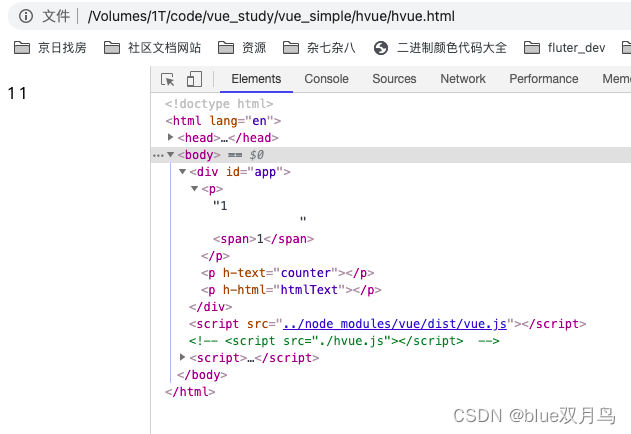
这里可以看到,此时使用的还是vue的,在接下来就要引用我们写的kvue.js。现在的页面效果如下:
明确实现hVue.js的过程
- 要实现数据的响应式
- 要实现一个模版引擎,可以将模版的各种插值和指令进行数据替换并渲染出来
- 要实现数据更新后,模版自动更新
数据响应式
hvue.js 实现 数据响应式的部分
class Hvue{
    constructor(options){
        // 先保存相关参数
        this.$options = options;
        this.$data = options.data;
        // 代理data,直接用this.xxx访问数据
        proxy(this);
        //1、实现数据响应式 遍历data
        observe(options.data)
        //2、编译
    }
}

//遍历data 使其成为响应式数据
function observe(data){
    // 判断类型
    if(typeof data !== 'object' || data === null) return data;

    Observe(data)
}

class Observe{
    constructor(obj){
        // 数组类型要进行特殊处理
        if(Array.isArray(obj)){

        }else{
            this.walk(obj);
        }
    }

    walk(obj){
        Object.keys(obj).forEach((key)=>defineReactive(obj,key,obj[key]));
    }
}

// 给 object 定义一个响应式属性
function defineReactive(obj,key,val){
    //对象嵌套处理
    //如果val是对象
    observe(val)


    Object.defineProperty(obj,key,{
        get(){
            return val;
        },
        set(newValue){
            val = newValue;
            return val;
        }
    })
}

//将所有的data代理到vue上,实现在代码中 this.xxx和this.data.xxx同样的效果
function proxy(vm){
    Object.keys(vm.$data).forEach((key)=>{
        Object.defineProperty(vm.$data,key,{
            get(){
                return vm.$data[key];
            },
            set(newValue){
                vm.$data[key] = newValue;
                return vm.$data[key];
            }
        })
    })
}
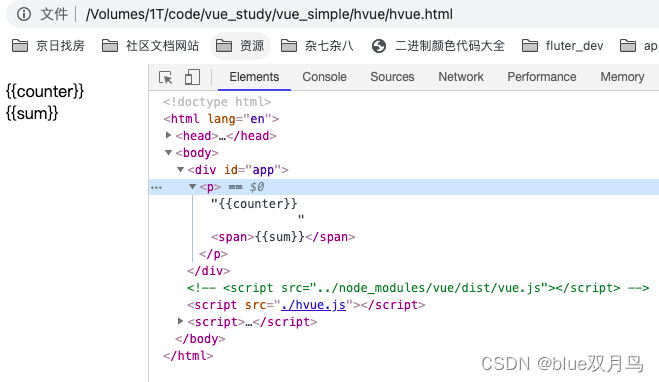
现在虽然已经将数据全部转换成响应式,但页面还是没有绑定上数据,因为我们还要进行模版处理
模版编译
现在实现模版编译,这块实现完成后,我们就可以初步查看页面效果啦。
class Hvue{
    constructor(options){
        // 先保存相关参数
        this.$options = options;
        this.$data = options.data;
        // 代理data,直接用this.xxx访问数据
        proxy(this);
        //1、实现数据响应式 遍历data
        observe(options.data)
        //2、编译 遍历节点
        new Compile(options.el,this)
    }
}

//遍历data 使其成为响应式数据
function observe(data){
    // 判断类型
    if(typeof data !== 'object' || data === null) return data;

    new Observe(data)
}

class Observe{
    constructor(obj){
        // 数组类型要进行特殊处理
        if(Array.isArray(obj)){

        }else{
            this.walk(obj);
        }
    }

    walk(obj){
        Object.keys(obj).forEach((key)=>defineReactive(obj,key,obj[key]));
    }
}

// 给 object 定义一个响应式属性
function defineReactive(obj,key,val){
    //对象嵌套处理
    //如果val是对象
    observe(val)


    Object.defineProperty(obj,key,{
        get(){
            return val;
        },
        set(newValue){
            val = newValue;
        }
    })
}

//将所有的data代理到vue上,实现在代码中 this.xxx和this.data.xxx同样的效果
function proxy(vm){
    Object.keys(vm.$data).forEach((key)=>{
        Object.defineProperty(vm,key,{
            get(){
                return vm.$data[key];
            },
            set(newValue){
                vm.$data[key] = newValue;
            }
        })
    })
}

// 模版引擎编译
class Compile{
    constructor(el,vm){
        this.$vm = vm;
        this.$el = document.querySelector(el);

        if(this.$el){
            this.compile(this.$el);
        }
    }

    compile(node){
        const childNodes = node.childNodes;

        Array.from(childNodes).forEach(n=>{
            // 判断节点类型
            //是元素节点
            if(this.isElement(n)){
            	//继续遍历节点
                if (n.childNodes.length > 0) {
                    this.compile(n);
                  }
            //字符串 插值表达式
            }else if (this.isInter(n)) {
                n.textContent = this.$vm[RegExp.$1];
            }
        })
    }

    isElement(n) {
        return n.nodeType === 1;
    }

    isInter(n){
        console.log(n.textContent)
        return n.nodeType === 3 && /\{\{(.*)\}\}/.test(n.textContent)
    }
}
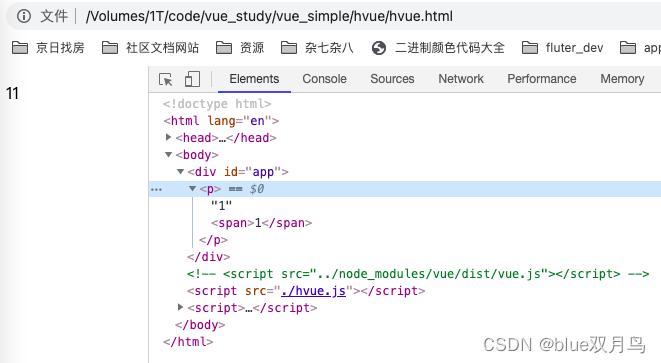
现在已经可以看到页面啦,现在只实现了插值处理,下面我们将完善代码,实现指令处理。现在我们在hvue.html文件里加上指令的相关代码。
<!DOCTYPE html>
<html lang="en">
<head>
    <meta charset="UTF-8">
    <meta http-equiv="X-UA-Compatible" content="IE=edge">
    <meta name="viewport" content="width=device-width, initial-scale=1.0">
    <title>简版vue的实现</title>
</head>
<body>
    <div id="app">
        <p>{{counter}}</p>
        <p h-text="counter"></p> //指令
        <p h-html="htmlText"></p> //指令
    </div>
</body>
<!-- <script src="../node_modules/vue/dist/vue.js"></script> -->
<script src="./hvue.js"></script>
<script>
    const app = new Hvue({
        el:'#app',
        data:{
            counter:1,
            htmlText:'<span style="color:red">我成功啦</span>'
        }
    })
</script>
</html>
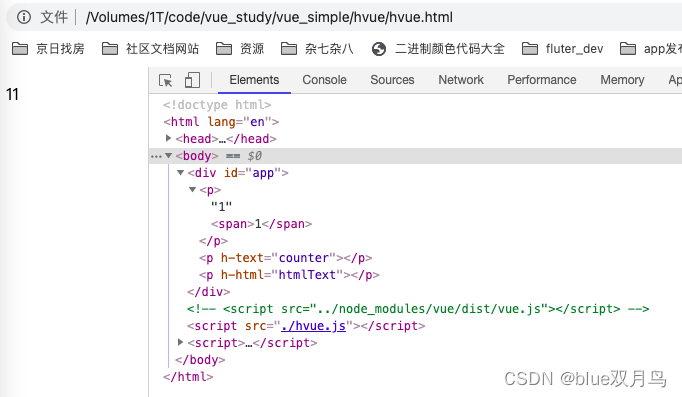
此时的页面并没有把准确的数据显示出来,下面我们将继续处理它。
class Hvue{
    constructor(options){
        // 先保存相关参数
        this.$options = options;
        this.$data = options.data;
        // 代理data,直接用this.xxx访问数据
        proxy(this);
        //1、实现数据响应式 遍历data
        observe(options.data)
        //2、编译 遍历节点
        new Compile(options.el,this)
    }
}

//遍历data 使其成为响应式数据
function observe(data){
    // 判断类型
    if(typeof data !== 'object' || data === null) return data;

    new Observe(data)
}

class Observe{
    constructor(obj){
        // 数组类型要进行特殊处理
        if(Array.isArray(obj)){

        }else{
            this.walk(obj);
        }
    }

    walk(obj){
        Object.keys(obj).forEach((key)=>defineReactive(obj,key,obj[key]));
    }
}

// 给 object 定义一个响应式属性
function defineReactive(obj,key,val){
    //对象嵌套处理
    //如果val是对象
    observe(val)


    Object.defineProperty(obj,key,{
        get(){
            return val;
        },
        set(newValue){
            val = newValue;
        }
    })
}

//将所有的data代理到vue上,实现在代码中 this.xxx和this.data.xxx同样的效果
function proxy(vm){
    Object.keys(vm.$data).forEach((key)=>{
        Object.defineProperty(vm,key,{
            get(){
                return vm.$data[key];
            },
            set(newValue){
                vm.$data[key] = newValue;
            }
        })
    })
}

// 模版引擎编译
class Compile{
    constructor(el,vm){
        this.$vm = vm;
        this.$el = document.querySelector(el);

        if(this.$el){
            this.compile(this.$el);
        }
    }

    compile(node){
        const childNodes = node.childNodes;

        Array.from(childNodes).forEach(n=>{
            // 判断节点类型
            //是元素节点
            if(this.isElement(n)){
                // ---------------处理指令编译--------------------------
                this.compileElement(n);
                //继续遍历节点
                if (n.childNodes.length > 0) {
                    this.compile(n);
                  }
            //字符串 插值表达式
            }else if (this.isInter(n)) {
                n.textContent = this.$vm[RegExp.$1];
            }
        })
    }

    isElement(n) {
        return n.nodeType === 1;
    }

    isInter(n){
        return n.nodeType === 3 && /\{\{(.*)\}\}/.test(n.textContent)
    }

    // 处理指令 编译
    compileElement(n){
        const attrs = n.attributes;
        Array.from(attrs).forEach(attr=>{
            const attrName = attr.name;
            const exp = attr.value;
            // 判断是否为特定的属性指令 h-
            if(this.isDir(attrName)){
                this.commandHandler(n,attrName,exp);
            }
        })
    }

    isDir(attrName){
        return attrName&&attrName.startsWith('h-');
    }

    // 匹配对应的指令处理函数
    commandHandler(node,attrName,exp){
        const fn = this[attrName.replace('h-','')+'CommandHandler'];
        fn&&fn.call(this,node,exp);
    }

    //h-text指令编译
    textCommandHandler(node,exp){
        node.textContent = this.$vm[exp];
    }

    //h-html
    htmlCommandHandler(node,exp){
        node.innerHTML= this.$vm[exp];
    }
}
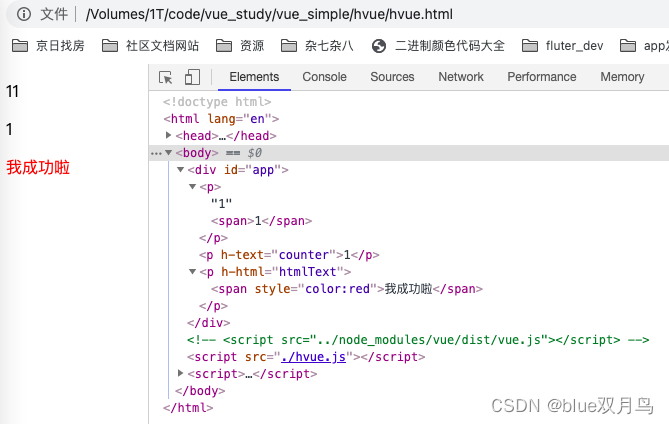
来看看页面效果
接下来我们要实现js中更改data,页面会自动更新。实现的简单思路:
- 在模版引擎编译处理的时候,遇到一个插值或者指令,就创建一个watcher,用于储存此节点的更新操作,同时将此watcher及其对应的响应数据存储到Dep中,一个响应数据对应一个Dep。
- 在将来响应数据发生变化的时候,找到对应的Dep,遍历执行里面的watcher,进行更新页面。
附上一张示意图: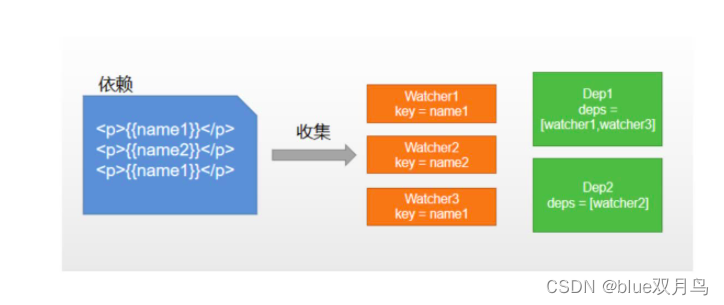
下面我们使用代码实现。
class Hvue{
    constructor(options){
        // 先保存相关参数
        this.$options = options;
        this.$data = options.data;
        // 代理data,直接用this.xxx访问数据
        proxy(this);
        //1、实现数据响应式 遍历data
        observe(options.data)
        //2、编译 遍历节点
        new Compile(options.el,this)
    }
}

//遍历data 使其成为响应式数据
function observe(data){
    // 判断类型
    if(typeof data !== 'object' || data === null) return data;

    new Observe(data)
}

class Observe{
    constructor(obj){
        // 数组类型要进行特殊处理
        if(Array.isArray(obj)){

        }else{
            this.walk(obj);
        }
    }

    walk(obj){
        Object.keys(obj).forEach((key)=>defineReactive(obj,key,obj[key]));
    }
}

// 给 object 定义一个响应式属性
function defineReactive(obj,key,val){
    //对象嵌套处理
    //如果val是对象
    observe(val)

    // 创建Dep实例
    const dep = new Dep()
    console.log(dep.watchers)

    Object.defineProperty(obj,key,{
        get(){
            Dep.target && dep.add(Dep.target);
            console.log(dep.watchers)
            return val;
        },
        set(newValue){
            console.log('set触发了')
            val = newValue;
            dep.emit()
        }
    })
}

//将所有的data代理到vue上,实现在代码中 this.xxx和this.data.xxx同样的效果
function proxy(vm){
    Object.keys(vm.$data).forEach((key)=>{
        Object.defineProperty(vm,key,{
            get(){
                return vm.$data[key];
            },
            set(newValue){
                vm.$data[key] = newValue;
            }
        })
    })
}

// 模版引擎编译
class Compile{
    constructor(el,vm){
        this.$vm = vm;
        this.$el = document.querySelector(el);

        if(this.$el){
            this.compile(this.$el);
        }
    }

    compile(node){
        const childNodes = node.childNodes;

        Array.from(childNodes).forEach(n=>{
            // 判断节点类型
            //是元素节点
            if(this.isElement(n)){
                // 处理指令编译
                this.compileElement(n);
                //继续遍历节点
                if (n.childNodes.length > 0) {
                    this.compile(n);
                  }
            //字符串 插值表达式
            }else if (this.isInter(n)) {
                // n.textContent = this.$vm[RegExp.$1];
                this.commandHandler(n,'h-text',RegExp.$1)
            }
        })
    }

    isElement(n) {
        return n.nodeType === 1;
    }

    isInter(n){
        return n.nodeType === 3 && /\{\{(.*)\}\}/.test(n.textContent)
    }

    // 处理指令 编译
    compileElement(n){
        const attrs = n.attributes;
        Array.from(attrs).forEach(attr=>{
            const attrName = attr.name;
            const exp = attr.value;
            // 判断是否为特定的属性指令 h-
            if(this.isDir(attrName)){
                this.commandHandler(n,attrName,exp);
            }
        })
    }

    isDir(attrName){
        return attrName&&attrName.startsWith('h-');
    }

    // 匹配对应的指令处理函数
    commandHandler(node,attrName,exp){
        const fn = this[attrName.replace('h-','')+'CommandHandler'];
        fn&&fn.call(this,node,this.$vm[exp]);

        // 创建watcher
        new Watcher(this.$vm,exp,()=>fn(node,this.$vm[exp]))
    }

    //h-text指令编译
    textCommandHandler(node,value){
        node.textContent = value;
    }

    //h-html
    htmlCommandHandler(node,value){
        node.innerHTML= value;
    }
}

// Watcher
class Watcher{
    constructor(vm,key,updater){
        this.vm = vm;
        this.key = key;
        this.updater = updater;

        Dep.target = this;
        console.log('Dep.target',Dep.target)
        this.vm[key]; //触发对应data的get函数
        Dep.target = null;
    }

    update(){
        this.updater()
    }
}
//保存Watcher 的 Dep 实例
class Dep{
    constructor(){
        this.watchers = [];
    }

    add(watcher){
        this.watchers.push(watcher);
        console.log('add',watcher,this.watchers)
    }

    emit(){
        console.log('emit',this.watchers)
        this.watchers.forEach(watcher=>watcher.update());
    }
}
hvue.html,写一个定时器改变counter的值。
<!DOCTYPE html>
<html lang="en">
<head>
    <meta charset="UTF-8">
    <meta http-equiv="X-UA-Compatible" content="IE=edge">
    <meta name="viewport" content="width=device-width, initial-scale=1.0">
    <title>简版vue的实现</title>
</head>
<body>
    <div id="app">
        <p>{{counter}}
            <span>{{sum}}</span>
        </p>
        <p h-text="counter"></p>
        <p h-html="htmlText"></p>
    </div>
</body>
<!-- <script src="../node_modules/vue/dist/vue.js"></script> -->
<script src="./hvue.js"></script>
<script>
    const app = new Hvue({
        el:'#app',
        data:{
            counter:1,
            sum:1,
            htmlText:'<span style="color:red">我成功啦</span>'
        }
    })
    setInterval(() => {
        // console.log(app.counter)
        app.counter++
    }, 1000);
</script>
</html>
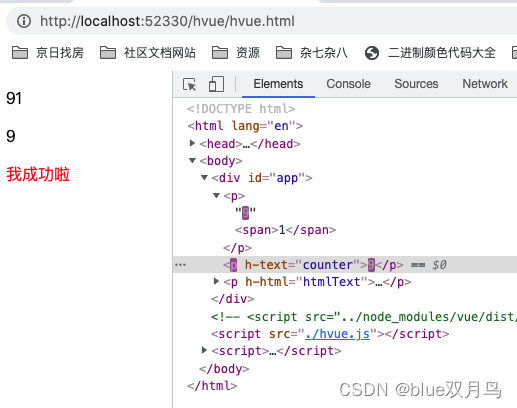
我们可以看到页面已经可以更新了
源码在这里
下篇将实现onClick和h-input。