C#的低频卡门禁系统
目录
准备工作
1我们要准备好NewLab实验台并放上M3模块和LF 天线模块 ,把实验台调整到"通讯模式"

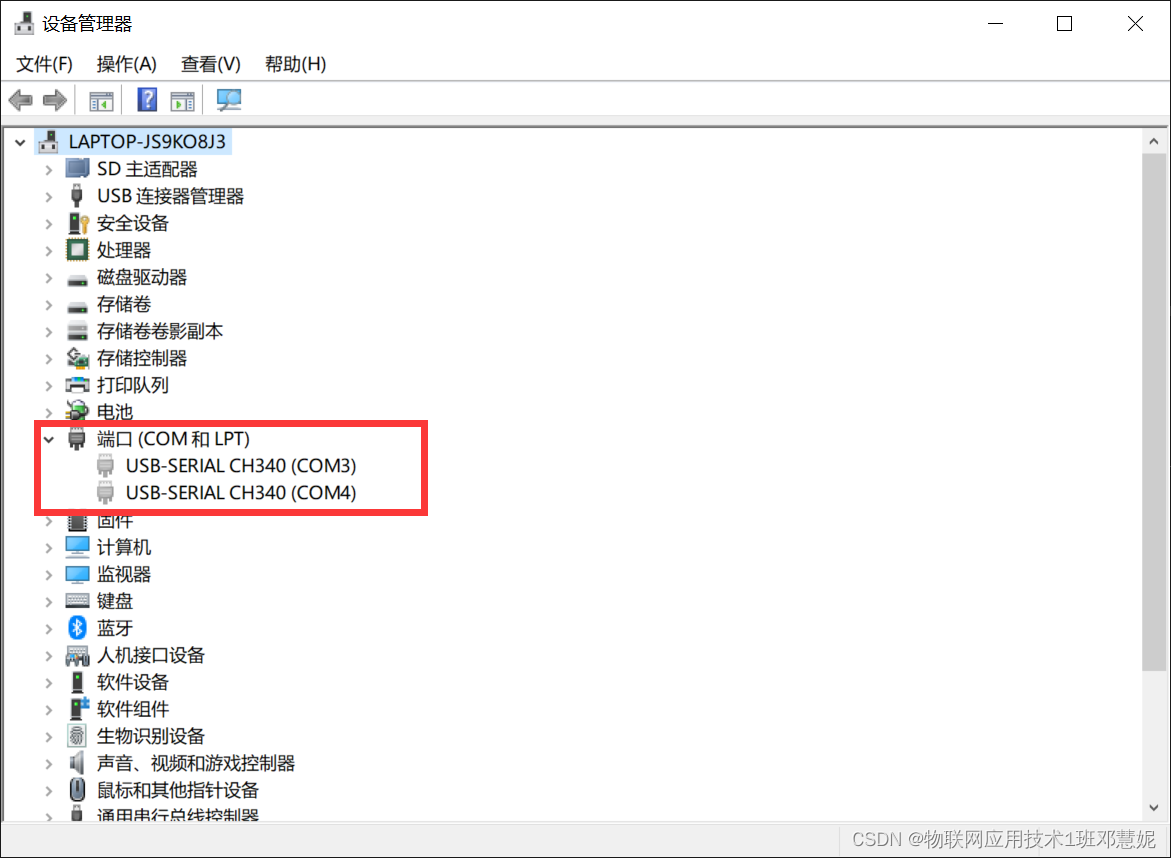
2在设备管理器中查找本机的串口号 ,默认是COM1
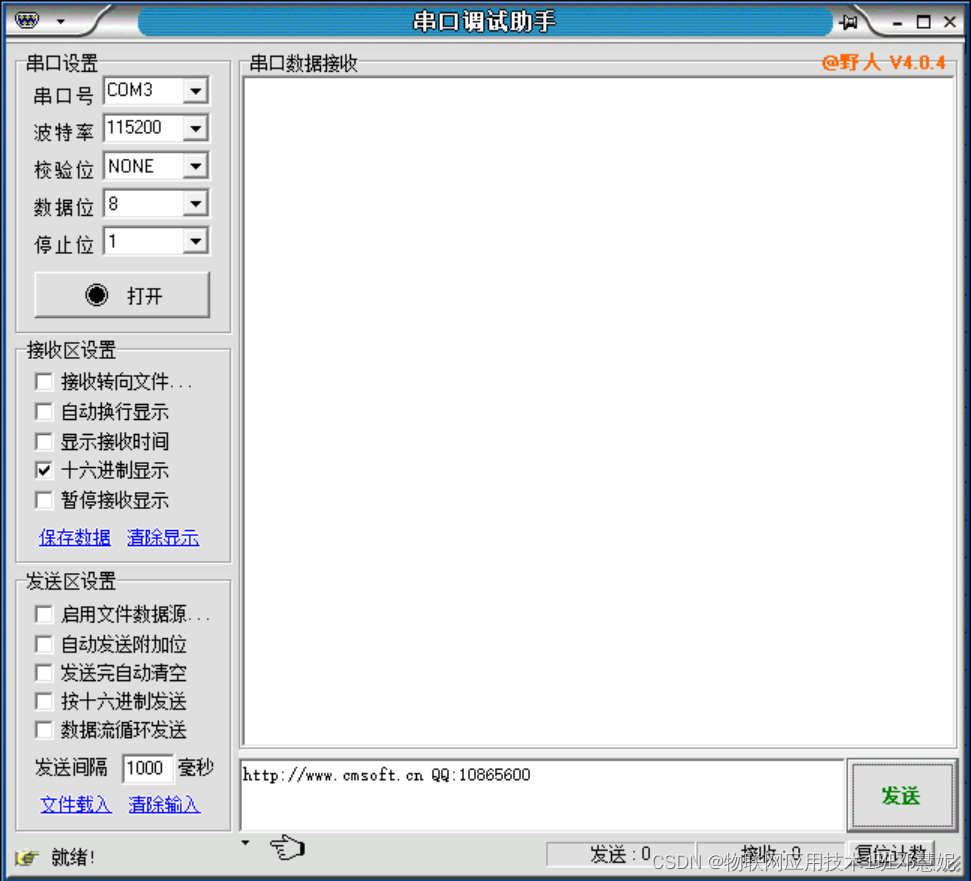
3打开串口调试助手,打开NewLab实验台看是否接收一串数据该数据为随机数
若测试不成功则有可能是
1、电脑自带的串口故障
2、串口线故障
先将串口线插入电脑后端的RS232接口,然后在串口线的另一头,用导线短接2、3脚,用“串口助手”发送一串数据,看是否能正常接收,若正常则RS232接口和串口线正常
3、若无法接收,再更换几条串口线测试,以判断是端口坏还是串口线坏。
首先我们要设置一个门禁卡的界面
1界面样貌如下
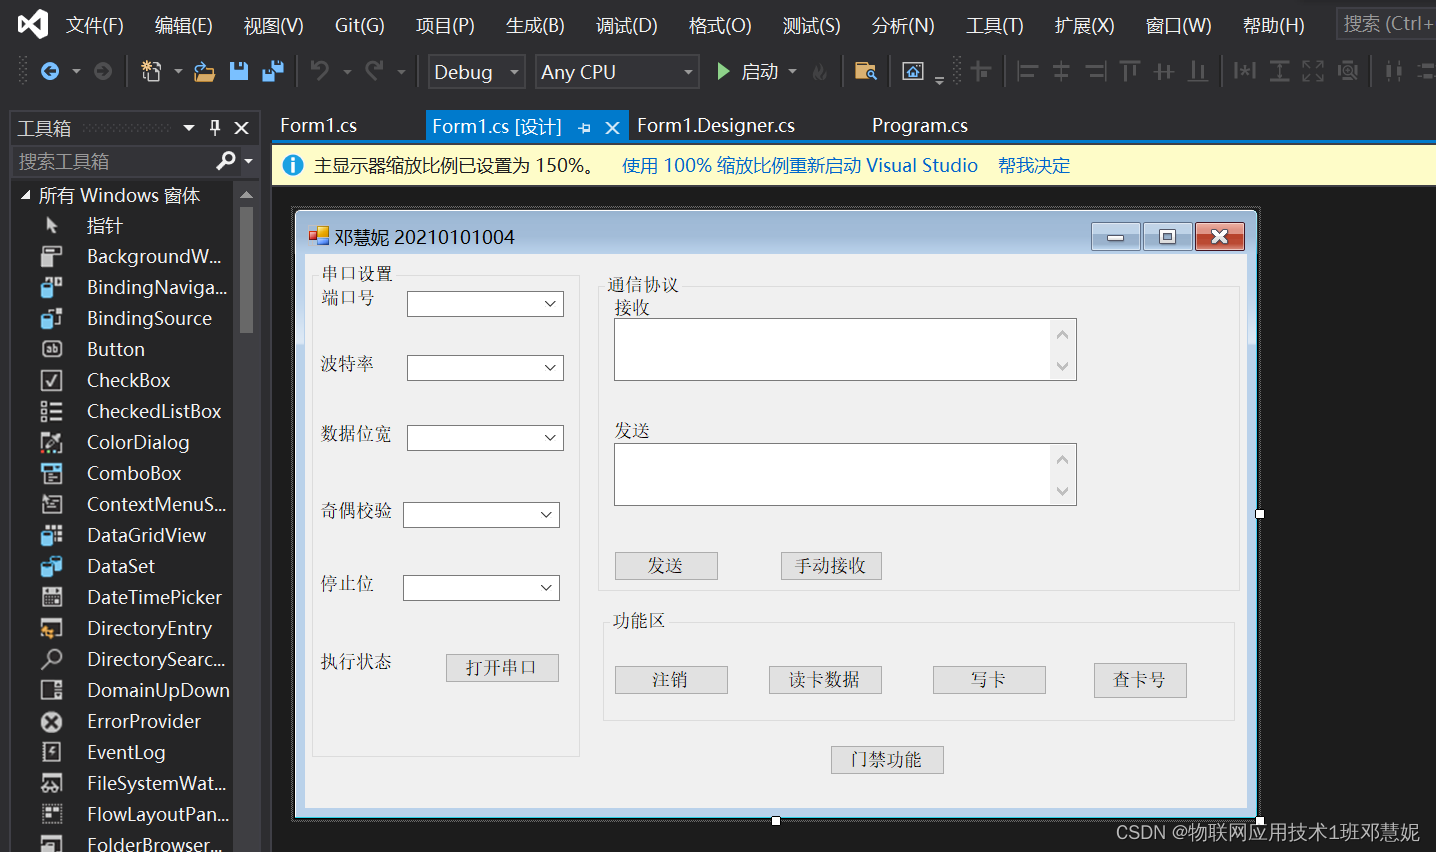
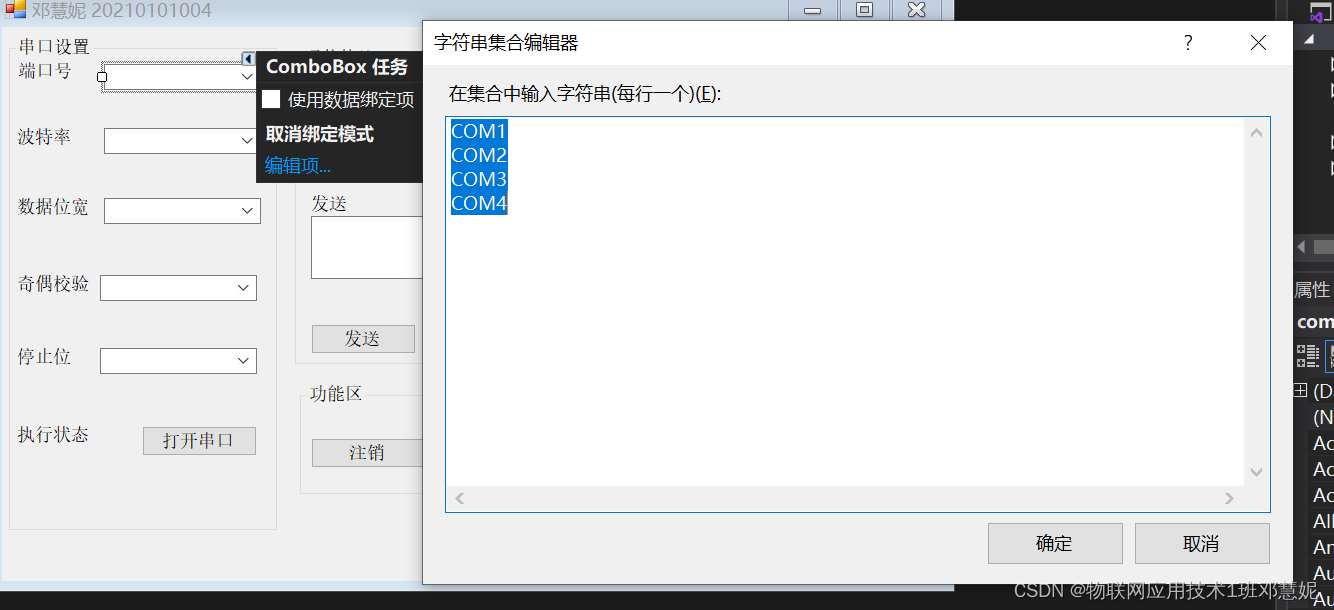
2 然后我们要在编辑器里面输入内容
端口号“COM1,COM2,COM3,COM4”(其实端口号要看电脑端口号具体是多少)
波特率添加“2400,9600,19200,115200”
数据位宽填写“7,8,9”
奇偶校验“None,Odd,Even”
停止位“One,Two,OnePointFive,None”
设置完界面接下来是代码部分
1主程序要添加一个串口件
  public partial class Form1 : Form
    {

        SerialPort com1 = new SerialPort();
        Timer t = new Timer();
2还要添加命名空间
using System.Windows.Forms;
using System.IO.Ports;
3设置串口部分代码还有选项框设置初值
 private void Form1_Load(object sender, EventArgs e)
        {
            SerialPort com1 = new SerialPort();
            String[] port = SerialPort.GetPortNames();//获取端口
            for (int i = 0; i < port.Length; i++)
            {
                comboBox1.Items.Add(port[i]);//添加串口号
            }
            t.Interval = 1000;
            t.Stop();
            t.Tick += new EventHandler(button7_Click);
            if (!com1.IsOpen)
            {
                button1.Text = "打开串口";
                button1.BackColor = Color.Red;

            }

            comboBox1.SelectedIndex = 4;     //选中串口
            comboBox2.SelectedIndex = 3;    //选中波特率
            comboBox3.SelectedIndex = 1;   //选中数据宽度
            comboBox4.SelectedIndex = 1;   //选中奇偶选项
            comboBox5.SelectedIndex = 1;   //选中停止位
        }
4打开串口
 private void button1_Click(object sender, EventArgs e)
        {
            if (!com1.IsOpen)//如果串口关闭,则打开
            {
                com1.PortName = comboBox1.Text;
                com1.BaudRate = int.Parse(comboBox2.Text);
                com1.Parity = Parity.None;
                com1.DataBits = 8;
                com1.StopBits = StopBits.One;
                com1.Open();
                button1.Text = "关闭端口";
                button1.BackColor = Color.Red;

                timer1.Start();
            }
            else if (com1.IsOpen)//如果串口已打开,则关闭
            {
                com1.Close();
                button1.Text = "打开端口";
                button1.BackColor = Color.Green;


                timer1 .Stop();

            }
        }
5组件发送部分
private void button2_Click(object sender, EventArgs e)
{
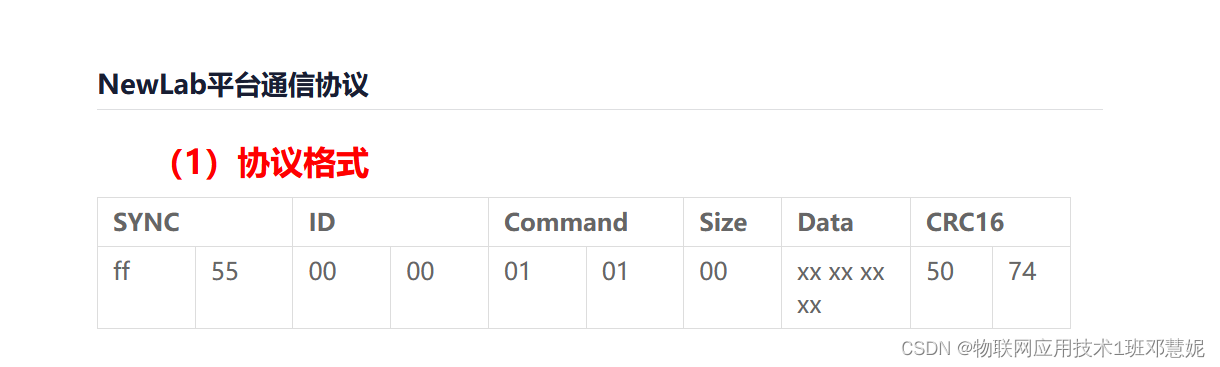
byte[] send = new byte[] { 0xff, 0x55, 0x00, 0x00, 0x01, 0x01, 0x00, 0x50, 0x74 };
com1.Write(send, 0, send.Length);
}6手动接收
 private void button7_Click(object sender, EventArgs e)
        {
            int x = com1.BytesToRead;
            byte[] buf = new byte[x];//创建一个字节数组;
            com1.Read(buf, 0, x);    //使用read方法,将串口接收到的字节数据保存在buf数组变量中
            //将buf显示出来
            for (int i = 0; i < x; i++)
            {
                textBox1.Text += buf[i].ToString("X").PadLeft(2, '0')+"";
            }
        }
7定时器组件代码
private void timer1_Tick(object sender, EventArgs e)//自动接收串口数据,并整理
        {
            if (com1.BytesToRead != 0)
            {
                int i = com1.BytesToRead;//读取接收缓冲区数据长度
                byte[] buffer = new byte[i];//新建一个字节数组buffer,长度与接收到的字节长度相同
                com1.Read(buffer, 0, i);    //通过Read方法将缓冲区的数据放置到buffer中
                if (buffer[9] == 0x13 && buffer[10] == 0x14)//对接收在到的数据进行判断,看是否为本小区用户

                {
                    button3.Text = "开门";
                    button3.BackColor = Color.Green;
                } else
                {
                    button3.Text = "禁止入内";
                    button3.BackColor = Color.Red  ;
                }
                for (int len = 0; len < i; len++)//将接收到的数据进行字符转换
                {
                    textBox1.Text += buffer[len].ToString("X").PadLeft(2, '0') + "";//*接收的数据整理为16进制,不够两位的
                }
            }
        }
8写卡
  private void button5_Click(object sender, EventArgs e)//写卡
        {
            textBox1.Text = "";
            byte[] buffer = new byte[] { 0xff, 0x55, 0x00, 0x00, 0x03, 0x04,
                0x05, 0x03, 0x00, 0x00, 0x13, 0x14, 0xB8 ,0x3C };
            com1.Write(buffer, 0, buffer.Length);
            label1.Text = "注册完成!";

        }
9注销
 private void button3_Click(object sender, EventArgs e)//注销
        {
            textBox1.Text = "";
            byte[] buffer = new byte[] { 0xff, 0x55, 0x00, 0x00, 0x03, 0x04,
                0x05, 0x02, 0x00, 0x99, 0x88, 0x71, 0x66 };
            com1.Write(buffer, 0, buffer.Length);
            label1.Text = "注销完成!";

        }
10读卡
private void button4_Click(object sender, EventArgs e)//读卡
        {
            textBox1.Text = "";
            byte[] buff = new byte[] {0xff, 0x55, 0x00, 0x00, 0x03,
                0x03,0x01,0x03,0xCE,0xB1 };
            com1.Write(buff, 0, buff.Length);
            label7.Text = "ff,55,00,00,03,01,03,CE,B1";
        }
11查卡
 private void button8_Click(object sender, EventArgs e)
        {
            textBox1.Text = "";
            byte[] buff = new byte[] { 0xff, 0x55, 0x00, 0x00, 0x01, 0x00, 0x50, 0x74 };
            com1.Write(buff, 0, buff.Length);
            label7.Text = "ff,55,00,00,01,01,00,50,74";
        }
总结
这些是重要部分的代码,基本上设置完成,这次设计的是一个简易低频卡门禁系统,以上代码仅供参考,当然这只是通过老师指导写出来的一个简易代码,代码内容还有许多不足!!!也希望各位能提供意见,一起学习。
根据老师要求要具备开关串口的功能,串口协议默认;要具备读取卡号(卡信息)的功能;可以对新卡进行注册;可以对已经注册的卡进行注销;手动读取卡数据(每个小组设定的读卡块位置不同,数据也不同);对读取到的数据进行判断,并正确显示“开门”或“禁止入内”等信息。
通过本次学习和了解明白了物联网(IoT)是一种利用射频识别(RFID)、红外感应器、全球定位系统、激光扫描器等信息传感设备,按约定的协议,把任何物品与互联网连接起来,进行信息交换和通讯,以实现智能化识别、定位、跟踪、监控和管理的一种网络。