vue3+ts开发干货笔记
总结一下在vue3中ts的使用。当篇记录部分来自于vue官网,记录一下,算是加深印象吧。
纯干笔记,不断补充,想到什么写什么,水平有限,欢迎评论指正!
类型标注
props
<script setup lang="ts">
const props = defineProps({
  foo: { type: String, required: true },
  bar: Number
})

props.foo // string
props.bar // number | undefined
</script>
可以通过更直接的泛型定义
<script setup lang="ts">
const props = defineProps<{
  foo: string
  bar?: number
}>()
</script>
也可以将 props 的类型移入一个单独的接口中
<script setup lang="ts">
interface Props {
  foo: string
  bar?: number
}

const props = defineProps<Props>()
</script>
把定义单独放到另一个文件中,引入使用
<script setup lang="ts">
import type { Props } from './foo'

const props = defineProps<Props>()
</script>
设置默认值— 通过 withDefaults 编译器宏
export interface Props {
  msg?: string
  labels?: string[]
}

const props = withDefaults(defineProps<Props>(), {
  msg: 'hello',
  labels: () => ['one', 'two']
})
复杂类型的props
<script setup lang="ts">
interface Book {
  title: string
  author: string
  year: number
}

const props = defineProps<{
  book: Book
}>()
</script>
也可以借助PropType 工具类型
import type { PropType } from 'vue'

const props = defineProps({
  book: Object as PropType<Book>
})
没有使用 < script setup > 时,使用 defineComponent()
import { defineComponent } from 'vue'

export default defineComponent({
  props: {
    message: String
  },
  setup(props) {
    props.message // <-- 类型:string
  }
})
import { defineComponent } from 'vue'
import type { PropType } from 'vue'

export default defineComponent({
  props: {
    book: Object as PropType<Book>
  }
})
emits
<script setup lang="ts">
// 运行时
const emit = defineEmits(['change', 'update'])

// 基于选项
const emit = defineEmits({
  change: (id: number) => {
    // 返回 `true` 或 `false`
    // 表明验证通过或失败
  },
  update: (value: string) => {
    // 返回 `true` 或 `false`
    // 表明验证通过或失败
  }
})

// 基于类型
const emit = defineEmits<{
  (e: 'change', id: number): void
  (e: 'update', value: string): void
}>()
</script>
vue3.3+: 可选的、更简洁的语法
const emit = defineEmits<{
  change: [id: number]
  update: [value: string]
}>()
若没有使用 < script setup >,defineComponent() 也可以根据 emits 选项推导暴露在 setup 上下文中的 emit 函数的类型:
import { defineComponent } from 'vue'

export default defineComponent({
  emits: ['change'],
  setup(props, { emit }) {
    emit('change') // <-- 类型检查 / 自动补全
  }
})
ref
ref 会根据初始化时的值推导其类型:
import { ref } from 'vue'

// 推导出的类型:Ref<number>
const year = ref(2020)

// => TS Error: Type 'string' is not assignable to type 'number'.
year.value = '2020'
或者在调用 ref() 时传入一个泛型参数,来覆盖默认的推导行为
// 得到的类型:Ref<string | number>
const year = ref<string | number>('2020')

year.value = 2020 // 成功!
另外也可以通过引入 Ref 来指定类型
import { ref } from 'vue'
import type { Ref } from 'vue'

const year: Ref<string | number> = ref('2020')

year.value = 2020 // 成功!
当指定了一个泛型参数但没有给出初始值,那么最后得到的就将是一个包含 undefined 的联合类型:
// 推导得到的类型:Ref<number | undefined>
const n = ref<number>()
reactive
reactive() 也会隐式地从它的参数中推导类型:
import { reactive } from 'vue'

// 推导得到的类型:{ title: string }
const book = reactive({ title: 'Vue 3 指引' })
要显式地标注一个 reactive 变量的类型,可以使用接口:
import { reactive } from 'vue'

interface Book {
  title: string
  year?: number
}

const book: Book = reactive({ title: 'Vue 3 指引' })
TIP
不推荐使用 reactive() 的泛型参数,因为处理了深层次 ref 解包的返回值与泛型参数的类型不同。
computed
computed() 会自动从其计算函数的返回值上推导出类型:
import { ref, computed } from 'vue'

const count = ref(0)

// 推导得到的类型:ComputedRef<number>
const double = computed(() => count.value * 2)

// => TS Error: Property 'split' does not exist on type 'number'
const result = double.value.split('')
还可以通过泛型参数显式指定类型:
const double = computed<number>(() => {
  // 若返回值不是 number 类型则会报错
})
事件处理函数
<script setup lang="ts">
function handleChange(event) {
  // `event` 隐式地标注为 `any` 类型
  console.log(event.target.value)
}
</script>

<template>
  <input type="text" @change="handleChange" />
</template>
没有类型标注时,这个 event 参数会隐式地标注为 any 类型。这也会在 tsconfig.json 中配置了 “strict”: true 或 “noImplicitAny”: true 时报出一个 TS 错误。因此,建议显式地为事件处理函数的参数标注类型。此外,你在访问 event 上的属性时可能需要使用类型断言:
function handleChange(event: Event) {
  console.log((event.target as HTMLInputElement).value)
}
provide/inject
provide 和 inject 通常会在不同的组件中运行。要正确地为注入的值标记类型,Vue 提供了一个 InjectionKey 接口,它是一个继承自 Symbol 的泛型类型,可以用来在提供者和消费者之间同步注入值的类型:
import { provide, inject } from 'vue'
import type { InjectionKey } from 'vue'

const key = Symbol() as InjectionKey<string>

provide(key, 'foo') // 若提供的是非字符串值会导致错误

const foo = inject(key) // foo 的类型:string | undefined
建议将注入 key 的类型放在一个单独的文件中,这样它就可以被多个组件导入。
当使用字符串注入 key 时,注入值的类型是 unknown,需要通过泛型参数显式声明:
const foo = inject<string>('foo') // 类型:string | undefined
注意注入的值仍然可以是 undefined,因为无法保证提供者一定会在运行时 provide 这个值。
当提供了一个默认值后,这个 undefined 类型就可以被移除:
const foo = inject<string>('foo', 'bar') // 类型:string
如果你确定该值将始终被提供,则还可以强制转换该值:
const foo = inject('foo') as string
模版引用
模板引用需要通过一个显式指定的泛型参数和一个初始值 null 来创建:
<script setup lang="ts">
import { ref, onMounted } from 'vue'

const el = ref<HTMLInputElement | null>(null)

onMounted(() => {
  el.value?.focus()
})
</script>

<template>
  <input ref="el" />
</template>
可以通过类似于 MDN 的页面来获取正确的 DOM 接口。
注意为了严格的类型安全,有必要在访问 el.value 时使用可选链或类型守卫。这是因为直到组件被挂载前,这个 ref 的值都是初始的 null,并且在由于 v-if 的行为将引用的元素卸载时也可以被设置为 null。
组件模版引用
有时,你可能需要为一个子组件添加一个模板引用,以便调用它公开的方法。举例来说,我们有一个 MyModal 子组件,它有一个打开模态框的方法:
<!-- MyModal.vue -->
<script setup lang="ts">
import { ref } from 'vue'

const isContentShown = ref(false)
const open = () => (isContentShown.value = true)

defineExpose({
  open
})
</script>
为了获取 MyModal 的类型,我们首先需要通过 typeof 得到其类型,再使用 TypeScript 内置的 InstanceType 工具类型来获取其实例类型:
<!-- App.vue -->
<script setup lang="ts">
import MyModal from './MyModal.vue'

const modal = ref<InstanceType<typeof MyModal> | null>(null)

const openModal = () => {
  modal.value?.open()
}
</script>
注意,如果你想在 TypeScript 文件而不是在 Vue SFC 中使用这种技巧,需要开启 Volar 的 Takeover 模式。
如果组件的具体类型无法获得,或者你并不关心组件的具体类型,那么可以使用 ComponentPublicInstance。这只会包含所有组件都共享的属性,比如 $el。
import { ref } from 'vue'
import type { ComponentPublicInstance } from 'vue'

const child = ref<ComponentPublicInstance | null>(null)
tsconfig.json
tsconfig.json是 TypeScript 项目的配置文件,放在项目的根目录下。指定了编译项目所需的根目录下的文件以及编译选项。官网参考
配置解析
{
  /* 根选项 */
  "include": ["./src/**/*"], // 指定被编译文件所在的目录
  "exclude": [], // 指定不需要被编译的目录
  //使用小技巧:在填写路径时 ** 表示任意目录, * 表示任意文件。

  /* 项目选项 */
  "compilerOptions": {
    "target": "ES6", // 目标语言的版本
    "module": "commonjs", // 生成代码的模板标准
    "lib": ["DOM", "ES5", "ES6", "ES7", "ScriptHost"], // TS需要引用的库
    "outDir": "./dist", // 指定输出目录
    "rootDir": "./", // 指定输出文件目录(用于输出),用于控制输出目录结构
    "allowJs": true, // 允许编译器编译JS,JSX文件
    "checkJs": true, // 允许在JS文件中报错,通常与allowJS一起使用
    "removeComments": true, // 删除注释
    "esModuleInterop": true, // 允许export=导出,由import from 导入

    /* 严格检查选项 */
    "strict": true, // 开启所有严格的类型检查
    "alwaysStrict": true, // 在代码中注入'use strict'
    "noImplicitAny": true, // 不允许隐式的any类型
    "noImplicitThis": true, // 不允许this有隐式的any类型
    "strictNullChecks": true, // 不允许把null、undefined赋值给其他类型的变量
    "strictBindCallApply": true, // 严格的bind/call/apply检查
    "strictFunctionTypes": true, // 不允许函数参数双向协变
    "strictPropertyInitialization": true, // 类的实例属性必须初始化

    /* 额外检查 */
    "noUnusedLocals": true, //是否检查未使用的局部变量
    "noUnusedParameters": true, //是否检查未使用的参数
    "noImplicitReturns": true, //检查函数是否不含有隐式返回值
    "noImplicitOverride": true, //是否检查子类继承自基类时,其重载的函数命名与基类的函数不同步问题
    "noFallthroughCasesInSwitch": true, //检查switch中是否含有case没有使用break跳出
    "noUncheckedIndexedAccess": true, //是否通过索引签名来描述对象上有未知键但已知值的对象
    "noPropertyAccessFromIndexSignature": true, //是否通过" . “(obj.key) 语法访问字段和"索引”( obj[“key”]), 以及在类型中声明属性的方式之间的一致性

    /* 实验选项 */
    "experimentalDecorators": true, //是否启用对装饰器的实验性支持,装饰器是一种语言特性,还没有完全被 JavaScript 规范批准
    "emitDecoratorMetadata": true, //为装饰器启用对发出类型元数据的实验性支持

    /* 高级选项 */
    "forceConsistentCasingInFileNames": true, //是否区分文件系统大小写规则
    "extendedDiagnostics": false, //是否查看 TS 在编译时花费的时间
    "noEmitOnError": true, //有错误时不进行编译
    "resolveJsonModule": true //是否解析 JSON 模块
  }
}
示例
{
  "compilerOptions": {
    "target": "ESNext",
    "module": "ESNext",
    "moduleResolution": "bundler",
    "strict": false,
    "jsx": "preserve",
    "importHelpers": true,
    "experimentalDecorators": true,
    "strictFunctionTypes": false,
    "skipLibCheck": true,
    "esModuleInterop": true,
    "isolatedModules": true,
    "allowSyntheticDefaultImports": true,
    "forceConsistentCasingInFileNames": true,
    "sourceMap": true,
    "baseUrl": ".",
    "allowJs": false,
    "resolveJsonModule": true,
    "lib": [
      "ESNext",
      "DOM"
    ],
    "paths": {
      "@/*": [
        "src/*"
      ],
      "@build/*": [
        "build/*"
      ]
    },
    "types": [
      "node",
      "vite/client",
      "element-plus/global",
      "@pureadmin/table/volar",
      "@pureadmin/descriptions/volar"
    ]
  },
  "include": [
    "mock/*.ts",
    "src/**/*.ts",
    "src/**/*.tsx",
    "src/**/*.vue",
    "types/*.d.ts",
    "vite.config.ts"
  ],
  "exclude": [
    "dist",
    "**/*.js",
    "node_modules"
  ]
}
全局类型声明
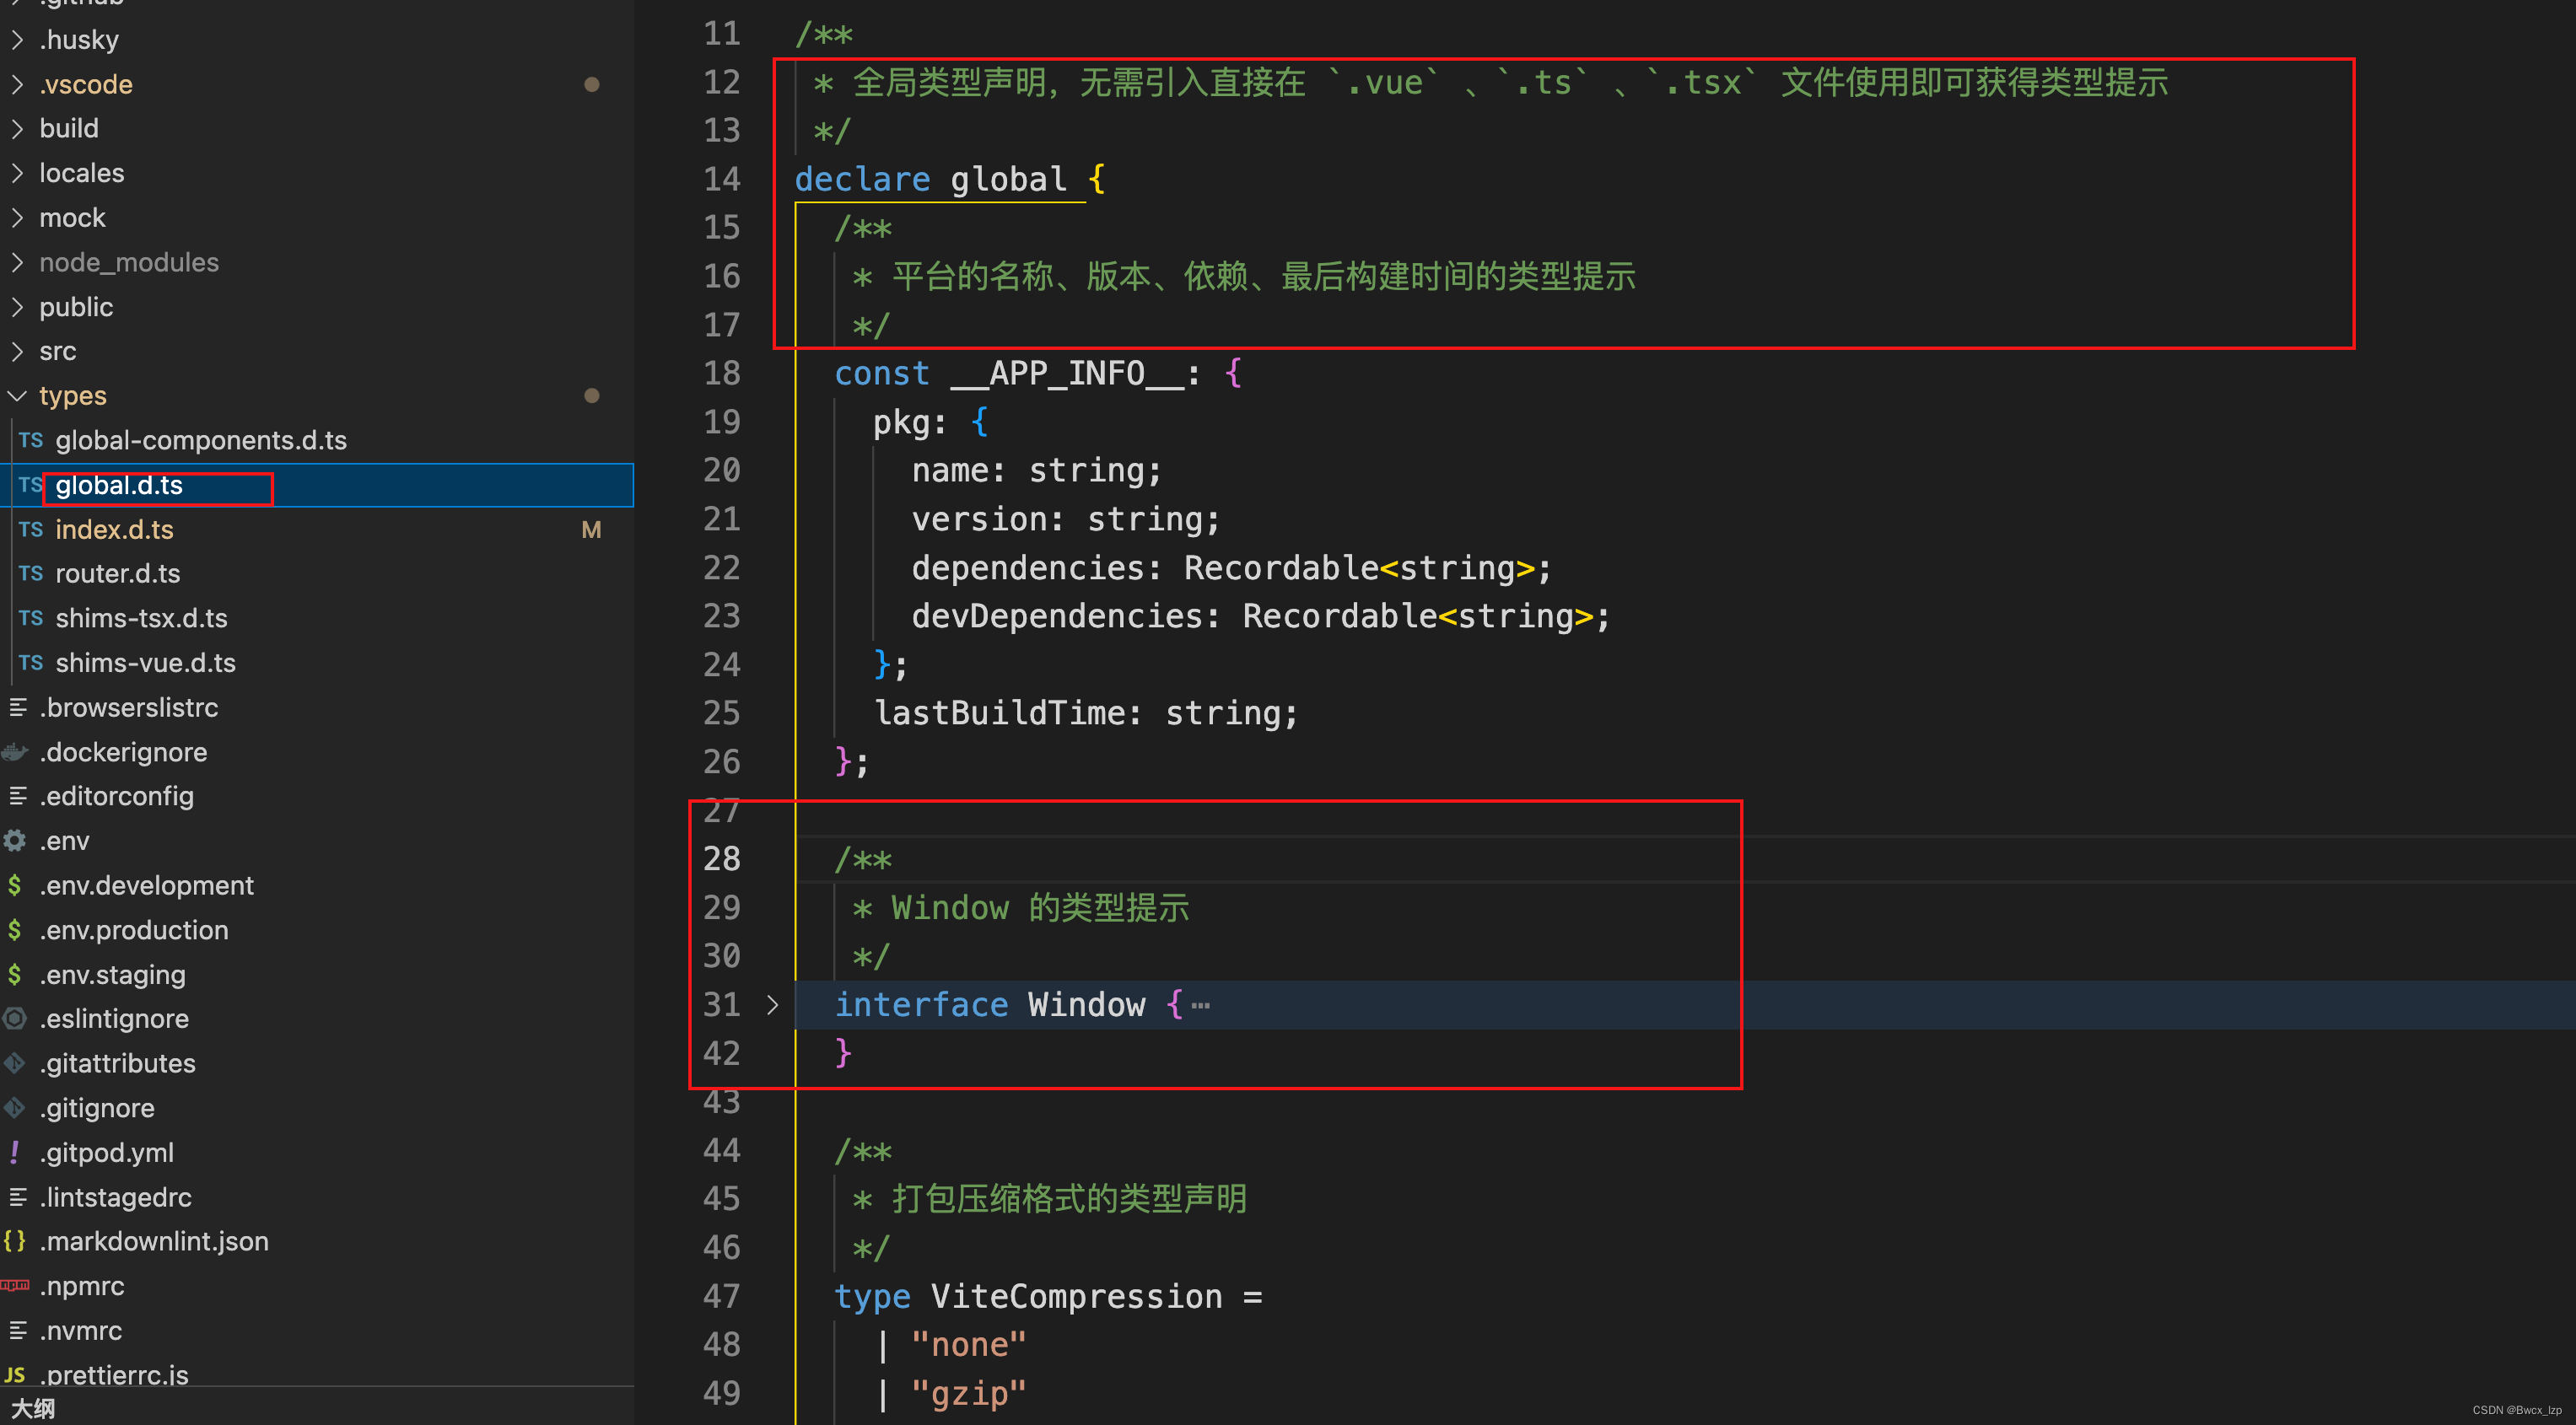
global.d.ts和index.d.ts
在 global.d.ts (opens new window)和 index.d.ts (opens new window)文件中编写的类型可直接在 .ts、.tsx、.vue 中使用

shims-tsx.d.ts
该文件是为了给 .tsx 文件提供类型支持,在编写时能正确识别语法
import Vue, { VNode } from "vue";

declare module "*.tsx" {
  import Vue from "compatible-vue";
  export default Vue;
}

declare global {
  namespace JSX {
    interface Element extends VNode {}
    interface ElementClass extends Vue {}
    interface ElementAttributesProperty {
      $props: any;
    }
    interface IntrinsicElements {
      [elem: string]: any;
    }
    interface IntrinsicAttributes {
      [elem: string]: any;
    }
  }
}
shims-vue.d.ts
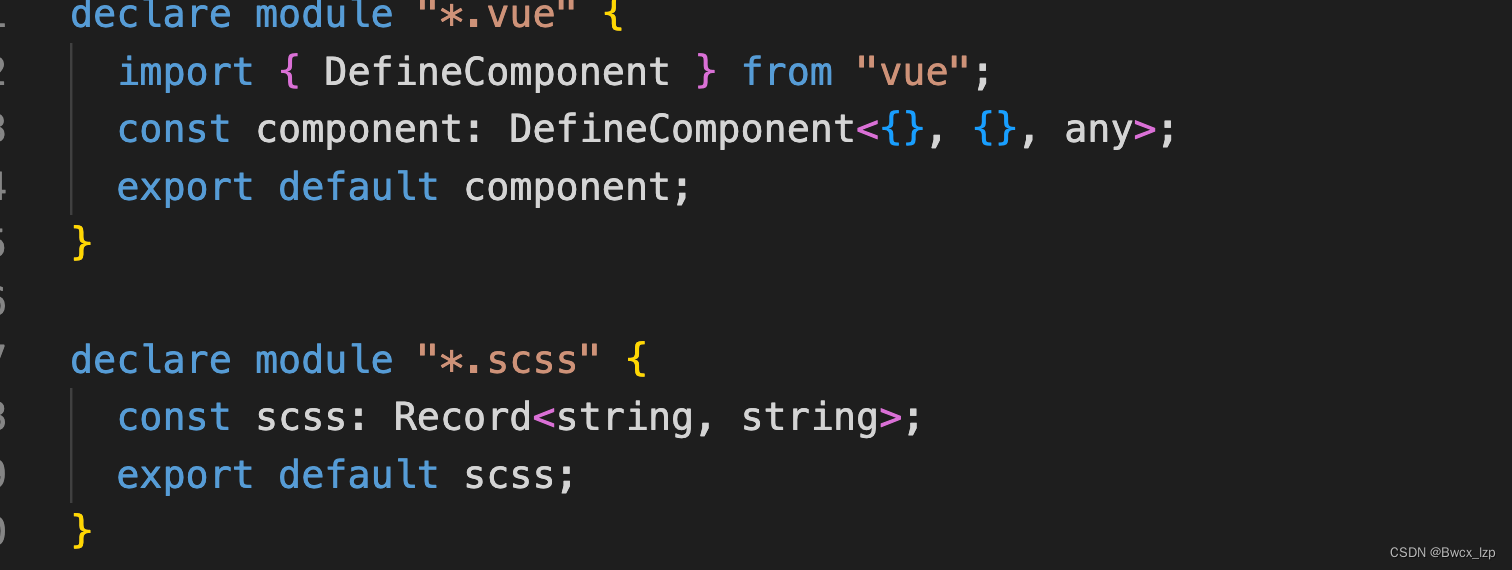
.vue、.scss 文件不是常规的文件类型,typescript 无法识别,所以我们需要通过下图的代码告诉 typescript 这些文件的类型,防止类型报错
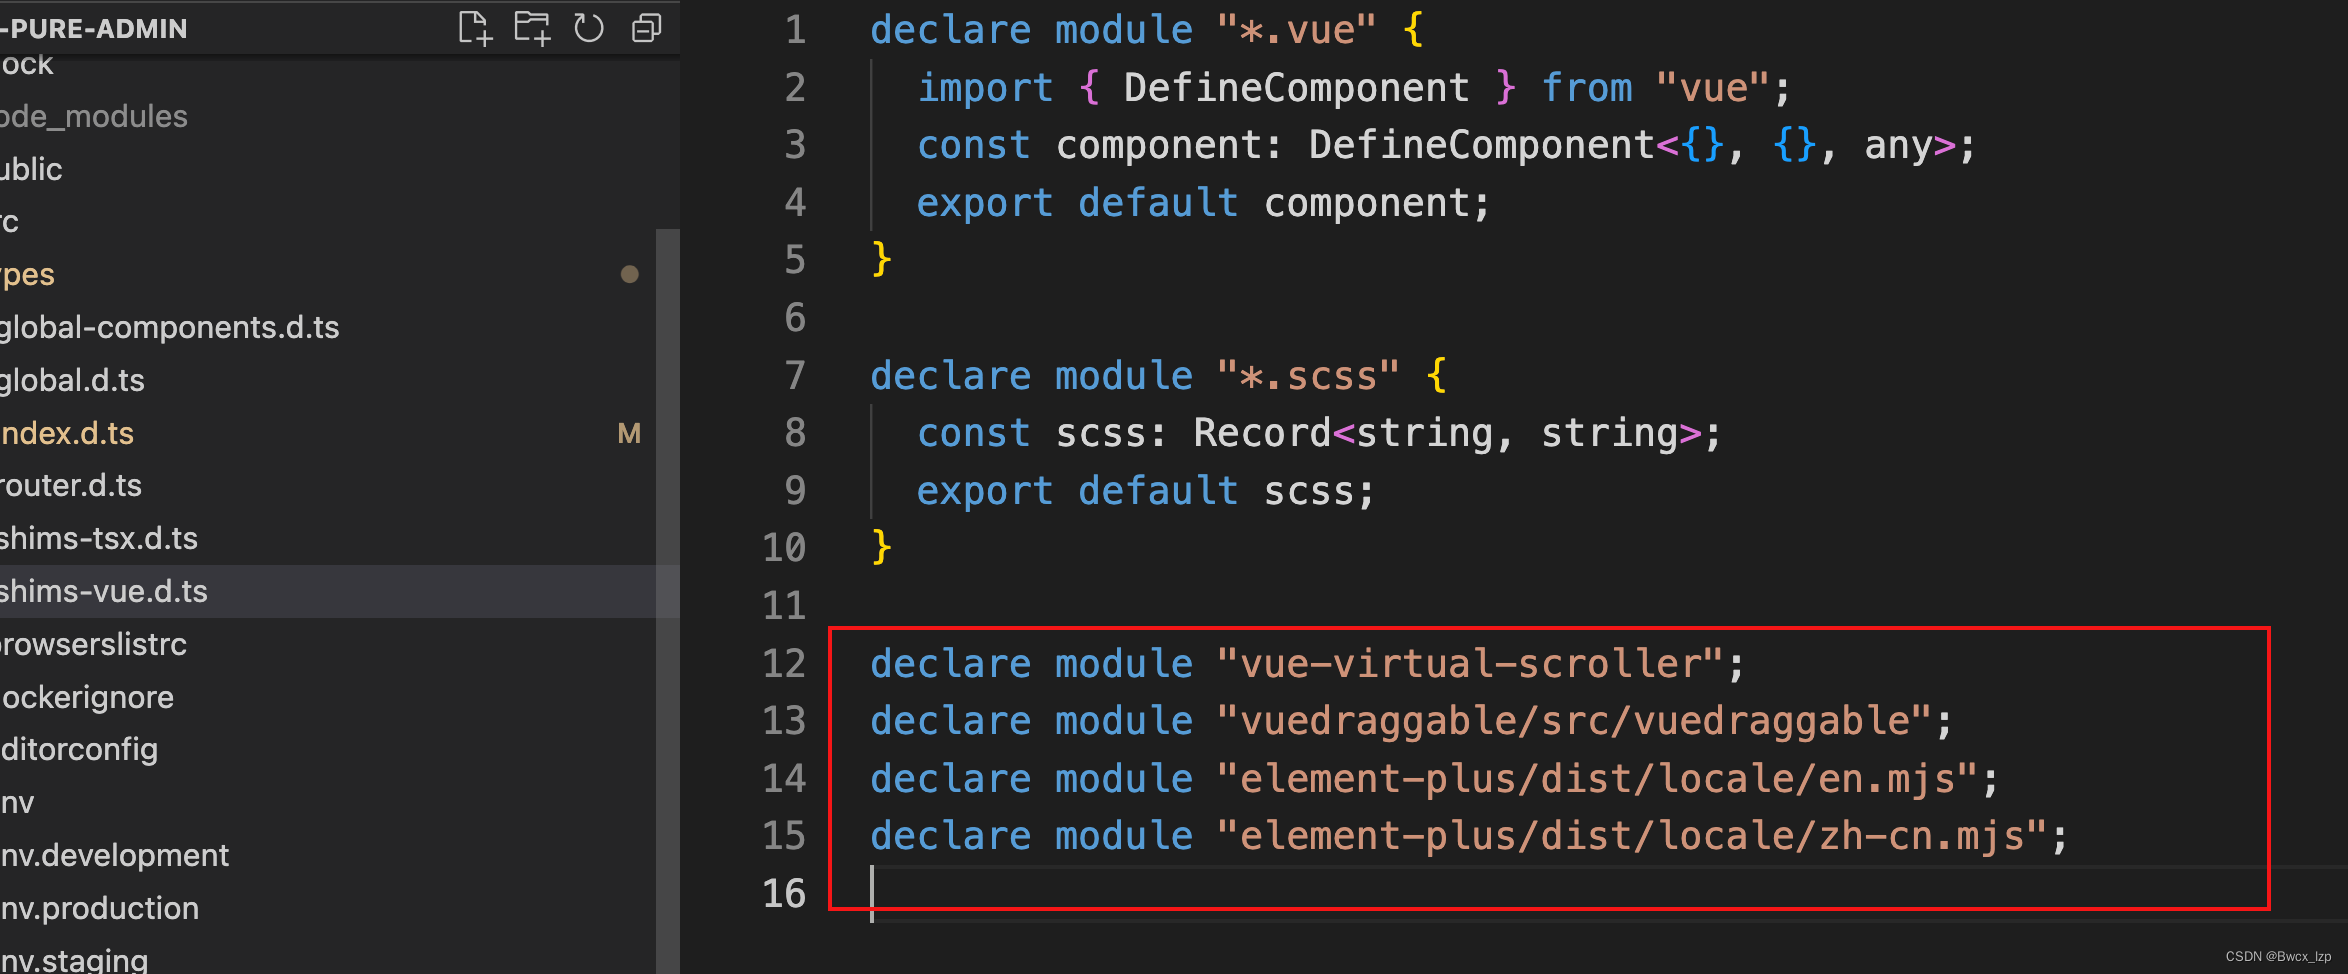
另外,项目开发,我们可能需要安装一些库或者插件什么的,当它们对 typescript 支持不是很友好的时候,就会出现下图的情况

解决办法就是将这些通过 declare module “包名” 的形式添加到 shims-vue.d.ts 中去,如下图
全局导入的组件获取类型提示
从 npm下载的组件库或者第三方库
也就是您使用 pnpm add 添加的包,比如 @pureadmin/table ,我们只需要将这个包提供的全局类声明文件导入到 tsconfig.json 的 types 配置项
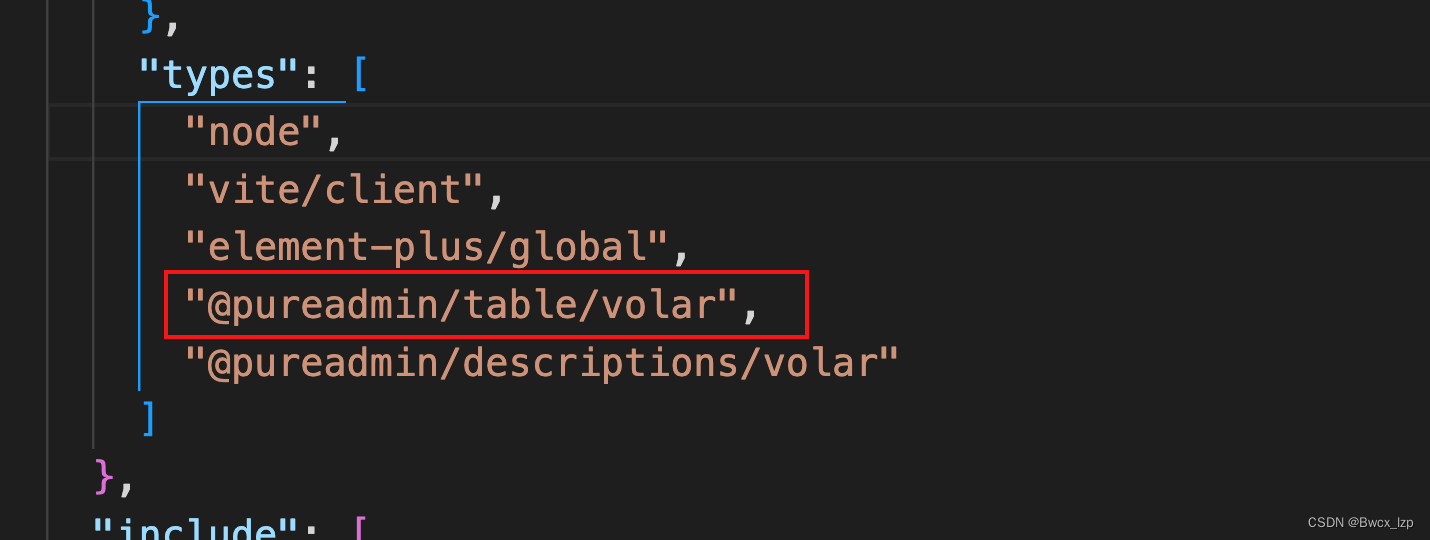
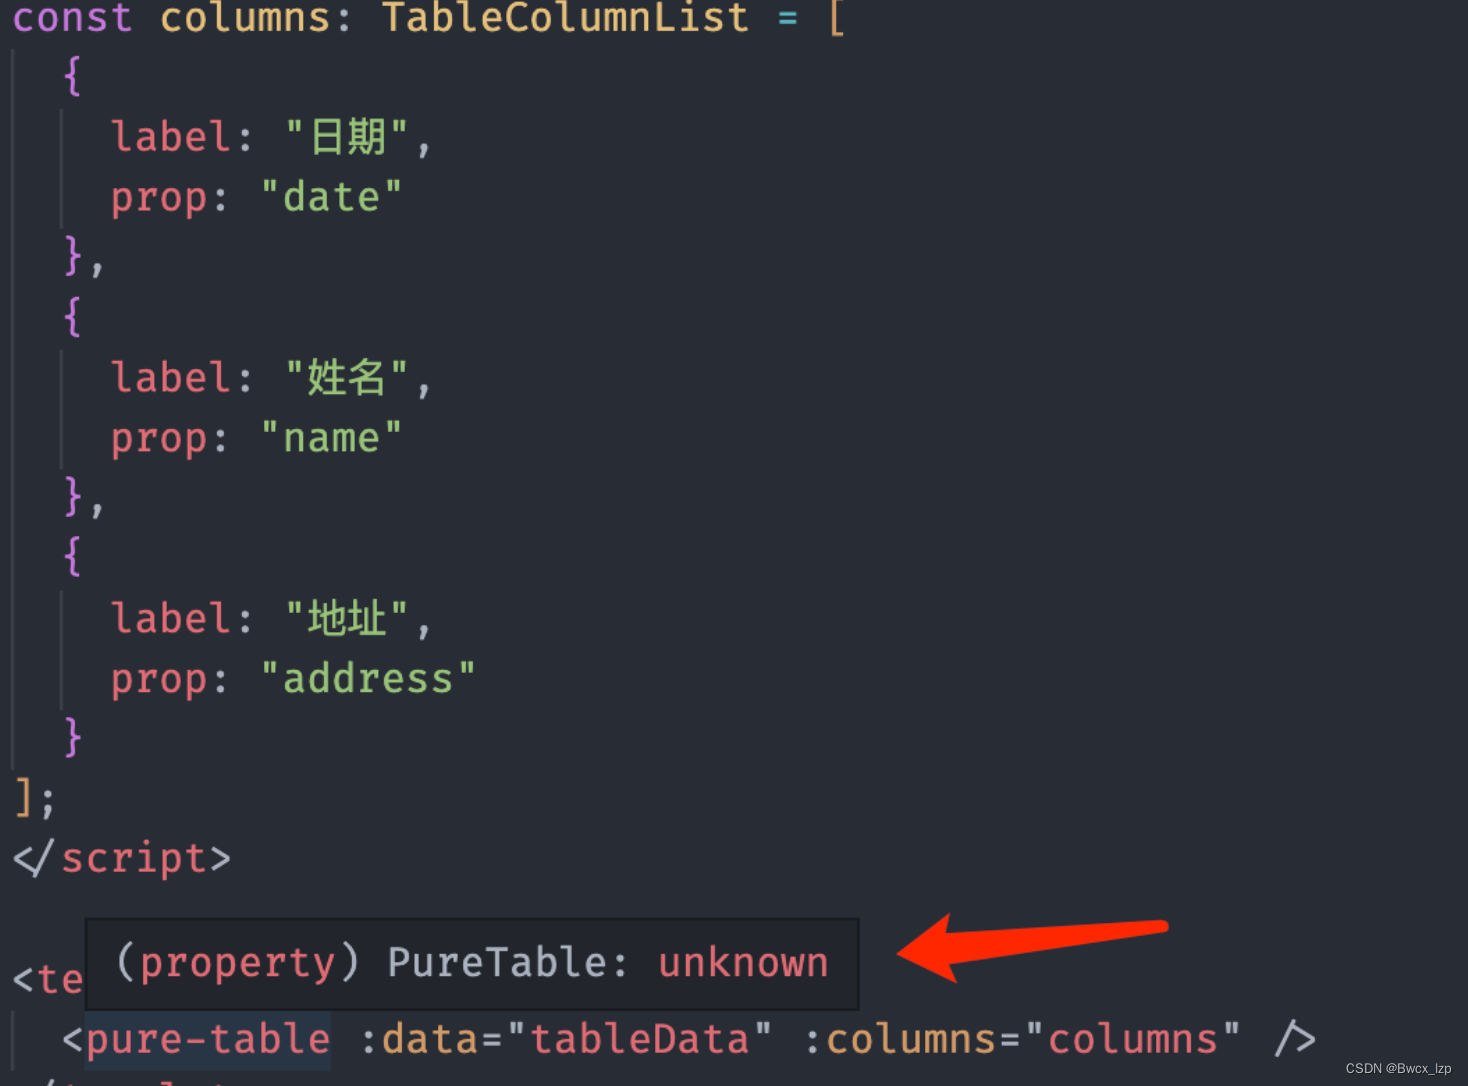
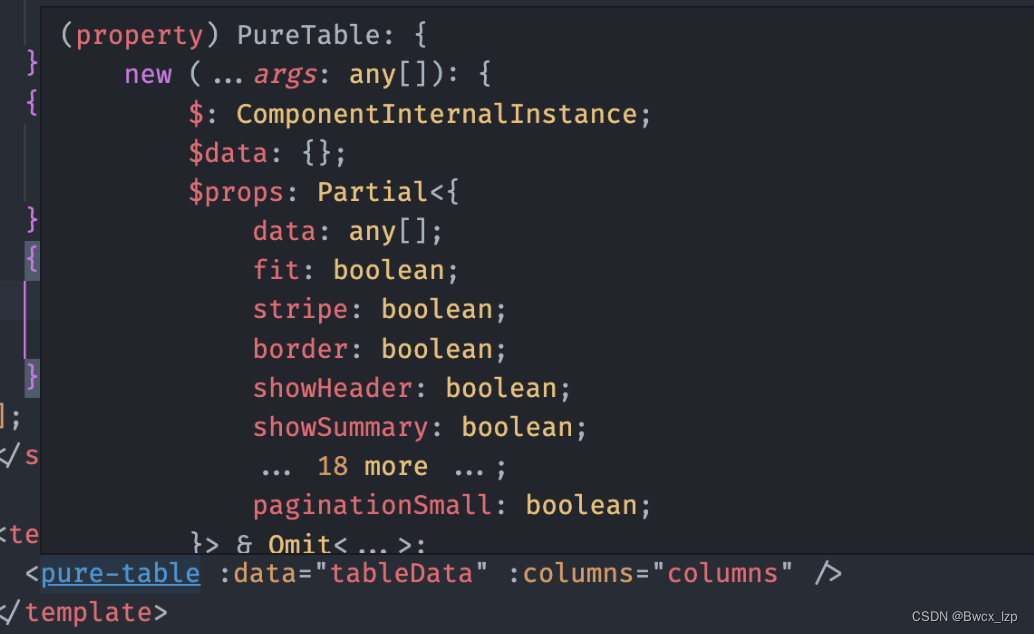
然后重启编辑器即可,如下图导入前和导入后的效果对比
导入前,pure-table 无高亮且鼠标覆盖无类型提示
导入后,pure-table 高亮且鼠标覆盖有类型提示
提示
当然这个导入前提是这个组件库或者第三方库是有导出全局类声明文件的。

平台内自定义的全局组件
封装的一个和权限相关的 Auth 组件举例
- 我们将 Auth 组件在 main.ts 中进行了全局注册

- 然后将 Auth 组件在 global-components.d 中引入,所有的全局组件都应该在 GlobalComponents 下引入才可获得类型支持,如下图

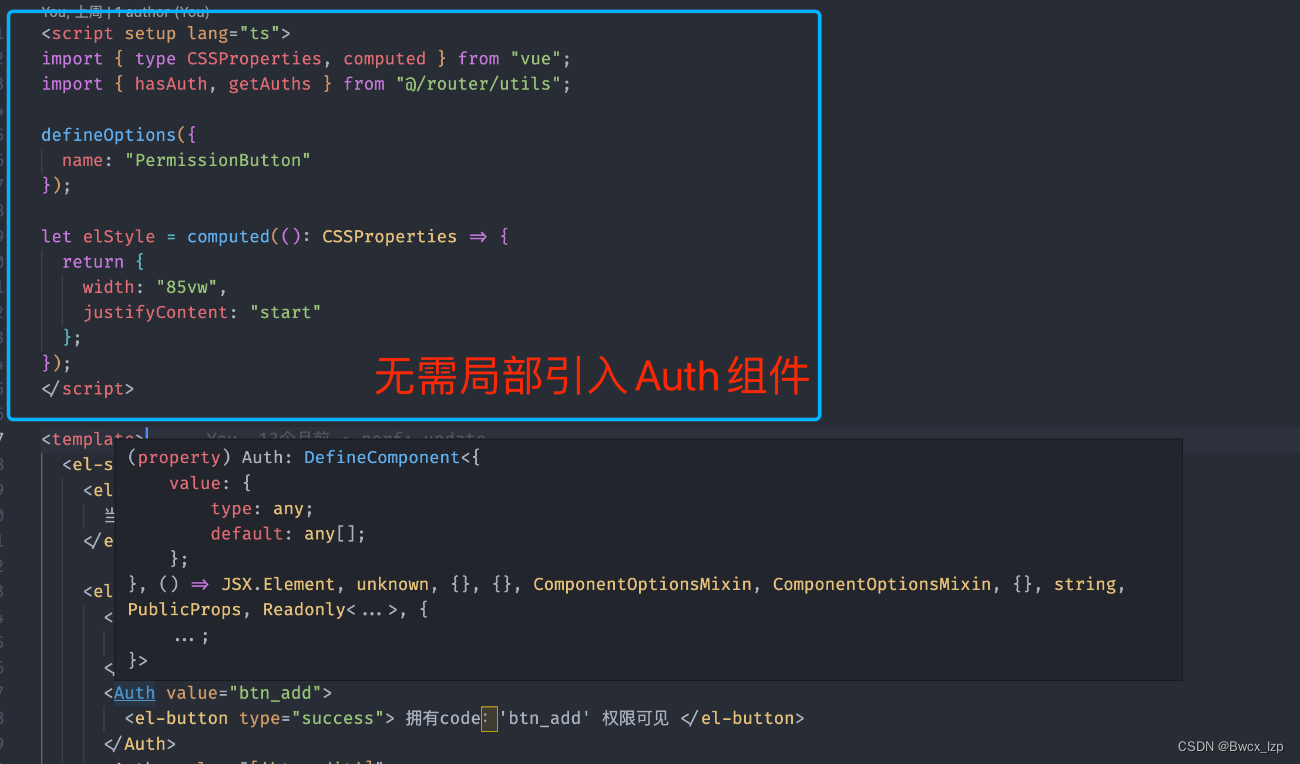
- 最后我们直接写 xxx 就可以得到类型提示啦,如下图
