《Docker系列》Docker安装MySQL 5.7

Docker安装MySQL 5.7
一、docker拉取MySQL 5.7镜像
-
docker pull mysql拉取最新MySQL
-
docker pull mysql:5.7拉取指定版本MySQL
1 拉取mysql 5.7镜像
[root@zxy_master ~]# docker pull mysql:5.7
5.7: Pulling from library/mysql
d26998a7c52d: Pull complete
4a9d8a3567e3: Pull complete
bfee1f0f349e: Pull complete
71ff8dfb9b12: Pull complete
bf56cbebc916: Pull complete
2e747e5e37d7: Pull complete
711a06e512da: Pull complete
3288d68e4e9e: Pull complete
49271f2d6d15: Pull complete
f782f6cac69c: Pull complete
701dea355691: Pull complete
Digest: sha256:6306f106a056e24b3a2582a59a4c84cd199907f826eff27df36406f227cd9a7d
Status: Downloaded newer image for mysql:5.7
docker.io/library/mysql:5.7
2 检查镜像
[root@zxy_master ~]# docker images
REPOSITORY                                             TAG        IMAGE ID       CREATED         SIZE
mysql                                                  5.7        d410f4167eea   13 days ago     495MB
二、创建MySQL容器
1 创建容器
docker run -p 33061:3306 --name mysql01 \
-v /zxy/apps/docker_mysql/mysql01/data:/var/lib/mysql \
-v /zxy/apps/docker_mysql/mysql01/conf:/etc/mysql/conf.d \
-v /zxy/apps/docker_mysql/mysql01/log:/var/log/mysql \
-e MYSQL_ROOT_PASSWORD=123456 \
-d mysql:5.7
-
-p 33061:3306左边是服务器端口,右边是容器内端口
-
--name mysql01容器名称
-
-v /zxy/apps/docker_mysql/mysql01/log:/var/log/mysql指定日志文件目录,左边是服务器目录,右边是容器内目录
-
-v /zxy/apps/docker_mysql/mysql01/data:/var/lib/mysql指定数据文件目录,左边是服务器目录,右边是容器内目录
-
-v /zxy/apps/docker_mysql/mysql01/conf:/etc/mysql/conf.d指定配置文件目录,左边是服务器目录,右边是容器内目录
-
-e MYSQL_ROOT_PASSWORD=123456指定root用户登录密码
[root@zxy_master apps]# docker run -p 33061:3306 --name mysql01 \
> -v /zxy/apps/docker_mysql/mysql01/conf:/etc/mysql/conf.d \
> -v /zxy/apps/docker_mysql/mysql01/data:/var/lib/mysql \
> -v /zxy/apps/docker_mysql/mysql01/log:/var/log/mysql \
> -e MYSQL_ROOT_PASSWORD=123456 \
> -d mysql:5.7
faf2312fd62ad4ebe05ba2cffa9917b47417cfad1f8175912e1e0bc6e089986c
2 检查容器启动状态
[root@zxy_master apps]# docker ps
CONTAINER ID   IMAGE                                                  COMMAND                  CREATED         STATUS         PORTS                                                    NAMES
faf2312fd62a   mysql:5.7                                              "docker-entrypoint.s…"   3 seconds ago   Up 2 seconds   33060/tcp, 0.0.0.0:33061->3306/tcp, :::33061->3306/tcp   mysql01
3 进入容器,登录MySQL
3.1 登陆方式一:容器内登录
[root@zxy_master etc]# docker exec -it faf2312fd62a /bin/bash
bash-4.2# mysql -uroot -p123456
mysql: [Warning] Using a password on the command line interface can be insecure.
Welcome to the MySQL monitor.  Commands end with ; or \g.
Your MySQL connection id is 2
Server version: 5.7.40 MySQL Community Server (GPL)

Copyright (c) 2000, 2022, Oracle and/or its affiliates.

Oracle is a registered trademark of Oracle Corporation and/or its
affiliates. Other names may be trademarks of their respective
owners.

Type 'help;' or '\h' for help. Type '\c' to clear the current input statement.

mysql>
3.2 登录方式二:主机内远程登陆
-
-u
指定用户名
-
-p
小写p,指定密码
-
-h
指定主机,127.0.0.1代表本机
-
-P
指定端口,创建容器时MySQL的外部端口
[root@zxy_master ~]# mysql -uroot -p123456 -h127.0.0.1 -P33061
mysql: [Warning] Using a password on the command line interface can be insecure.
Welcome to the MySQL monitor.  Commands end with ; or \g.
Your MySQL connection id is 4
Server version: 5.7.40 MySQL Community Server (GPL)

Copyright (c) 2000, 2022, Oracle and/or its affiliates.

Oracle is a registered trademark of Oracle Corporation and/or its
affiliates. Other names may be trademarks of their respective
owners.

Type 'help;' or '\h' for help. Type '\c' to clear the current input statement.

mysql>
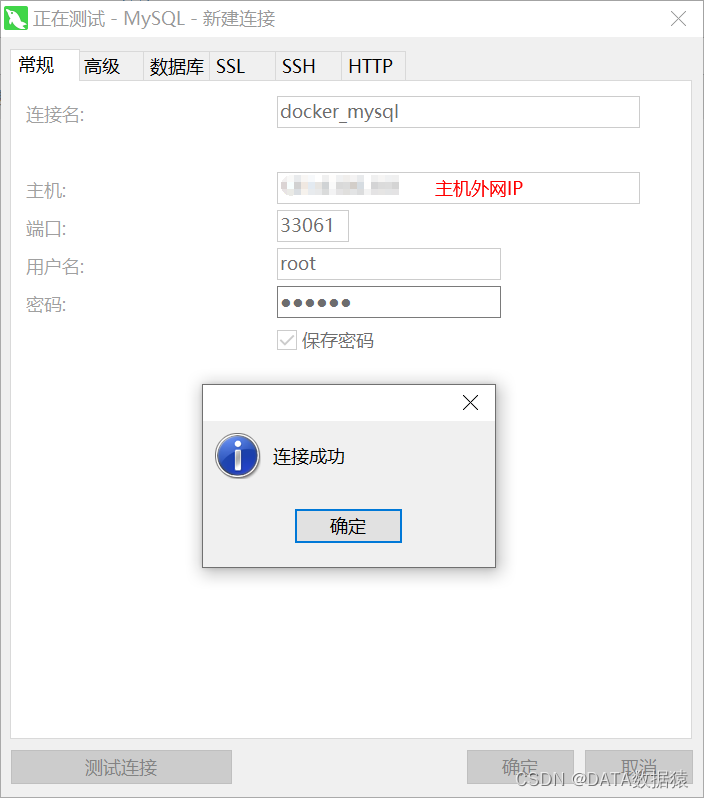
3.2 登陆方式三:外部远程登陆
开放防火墙的33061端口

4 【拓展】查看/修改容器内my.cnf配置文件
4.1 find查找my.cnf
[root@zxy_master etc]# docker exec -it faf2312fd62a /bin/bash
bash-4.2# find / -name 'my.cnf'
/etc/my.cnf
4.2 查看my.cnf
bash-4.2# cat my.cnf
# For advice on how to change settings please see
# http://dev.mysql.com/doc/refman/5.7/en/server-configuration-defaults.html

[mysqld]
#
# Remove leading # and set to the amount of RAM for the most important data
# cache in MySQL. Start at 70% of total RAM for dedicated server, else 10%.
# innodb_buffer_pool_size = 128M
#
# Remove leading # to turn on a very important data integrity option: logging
# changes to the binary log between backups.
# log_bin
#
# Remove leading # to set options mainly useful for reporting servers.
# The server defaults are faster for transactions and fast SELECTs.
# Adjust sizes as needed, experiment to find the optimal values.
# join_buffer_size = 128M
# sort_buffer_size = 2M
# read_rnd_buffer_size = 2M
skip-host-cache
skip-name-resolve
datadir=/var/lib/mysql
socket=/var/run/mysqld/mysqld.sock
secure-file-priv=/var/lib/mysql-files
user=mysql

# Disabling symbolic-links is recommended to prevent assorted security risks
symbolic-links=0

#log-error=/var/log/mysqld.log
pid-file=/var/run/mysqld/mysqld.pid
[client]
socket=/var/run/mysqld/mysqld.sock

!includedir /etc/mysql/conf.d/
!includedir /etc/mysql/mysql.conf.d/
4.2 修改my.cnf,需要下载vi
可以看到直接使用vi命令修改my.cnf是不行的。
bash-4.2# cd /etc/
bash-4.2# vi my.cnf
bash: vi: command not found
先安装vi命令,即可以修改
bash-4.2# yum -y install vi
Loaded plugins: ovl
mysql-tools-community                                                                                                             | 2.6 kB  00:00:00
mysql5.7-server-minimal                                                                                                           | 2.6 kB  00:00:00
ol7_developer_EPEL                                                                                                                | 3.6 kB  00:00:00
ol7_latest                                                                                                                        | 3.6 kB  00:00:00
......
--> Running transaction check
---> Package vim-minimal.x86_64 2:7.4.629-8.0.1.el7_9 will be installed
--> Finished Dependency Resolution
......
Installed:
  vim-minimal.x86_64 2:7.4.629-8.0.1.el7_9

Complete!