C# SolidWorks 二次开发 -从零开始创建一个插件(2)
上一篇我详细讲解了如何创建一个插件,但是无界面无按钮,这种插件适合配合事件偷偷的在后台做点什么事情。今天这篇讲一下如何增加一些按钮到工具栏、菜单上去。
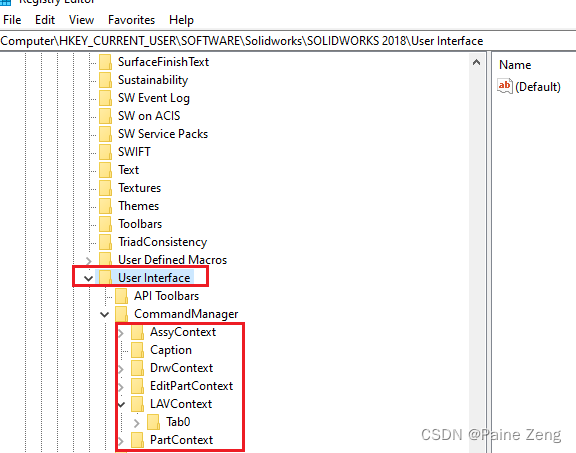
先告诉大家这个东西注册表在哪,因为solidworks在这方面做的不太好,插件你改个名字,就有多个工具栏在solidworks上面了,如果后面有些没用的工具栏名称,它的图标还会乱跑,就可以到这里面去删除没用的名称。
准备图标
有菜单,肯定要图标,也方便用户更好的识别。
这里我就拿之前demo中的示例图标了
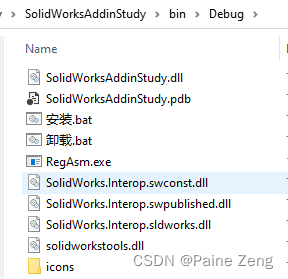
在项目目录下新建一个icons的文件夹,把图标放进来,高版本是推荐这6种图标的,旧版api示例中是大图标和两图标2种格式就好了,当然代码写法也有点区别:
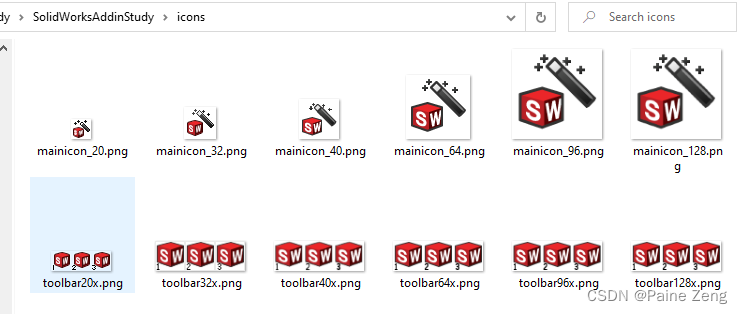
mainicon是插件的主图标,用在工具条显示的的前面
还有个地方显示的,但官方的图标没有显示,应该是因为图标位深(8的可以显示,32的显示不了)的问题,具体没研究,而且插件名称中如果有.,那么在dll中资源识别的时候会导致名称不一样,solidwroks也不能识别插件的图标。
然后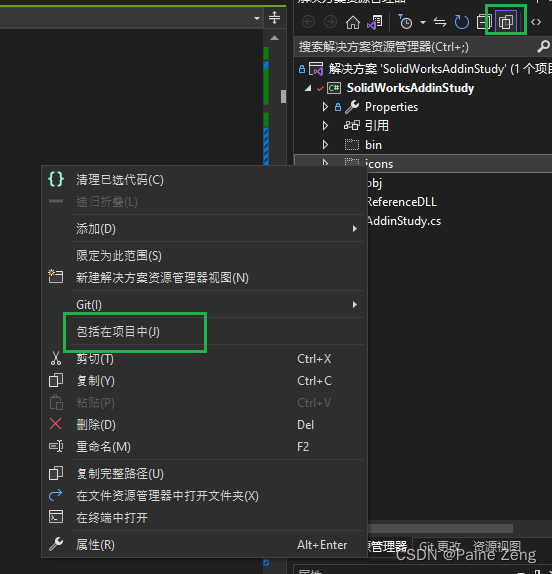
再设置为如果较新则复制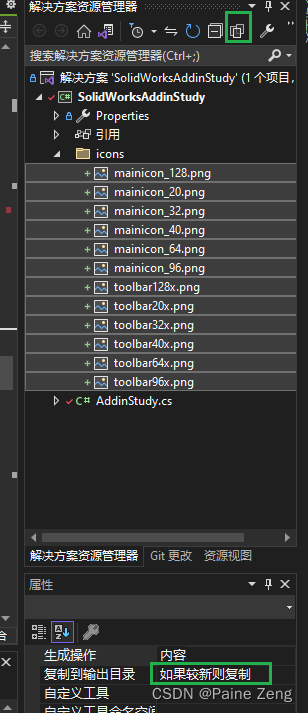
这样,我们再次生成插件的时候,这些图标就会复制到输出的目录中区,当然大家也可以按api帮助中的把这些设置为资源文件。
我这样是方便我换图标。
代码处理
先增加几个私用的变量,用于命令管理 插件CookieID ,工具组ID 以及命令id数组,还有图标的路径。
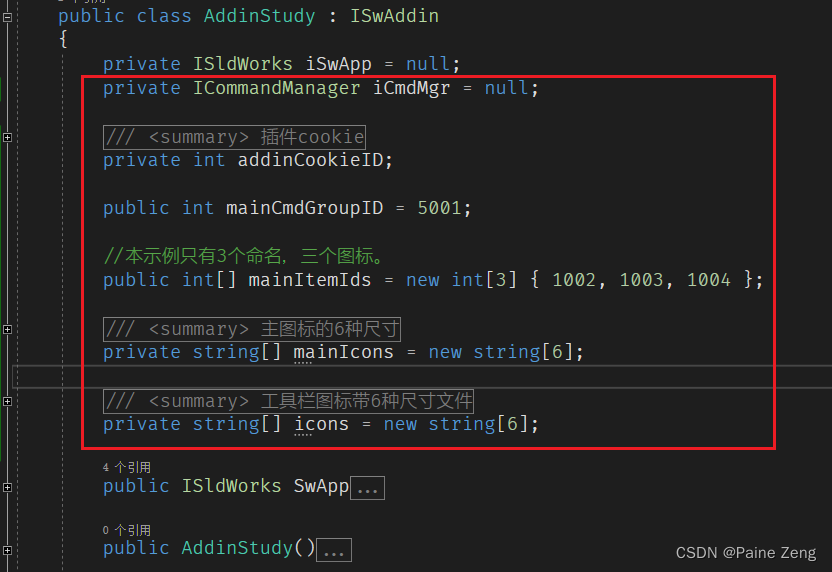
   		 private ICommandManager iCmdMgr = null;

        /// <summary>
        /// 插件cookie
        /// </summary>
        private int addinCookieID;

        public int mainCmdGroupID = 5001;

        //本示例只有3个命名,三个图标。
        public int[] mainItemIds = new int[3] { 1002, 1003, 1004 };

        /// <summary>
        /// 主图标的6种尺寸
        /// </summary>
        private string[] mainIcons = new string[6];

        /// <summary>
        /// 工具栏图标带6种尺寸文件
        /// </summary>
        private string[] icons = new string[6];
然后修改ConnectToSW的代码,注释掉之前加载过程中的提示,并在此增加命令。
        /// <summary>
        /// 连接到SolidWorks
        /// </summary>
        /// <param name="ThisSW"></param>
        /// <param name="Cookie"></param>
        /// <returns></returns>
        public bool ConnectToSW(object ThisSW, int Cookie)
        {
            iSwApp = (ISldWorks)ThisSW;

            //iSwApp.SendMsgToUser("SolidWorks正在加载此插件...");

            addinCookieID = Cookie;
            iSwApp.SetAddinCallbackInfo(0, this, addinCookieID);
            iCmdMgr = iSwApp.GetCommandManager(addinCookieID);
            AddCommandMgr();

            return true;
        }
然后就是增加AddCommandMgr EnableFunction FunctionProxy 这三方方法,用于执行增加命令的菜单,命令的可用性,以及功能的代理。
/// <summary>
/// 增加命令
/// </summary>
public void AddCommandMgr()
{
try
{
ICommandGroup cmdGroup;
//如果要支持多语言,就在这里下功夫
string Title = "Addin Study";
string ToolTip = "Addin Study ToolTip";
int[] docTypes = new int[]{(int)swDocumentTypes_e.swDocASSEMBLY,
(int)swDocumentTypes_e.swDocDRAWING,
(int)swDocumentTypes_e.swDocPART};
int cmdGroupErr = 0;
bool ignorePrevious = false;
object registryIDs;
//通过id从注册表获取工具栏的信息,并返回之前的命令id
bool getDataResult = iCmdMgr.GetGroupDataFromRegistry(mainCmdGroupID, out registryIDs);
//当前版本的插件id
var knownIDs = mainItemIds;
if (getDataResult)
{
//如果命令id集不一样了,那么就要忽略,后面要重新建立
if (!CompareIDs((int[])registryIDs, knownIDs)) //if the IDs don't match, reset the commandGroup
{
ignorePrevious = true;
}
}
cmdGroup = iCmdMgr.CreateCommandGroup2(mainCmdGroupID, Title, ToolTip, "", -1, ignorePrevious, ref cmdGroupErr);
// 设置对应的图标带 ,后面增加命令的时候就是传递的图标带的序号,从0开始
icons[0] = $@"{RegDllPath()}\icons\toolbar20x.png";// iBmp.CreateFileFromResourceBitmap("toolbar20x.png", thisAssembly);
icons[1] = $@"{RegDllPath()}\icons\toolbar32x.png";// iBmp.CreateFileFromResourceBitmap("toolbar32x.png", thisAssembly);
icons[2] = $@"{RegDllPath()}\icons\toolbar40x.png";// iBmp.CreateFileFromResourceBitmap("toolbar40x.png", thisAssembly);
icons[3] = $@"{RegDllPath()}\icons\toolbar64x.png";// iBmp.CreateFileFromResourceBitmap("toolbar64x.png", thisAssembly);
icons[4] = $@"{RegDllPath()}\icons\toolbar96x.png";// iBmp.CreateFileFromResourceBitmap("toolbar96x.png", thisAssembly);
icons[5] = $@"{RegDllPath()}\icons\toolbar128x.png";//iBmp.CreateFileFromResourceBitmap("toolbar128x.png", thisAssembly);
mainIcons[0] = $@"{RegDllPath()}\icons\mainicon_20.png";//iBmp.CreateFileFromResourceBitmap("mainicon_20.png", thisAssembly);
mainIcons[1] = $@"{RegDllPath()}\icons\mainicon_32.png";//iBmp.CreateFileFromResourceBitmap("mainicon_32.png", thisAssembly);
mainIcons[2] = $@"{RegDllPath()}\icons\mainicon_40.png";//iBmp.CreateFileFromResourceBitmap("mainicon_40.png", thisAssembly);
mainIcons[3] = $@"{RegDllPath()}\icons\mainicon_64.png";//iBmp.CreateFileFromResourceBitmap("mainicon_64.png", thisAssembly);
mainIcons[4] = $@"{RegDllPath()}\icons\mainicon_96.png";//iBmp.CreateFileFromResourceBitmap("mainicon_96.png", thisAssembly);
mainIcons[5] = $@"{RegDllPath()}\icons\mainicon_128.png";//iBmp.CreateFileFromResourceBitmap("mainicon_128.png", thisAssembly);
cmdGroup.MainIconList = mainIcons;
cmdGroup.IconList = icons;
//菜单的类型有哪些 菜单 工具条
int menuToolbarOption = (int)(swCommandItemType_e.swMenuItem | swCommandItemType_e.swToolbarItem);
//菜单
List<int> cmdIndexs = new List<int>();
//API提示的信息有误
//第一个参数是菜单里面的名称
//第三个参数是提示信息
//第四个参数是工具条上的名称
var tempCmdIndex1 = cmdGroup.AddCommandItem2("Cmd1", -1, "Cmd Tooltip1", "Cmd-1", 0, $"FunctionProxy({mainItemIds[0]})", $@"EnableFunction({mainItemIds[0]})", mainItemIds[0], menuToolbarOption);
var tempCmdIndex2 = cmdGroup.AddCommandItem2("Cmd2", -1, "Cmd Tooltip2", "Cmd-2", 1, $"FunctionProxy({mainItemIds[1]})", $@"EnableFunction({mainItemIds[1]})", mainItemIds[1], menuToolbarOption);
var tempCmdIndex3 = cmdGroup.AddCommandItem2("Cmd3", -1, "Cmd Tooltip3", "Cmd-3", 2, $"FunctionProxy({mainItemIds[2]})", $@"EnableFunction({mainItemIds[2]})", mainItemIds[2], menuToolbarOption);
cmdIndexs.Add(tempCmdIndex1);
cmdIndexs.Add(tempCmdIndex2);
cmdIndexs.Add(tempCmdIndex3);
cmdGroup.HasToolbar = true;
cmdGroup.HasMenu = true;
cmdGroup.Activate();
//增加到工具条,是通过每个文档对象来增加的。 比如零件 装配 工程图
bool bResult;
foreach (int type in docTypes)
{
CommandTab cmdTab;
cmdTab = iCmdMgr.GetCommandTab(type, Title);
//如果已经存在,并且id命令有变化,需要移除之后 ,重新增加。
if (cmdTab != null & !getDataResult | ignorePrevious)
{
bool res = iCmdMgr.RemoveCommandTab(TabToRemove: cmdTab);
cmdTab = null;
}
//工具栏为空时,重新增加
if (cmdTab == null)
{
cmdTab = iCmdMgr.AddCommandTab(type, Title);
CommandTabBox cmdBox = cmdTab.AddCommandTabBox();
List<int> cmdIDs = new List<int>();
//工具栏样式,
List<int> showTextType = new List<int>();
for (int i = 0; i < mainItemIds.Length; i++)
{
cmdIDs.Add(cmdGroup.get_CommandID(i));
showTextType.Add((int)swCommandTabButtonTextDisplay_e.swCommandTabButton_TextBelow);
}
bResult = cmdBox.AddCommands(cmdIDs.ToArray(), showTextType.ToArray());
CommandTabBox cmdBox1 = cmdTab.AddCommandTabBox();
//这个是加分割线,记得从后往前,因为分割后最前的id集变少了。
//cmdTab.AddSeparator(cmdBox1, cmdIDs[0]);
}
}
}
catch (Exception ex)
{
SwApp.SendMsgToUser(ex.StackTrace);
}
}
/// <summary>
/// 决定此命令在该环境下是否可用
/// </summary>
/// <param name="data"></param>
/// <returns></returns>
public int EnableFunction(string data)
{
int commandType = int.Parse(data);
return 1;
}
/// <summary>
/// 通过用户点击的菜单id来执行不同的动作
/// </summary>
/// <param name="data"></param>
public void FunctionProxy(string data)
{
int commandId = int.Parse(data);
switch (commandId)
{
case 1002:
SwApp.SendMsgToUser("Cmd1 Click");
break;
case 1003:
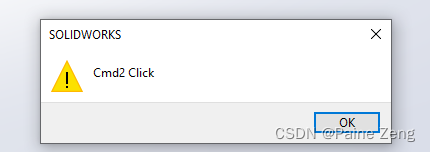
SwApp.SendMsgToUser("Cmd2 Click");
break;
case 1004:
SwApp.SendMsgToUser("Cmd3 Click");
break;
}
}
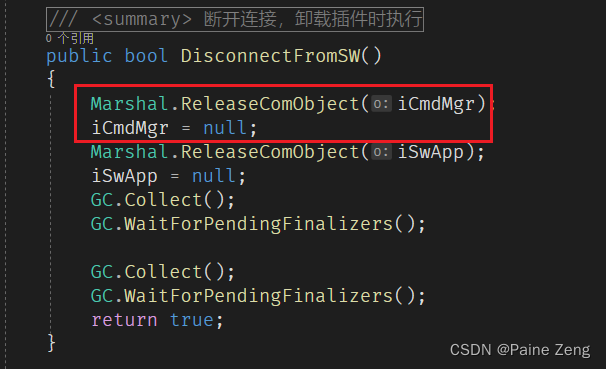
最后把断开的写一下
现在应该差不多了,生成一下:
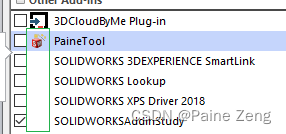
如果不放心,就再安装 一下:
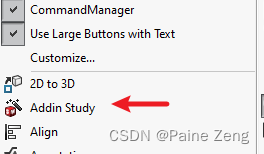
再次打开SolidWorks.
然后新建一个零件:
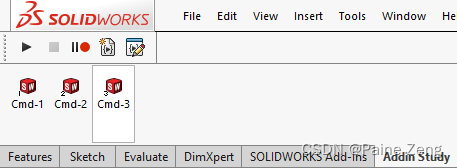
点击 一下Cmd-2
好了,下面就是具体的开发逻辑处理了,和exe程序基本是一样的。
基本上就可以了,源代码已经上传。
https://gitee.com/painezeng/SolidWorksAddinStudy
有什么问题欢迎来聊。