Spring Boot整合Spring Security并设置自定义登录页面
准备工作,创建一个Spring Boot项目,注意选择Spring Boot的版本,选择3.0以下的版本。
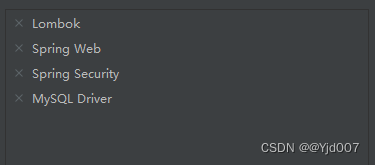
选择如下依赖,等待项目创建成功。
项目创建成功之后,添加Mybatis-plus的依赖。
 <dependency>
            <groupId>com.baomidou</groupId>
            <artifactId>mybatis-plus-boot-starter</artifactId>
            <version>3.3.1.tmp</version>
        </dependency>
上篇文章没有带大家查询数据库,这次我们就去查一下,并且使用ide自带的MybatisX的插件去逆向生成我们的的实体类和mapper文件。
创建数据库text,创建表、字段.
CREATE DATABASE `text`;

USE `text`;


DROP TABLE IF EXISTS `t_user`;

CREATE TABLE `t_user` (
  `t_id` int(4) NOT NULL AUTO_INCREMENT,
  `t_name` varchar(20) DEFAULT NULL,
  `t_password` varchar(60) DEFAULT NULL,
  `t_authority` varchar(60) DEFAULT NULL,
  PRIMARY KEY (`t_id`)
) ENGINE=InnoDB AUTO_INCREMENT=3 DEFAULT CHARSET=utf8;


insert  into `t_user`(`t_id`,`t_name`,`t_password`,`t_authority`) values (1,'yjd','123','1'),(2,'zhansan','123','0');
MybatisX的使用大家可以看一下我的另外一篇文章。这里不再赘述了。
逆向生成实体类之后,我们先配置数据源。
server:
  port: 8081
spring:
  datasource:
    url: jdbc:mysql://localhost:3306/text?useUnicode=true&characterEncoding=UTF-8&serverTimezone=Asia/Shanghai
    username: root
    password: ******

mybatis-plus:
  #    配置mybatis-plus
  mapper-locations: mapper/*.xml
启动项目,不出意外是Security默认生成是账户和密码。接下来我们按照我上一篇文章的方法,使用UserDetailsService和PasswordEncode接口,自定义登录验证的逻辑,将它更改为从数据库查询。
由于我们存放在数据库中的密码是明文的方式,所以我们先通过测试类,使用 BCryptPasswordEncoder加密一下密码并放到数据库中
    @Test
    void contextLoads() {
        PasswordEncoder pe=new BCryptPasswordEncoder();
        System.out.println(pe.encode("123"));
    }

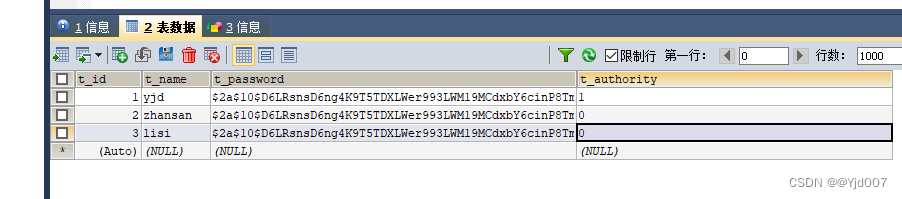
数据存入数据库之后,和上一篇文章一样,创建一个配置类,将PasswordEncoder注入容器,然后创建一个类去实现UserDetailsService接口。
实现UserDetailsService接口
package com.dong.service.impl;

import com.baomidou.mybatisplus.core.conditions.query.QueryWrapper;
import com.dong.mapper.UserMapper;
import com.dong.pojo.User;

import org.springframework.security.core.authority.AuthorityUtils;
import org.springframework.security.core.userdetails.UserDetails;
import org.springframework.security.core.userdetails.UserDetailsService;
import org.springframework.security.core.userdetails.UsernameNotFoundException;
import org.springframework.stereotype.Service;
import org.springframework.util.StringUtils;

import javax.annotation.Resource;

@Service
public class UserDetailsServiceImpl implements UserDetailsService {
    //注入mapper查询数据库

    @Resource
    private UserMapper userMapper;
    @Override
    public UserDetails loadUserByUsername(String username) throws UsernameNotFoundException {
       //1.查询数据库
        QueryWrapper<User> lqw=new QueryWrapper<>();
        lqw.eq("t_name",username); //查询数据库中用户名为username的用户。
        User user = userMapper.selectOne(lqw);
        System.out.println("user = " + user);
        if(StringUtils.isEmpty(user)){
//            如果为空,抛出异常。
            throw new UsernameNotFoundException("用户不存在!");
        }
        //如果存在,则封装到User中返回,这里要注意区分两个User
        return new org.springframework.security.core.userdetails.User
        (user.getTName(),user.getTPassword(), AuthorityUtils.commaSeparatedStringToAuthorityList(user.getTAuthority()));
    }
}
创建配置类,注入PasswordEncoder
package com.dong.config;

import org.springframework.context.annotation.Bean;
import org.springframework.context.annotation.Configuration;
import org.springframework.security.crypto.bcrypt.BCryptPasswordEncoder;
import org.springframework.security.crypto.password.PasswordEncoder;

@Configuration
public class SecurityConfig {

    @Bean
    public PasswordEncoder getPe(){
        return new BCryptPasswordEncoder();
    }
}
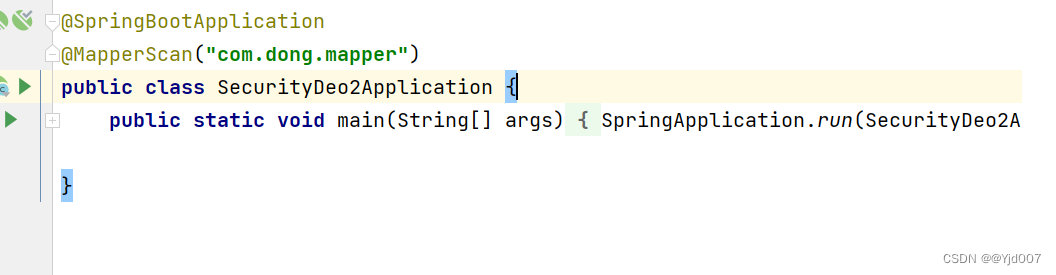
别忘了在启动类上面添加mapperScan注解。
启动项目, 输入数据库中的用户登录。
ps:如果启动之后配置没有生效。观察你的启动类是不是所在的位置。
登录成功,并且后台也输出了我们从数据库中查询到的数据。

接下来就是替换掉security自带的登录页面,换成我们自己的登录页面
首先我们在static目录下面准备两个页面,一个是登录页面,一个是登录成功的页面。
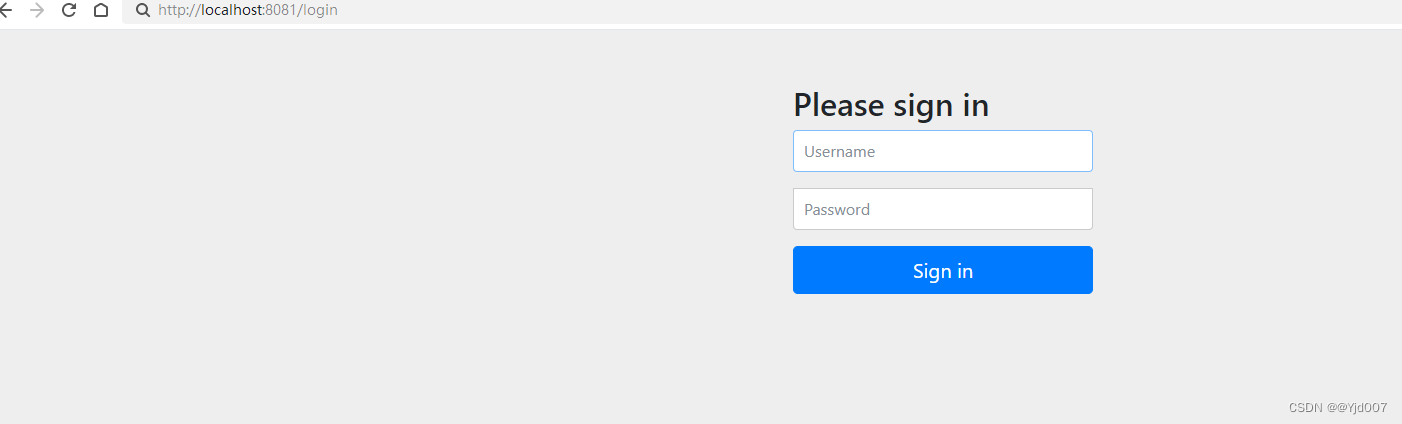
重启项目,访问login.html,发现还是得先登录之后才能访问到我们的页面
![]()
接下来继续在我们之前创建的SecurityConfig配置类中进行配置。
让其SecurityConfig配置类继承WebSecurityConfigureAdapter类,并且重写其中的configure方法,在configur方法中就可以自定义登录页面。
@Configuration
public class SecurityConfig extends WebSecurityConfigurerAdapter {
    @Override
    protected void configure(HttpSecurity httpSecurity) throws Exception {
        //表单提交
        httpSecurity.formLogin()
                //自定义登录页面
                .loginPage("/login.html");
    }
    @Bean
    public PasswordEncoder getPe(){
        return new BCryptPasswordEncoder();
    }
}
我们再次重启项目,发现可以直接访问到login.html。
不仅可以访问到login.html页面,而且也可以访问到index.html,好像不用登录也可以访问了,那这样我们做的那些配置不就都没有用了吗?当然不是,我们还需要对它进行配置。
package com.dong.config;

import org.springframework.context.annotation.Bean;
import org.springframework.context.annotation.Configuration;
import org.springframework.security.config.annotation.web.builders.HttpSecurity;
import org.springframework.security.config.annotation.web.configuration.WebSecurityConfiguration;
import org.springframework.security.config.annotation.web.configuration.WebSecurityConfigurerAdapter;
import org.springframework.security.crypto.bcrypt.BCryptPasswordEncoder;
import org.springframework.security.crypto.password.PasswordEncoder;

@Configuration
public class SecurityConfig extends WebSecurityConfigurerAdapter {
    @Override
    protected void configure(HttpSecurity httpSecurity) throws Exception {
        //表单提交
        httpSecurity.formLogin()
                //自定义登录页面
                .loginPage("/login.html")
                //设置默认的的登录路径
                .loginProcessingUrl("/login")
                //登录成功之后跳转的路径
                .successForwardUrl("/index");

        //开启授权认证
        httpSecurity.authorizeRequests()
                //将登录路径排除在外
                .antMatchers("/login.html").permitAll()
                //所有的请求都需要登录之后才能访问
                .anyRequest().authenticated();
        //关闭security的防护,类似于电脑的防火墙
        httpSecurity.csrf().disable();
    }

    @Bean
    public PasswordEncoder getPe(){
        return new BCryptPasswordEncoder();
    }
}
配置完成之后,启动项目测试一下,然后你会发现无论我们访问什么路径,它最终都会跳转到登录页面。只有登录之后才会跳转到其他页面。
以上就是自定义登录逻辑和自定义登录页面的内容了。