基于趋动云的chatGLM-6B模型的部署
首先根据官方示例教程,学会怎么创建项目,怎么使用数据,怎么进入开发环境,以及了解最重要的2个环境变量:
这个是进入开发环境以后的代码目录
$GEMINI_CODE
这个是引用数据集后,数据集存放的路径
$GEMINI_DATA_IN1
这2个linux shell环境变量很关键
创建项目时,需要注意的:
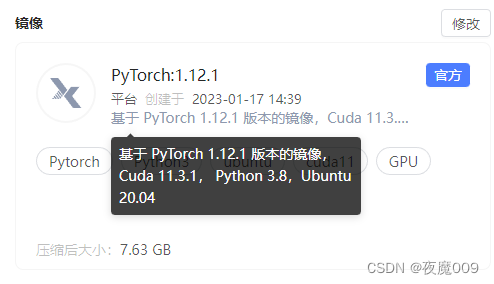
镜像选择:
数据集选择:
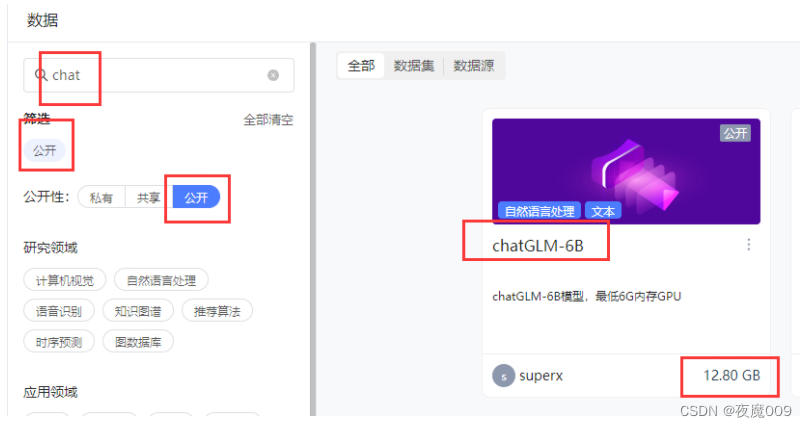
数据集选择后,页面会提示,数据集绑定在/gemini/data-1路径了。这个不用记忆,这个路径会保存在前面说的那个系统环境变量里,主要记住是data-#几。
运行规格选择:
这个模型你要想跑的效果快一些,必然是GPU显存多用一些,才能快,虽然6G也能跑,但是会很慢。所以选那个算力高一些的:

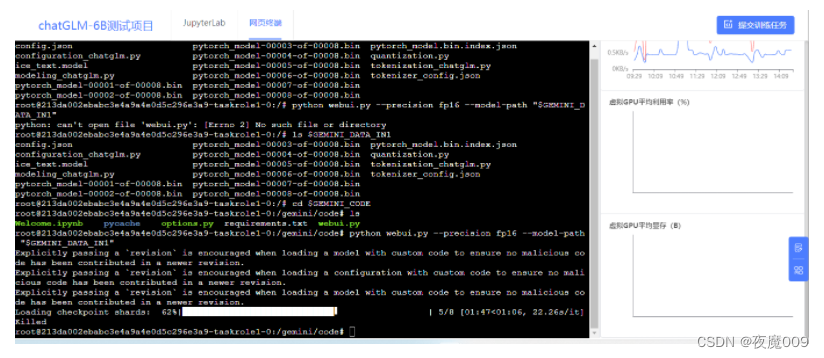
我第一次选的B1中等主机,结果加载到62%,直接被自动Kill了,需要大一些,建议搞large的!
 上传代码:
上传代码:
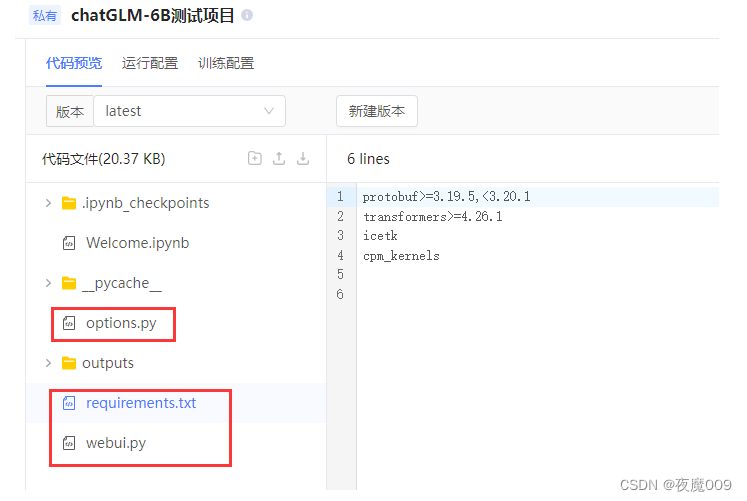
把这三个代码上传上去,文件名别改,除非你自己懂。
requirements.txt
protobuf>=3.19.5,<3.20.1
transformers>=4.26.1
icetk
cpm_kernels
gradio
options.py
import argparse

parser = argparse.ArgumentParser()

parser.add_argument("--port", type=int, default="17860")
parser.add_argument("--model-path", type=str, default="/gemini/data-1")
parser.add_argument("--precision", type=str, help="evaluate at this precision", choices=["fp16", "int4", "int8"], default="fp16")
parser.add_argument("--listen", action='store_true', help="launch gradio with 0.0.0.0 as server name, allowing to respond to network requests")
parser.add_argument("--cpu", action='store_true', help="use cpu")
parser.add_argument("--share", action='store_true', help="use gradio share")
webui.py
import json
import os
import time
import gradio as gr
from transformers import AutoModel, AutoTokenizer
from options import parser
history = []
readable_history = []
cmd_opts = parser.parse_args()
tokenizer = AutoTokenizer.from_pretrained(cmd_opts.model_path, trust_remote_code=True)
model = AutoModel.from_pretrained(cmd_opts.model_path, trust_remote_code=True)
_css = """
#del-btn {
max-width: 2.5em;
min-width: 2.5em !important;
height: 2.5em;
margin: 1.5em 0;
}
"""
def prepare_model():
global model
if cmd_opts.cpu:
model = model.float()
else:
if cmd_opts.precision == "fp16":
model = model.half().cuda()
elif cmd_opts.precision == "int4":
model = model.half().quantize(4).cuda()
elif cmd_opts.precision == "int8":
model = model.half().quantize(8).cuda()
model = model.eval()
prepare_model()
def parse_codeblock(text):
lines = text.split("\n")
for i, line in enumerate(lines):
if "```" in line:
if line != "```":
lines[i] = f'<pre><code class="{lines[i][3:]}">'
else:
lines[i] = '</code></pre>'
else:
if i > 0:
lines[i] = "<br/>" + line.replace("<", "<").replace(">", ">")
return "".join(lines)
def predict(query, max_length, top_p, temperature):
global history
output, history = model.chat(
tokenizer, query=query, history=history,
max_length=max_length,
top_p=top_p,
temperature=temperature
)
readable_history.append((query, parse_codeblock(output)))
print(output)
return readable_history
def save_history():
if not os.path.exists("outputs"):
os.mkdir("outputs")
s = [{"q": i[0], "o": i[1]} for i in history]
filename = f"save-{int(time.time())}.json"
with open(os.path.join("outputs", filename), "w", encoding="utf-8") as f:
f.write(json.dumps(s, ensure_ascii=False))
def load_history(file):
global history, readable_history
try:
with open(file.name, "r", encoding='utf-8') as f:
j = json.load(f)
_hist = [(i["q"], i["o"]) for i in j]
_readable_hist = [(i["q"], parse_codeblock(i["o"])) for i in j]
except Exception as e:
print(e)
return readable_history
history = _hist.copy()
readable_history = _readable_hist.copy()
return readable_history
def clear_history():
history.clear()
readable_history.clear()
return gr.update(value=[])
def create_ui():
with gr.Blocks(css=_css) as demo:
prompt = "输入你的内容..."
with gr.Row():
with gr.Column(scale=3):
gr.Markdown("""<h2><center>ChatGLM WebUI</center></h2>""")
with gr.Row():
with gr.Column(variant="panel"):
with gr.Row():
max_length = gr.Slider(minimum=4, maximum=4096, step=4, label='Max Length', value=2048)
top_p = gr.Slider(minimum=0.01, maximum=1.0, step=0.01, label='Top P', value=0.7)
with gr.Row():
temperature = gr.Slider(minimum=0.01, maximum=1.0, step=0.01, label='Temperature', value=0.95)
# with gr.Row():
# max_rounds = gr.Slider(minimum=1, maximum=50, step=1, label="最大对话轮数(调小可以显著改善爆显存,但是会丢失上下文)", value=20)
with gr.Row():
with gr.Column(variant="panel"):
with gr.Row():
clear = gr.Button("清空对话(上下文)")
with gr.Row():
save_his_btn = gr.Button("保存对话")
load_his_btn = gr.UploadButton("读取对话", file_types=['file'], file_count='single')
with gr.Column(scale=7):
chatbot = gr.Chatbot(elem_id="chat-box", show_label=False).style(height=800)
with gr.Row():
message = gr.Textbox(placeholder=prompt, show_label=False, lines=2)
clear_input = gr.Button("🗑️", elem_id="del-btn")
with gr.Row():
submit = gr.Button("发送")
submit.click(predict, inputs=[
message,
max_length,
top_p,
temperature
], outputs=[
chatbot
])
clear.click(clear_history, outputs=[chatbot])
clear_input.click(lambda x: "", inputs=[message], outputs=[message])
save_his_btn.click(save_history)
load_his_btn.upload(load_history, inputs=[
load_his_btn,
], outputs=[
chatbot
])
return demo
ui = create_ui()
ui.queue().launch(
server_name="0.0.0.0" if cmd_opts.listen else None,
server_port=cmd_opts.port,
share=cmd_opts.share
)
然后到网页终端执行后续命令,就可以把模型跑起来
#到项目容器的代码路径
cd $GEMINI_CODE
#检查一下数据(模型)路径是不是正确绑定了,应该要能看到文件
ls $GEMINI_DATA_IN1
#更改pip源到国内镜像,清华的镜像
pip config set global.index-url https://pypi.tuna.tsinghua.edu.cn/simple

#升级一下pip到最新版
python3 -m pip install --upgrade pip

#安装 requirements.txt里模型启动需要依赖的东东
pip install --upgrade -r requirements.txt

#运行模型,这里注意几个参数,
#fp16是指GPU要在12G显存以上的显卡环境,内存要在24G左右
#8G以下显存GPU,把fp16 改为 int4
#8G显存GPU,把fp16 改为 int8
#具体在 options.py 中有说明
python webui.py --precision fp16 --model-path "$GEMINI_DATA_IN1"  --listen
运行后窗口出现这类信息

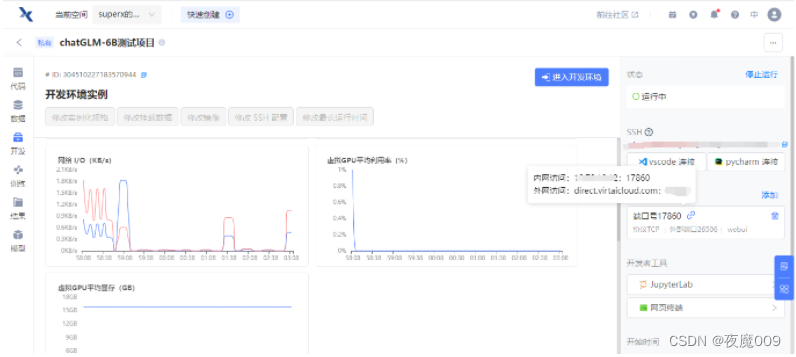
就是运行成功了,访问17860端口就可以。
因为在云平台,所以还要到开发环境去再看一下,外网访问的端口,如下图 端口号17860 的位置所示
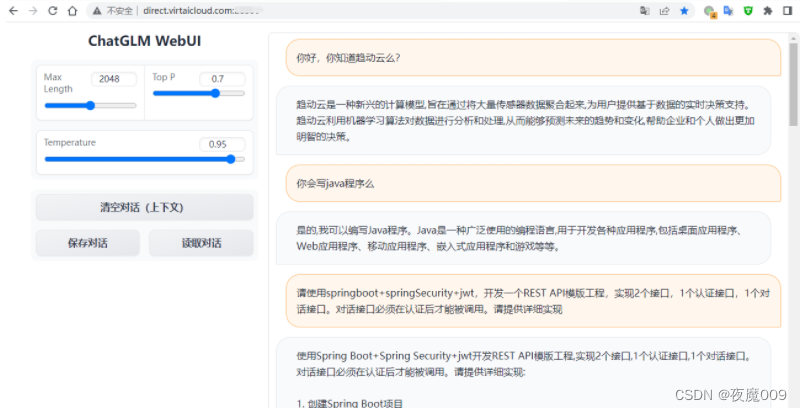
 根据地址直接访问,就可以会话了。注意滚动条往下拉一下,可以找到会话窗口。
尝试完成之后,记得关闭实验环境,不然会费算力点
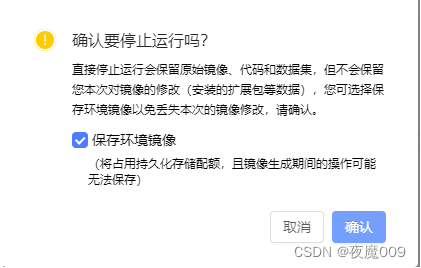
勾选上保存环境镜像,下次进来的时候,操作不会丢可以继续!