springBoot整合springSecurity(认证)
springSecurity(安全)
1.什么是springSecurity?
Spring Security是 Spring 家族中的一个安全管理框架。相比与另外一个安全框架Shiro,它提供了更丰富的功能,社区资源也比Shiro丰富;
Spring Security是一个功能强大且高度可定制的身份验证和访问控制框架。它是用于保护基于Spring的应用程序的实际标准;
Spring Security是一个框架,致力于为Java应用程序提供身份验证和授权。与所有Spring项目一样,Spring Security的真正强大之处在于可以轻松扩展以满足自定义要求。
在 Java 生态中,目前有 Spring Security 和 Apache Shiro 两个安全框架,可以完成认证和授权的功能。
我们先来学习下 Spring Security 。其官方对自己介绍如下:
Spring Security is a powerful and highly customizable authentication and access-control framework. It is the de-facto standard for securing Spring-based applications.
Spring Security是一个功能强大且高度可定制的身份验证和访问控制框架。它是保护基于Spring的应用程序的事实标准。
Spring Security is a framework that focuses on providing both authentication and authorization to Java applications. Like all Spring projects, the real power of Spring Security is found in how easily it can be extended to meet custom requirementsSpring
Security是一个专注于为Java应用程序提供身份验证和授权的框架。与所有Spring项目一样,Spring Security的真正威力在于它可以多么容易地扩展以满足定制需求
一般Web应用的需要进行认证和授权。
认证(Authentication):验证当前访问系统的是不是本系统的用户,并且要确认具体是哪个用户
授权(Authorization):经过认证后判断当前用户是否有权限进行某个操作
而认证和授权就是SpringSecurity作为安全框架的核心功能。
2.认证
2.1导入springSecurity依赖
<dependency>
    <groupId>org.springframework.boot</groupId>
    <artifactId>spring-boot-starter-security</artifactId>
</dependency>
然后运行项目
输入localhost:自己的端口号会出来这个页面
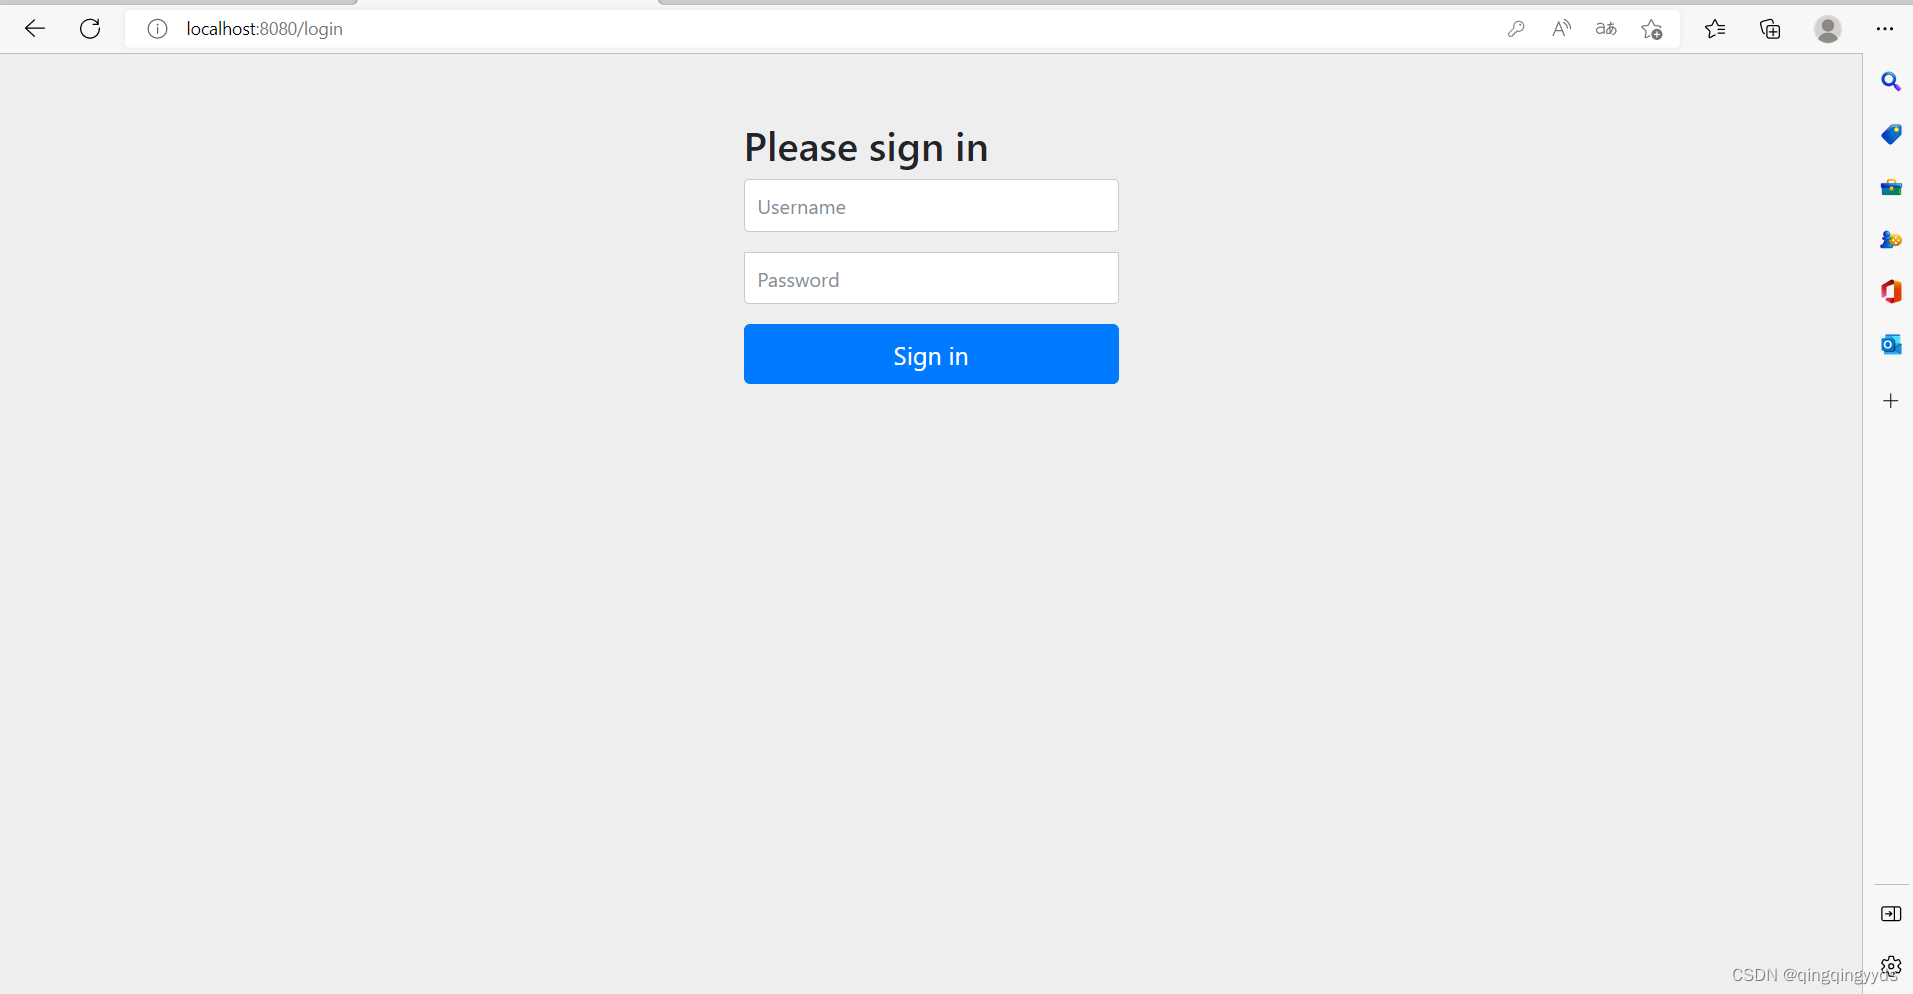
![]()
![]()
此时所有的接口都已经被保护了
2.2那账号密码是什么呢
我们查看一下控制台

![]()
有一串uuid这就是密码,账号为user
输入进去就可以登录成功了
![]()
2.3表单登录
2.3.1登录的html文件
在resources里面的static目录创建一个html文件
<!DOCTYPE html>
<html lang="en">
<head>
<meta charset="UTF-8">
<title>登陆</title>
<link
href="//maxcdn.bootstrapcdn.com/bootstrap/4.1.1/css/bootstrap.min.css"
rel="stylesheet" id="bootstrap-css">
<script
src="//maxcdn.bootstrapcdn.com/bootstrap/4.1.1/js/bootstrap.min.js" >
</script>
<script
src="//cdnjs.cloudflare.com/ajax/libs/jquery/3.2.1/jquery.min.js">
</script>
</head>
<style>
#login .container #login-row #login-column #login-box{
border: 1px solid #9c9c9c ;
background-color: #EAEAEA;
}
</style>
<body>
<form id="login-form" class="form" action="/doLogin" method="post">
<h3>登录</h3>
<label for="username" class="text-into" >用户名</label><br>
<input type="text" name="uname" id="username" class="form-control" ><br>
<label for="password" class="text-info">密码</label><br>
<input type="password" name="passwd" id="password" class="form-control"><br>
<input type="submit" name="submit" class="btn btn-info btn-md" value="登录">
</form>
</body>
</html>2.3.2配置一下security的配置
创建一个SecurityConfig配置类
继承WebSecurityConfigurerAdapter
@Configuration
public class SecurityConfig extends WebSecurityConfigurerAdapter {
@Autowired
private UserDetailsServiceImpl userDetailsService;
@Override
protected void configure(HttpSecurity http) throws Exception {
//authorizeRequests开启权限配置
http.authorizeRequests()
//anyRequest().authenticated()所有请求都要认证
.anyRequest().authenticated()
//and()和http.同意
.and()
//formLogin开启表单登陆的配置
.formLogin()
//loginPage登录的页面地址
.loginPage("/mylogin.html")
//loginProcessingUrl登录接口
.loginProcessingUrl("/doLogin")
// //defaultSuccessUrl登录成功跳转的页面,如果直接到Login页面登陆成功跳转的地址
.defaultSuccessUrl("/index")
//登陆失败跳转的路径,并且携带错误信息
.failureForwardUrl("/mylogin.html")
//登录的用户名
.usernameParameter("uname")
//登录的密码
.passwordParameter("passwd")
//表示跟登录相关的接口不拦截
.permitAll()
.and()
//关闭csrf跨域攻击
.csrf().disable();
}
}2.3.3设置登录的账号密码
在application.yml文件当中配置
spring:
  #security
  security:
    user:
      name: admin
      password: 123456
登录成功之后会跳转到/index接口
登录失败之后会再次跳转到/mylogin.html的登录页面
2.3.4前后分离之下的登录
有时候页面跳转并不能满足我们的需求,特别是现在流行的前后分离开发当中,用户登录成功后就不需要跳转了,
只需要返回给前端一个JSON数据即可,告诉前端登录成功还是登录失败,全端接收到消息之后自行处理。
像这样的需求,我们可以通过自定义的AuthenticationHandler
2.3.4.1登录成功处理器
@Configuration
public class MyAuthenticationSuccessHandler implements AuthenticationSuccessHandler {
    //自定义配置登录成功的处理器
    @Override
    public void onAuthenticationSuccess(HttpServletRequest request, HttpServletResponse response, Authentication authentication) throws IOException, ServletException {
        response.setContentType("application/json;charset=utf-8");
        Map<String,Object> successMap=new HashMap<>();
        successMap.put("msg","登录成功");
        successMap.put("code",200);
        ObjectMapper objectMapper=new ObjectMapper();
        String successLogin=objectMapper.writeValueAsString(successMap);
        response.getWriter().write(successLogin);
    }
}
2.3.4.2登录失败处理器
@Configuration
public class MyAuthenticationFailureHandler implements AuthenticationFailureHandler {
    //自定义配置登录失败返回的信息
    @Override
    public void onAuthenticationFailure(HttpServletRequest request, HttpServletResponse response, AuthenticationException exception) throws IOException, ServletException {
        response.setContentType("application/json;charset=utf-8");
        Map<String,Object> successMap=new HashMap<>();
        successMap.put("msg","登录失败"+exception.getMessage());
        successMap.put("code", Constants.CODE_500);
        ObjectMapper objectMapper=new ObjectMapper();
        String successLogin=objectMapper.writeValueAsString(successMap);
        response.getWriter().write(successLogin);
    }

}
2.3.4.3重新配置一下
修改一下刚才的SpringSecurity配置
@Configuration
public class SecurityConfig extends WebSecurityConfigurerAdapter {
@Autowired
private UserDetailsServiceImpl userDetailsService;
@Override
protected void configure(HttpSecurity http) throws Exception {
//authorizeRequests开启权限配置
http.authorizeRequests()
//anyRequest().authenticated()所有请求都要认证
.anyRequest().authenticated()
//and()和http.同意
.and()
//formLogin开启表单登陆的配置
.formLogin()
//loginPage登录的页面地址
.loginPage("/mylogin.html")
//loginProcessingUrl登录接口
.loginProcessingUrl("/doLogin")
//自定义登录成功的处理器
.successHandler(new MyAuthenticationSuccessHandler())
//自定义登陆失败的处理器
.failureHandler(new MyAuthenticationFailureHandler())
//登录的用户名
.usernameParameter("uname")
//登录的密码
.passwordParameter("passwd")
//表示跟登录相关的接口不拦截
.permitAll()
.and()
//关闭csrf跨域攻击
.csrf().disable();
}
}再次重启
2.3.4.4登录成功返回的信息

![]()
2.3.4.5登录失败返回的信息

![]()
2.4退出登录
2.4.1默认的退出登录
添加退出登录的security配置
@Configuration
public class SecurityConfig extends WebSecurityConfigurerAdapter {

@Override
protected void configure(HttpSecurity http) throws Exception {
    //authorizeRequests开启权限配置
    http.authorizeRequests()
            //anyRequest().authenticated()所有请求都要认证
            .anyRequest().authenticated()
            //and()和http.同意
            .and()
            //formLogin开启表单登陆的配置
            .formLogin()
            //loginPage登录的页面地址
            .loginPage("/mylogin.html")
            //loginProcessingUrl登录接口
            .loginProcessingUrl("/doLogin")
             //自定义登录成功的处理器
            .successHandler(new MyAuthenticationSuccessHandler())
            //自定义登陆失败的处理器
            .failureHandler(new MyAuthenticationFailureHandler())
            //登录的用户名
            .usernameParameter("uname")
            //登录的密码
            .passwordParameter("passwd")
            //表示跟登录相关的接口不拦截
            .permitAll()
            .and()
            //logout开启注销配置
            .logout()
            //logoutUrl注销登录的请求路径
            .logoutUrl("/logout")
            .invalidateHttpSession(true)
            //clearAuthentication表示清除认证信息,默认为true
            .clearAuthentication(true)
            //logoutSuccessUrl退出成功之后的页面
            .logoutSuccessUrl("/mylogin.html")
            //关闭csrf跨域攻击
            .csrf().disable();
  }
}
security的默认的退出路径为logout,退出成功返回的页面为/mylogin.html
2.4.2退出登录的处理器
退出登录也可以和登录成功登录失败一样,返回json数据
@Configuration
public class MyLogoutSuccessHandler implements LogoutSuccessHandler {
    @Override
    public void onLogoutSuccess(HttpServletRequest request, HttpServletResponse response, Authentication authentication) throws IOException, ServletException {
        response.setContentType("application/json;charset=utf-8");
        Map<String,Object> successMap=new HashMap<>();
        successMap.put("msg","退出成功");
        successMap.put("code",200);
        ObjectMapper objectMapper=new ObjectMapper();
        String successLogin=objectMapper.writeValueAsString(successMap);
        response.getWriter().write(successLogin);
    }
}
同时也要配置一下
@Configuration
public class SecurityConfig extends WebSecurityConfigurerAdapter {
@Autowired
private UserDetailsServiceImpl userDetailsService;
@Override
protected void configure(HttpSecurity http) throws Exception {
//authorizeRequests开启权限配置
http.authorizeRequests()
//anyRequest().authenticated()所有请求都要认证
.anyRequest().authenticated()
//and()和http.同意
.and()
//formLogin开启表单登陆的配置
.formLogin()
//loginPage登录的页面地址
.loginPage("/mylogin.html")
//loginProcessingUrl登录接口
.loginProcessingUrl("/doLogin")
//自定义登录成功的处理器
.successHandler(new MyAuthenticationSuccessHandler())
//自定义登陆失败的处理器
.failureHandler(new MyAuthenticationFailureHandler())
//登录的用户名
.usernameParameter("uname")
//登录的密码
.passwordParameter("passwd")
//表示跟登录相关的接口不拦截
.permitAll()
.and()
//logout开启注销配置
.logout()
//logoutUrl注销登录的请求路径
.logoutUrl("/logout")
//配置退出登录处理器
.logoutSuccessHandler(new MyLogoutSuccessHandler())
.invalidateHttpSession(true)
//clearAuthentication表示清除认证信息,默认为true
.clearAuthentication(true)
//关闭csrf跨域攻击
.csrf().disable();
}
}2.5登录用户数据获取
2.5.1从SecurityContextHolder中获取
登录成功之后直接可以通过security中获取对象信息,security已经给我们封装好了
@GetMapping("/getUser")
    public Object getUserInfo(){
        //获取用户信息
        return SecurityContextHolder.getContext().getAuthentication().getPrincipal();
    }
我们用账号admin登录
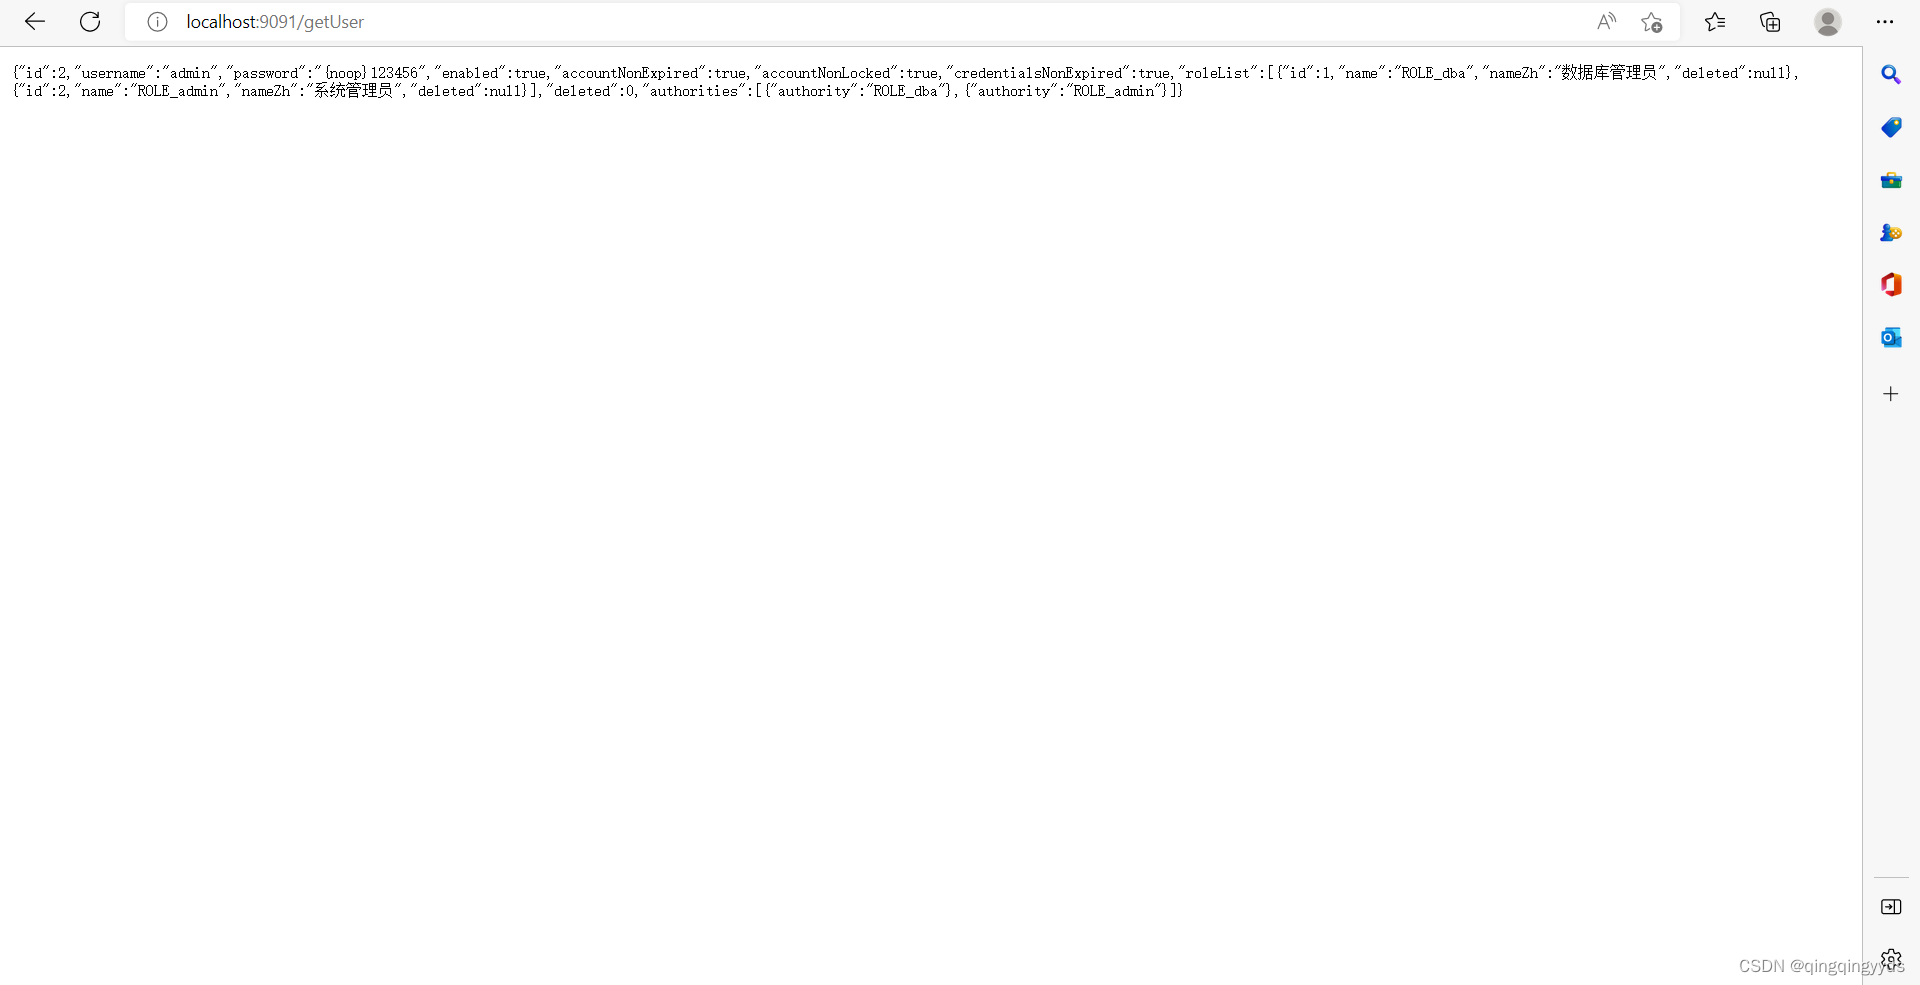
![]()
这样就能获取到用户信息了
是Authentication里面有五个接口
//获取用户权限
Collection<? extends GrantedAuthority> getAuthorities();
//获取用户凭证,一般是密码,但是为了安全返回的是null
Object getCredentials();
//用来获取用户详细信息
Object getDetails();
//获取当前用户信息,可以是一个用户名,也可以是一个用户对象
Object getPrincipal();
//当前用户是否认证成功
boolean isAuthenticated();2.5.2从当前请求对象中获取
@RequestMapping("/authentication")
public AjaxResult authentication(Authentication authentication){
return authentication;
}
@RequestMapping("/principal")
public AjaxResult principal(Principal principal){
return principal;
}第一个方法返回的用户信息

![]()
第二个方法获取的用户信息
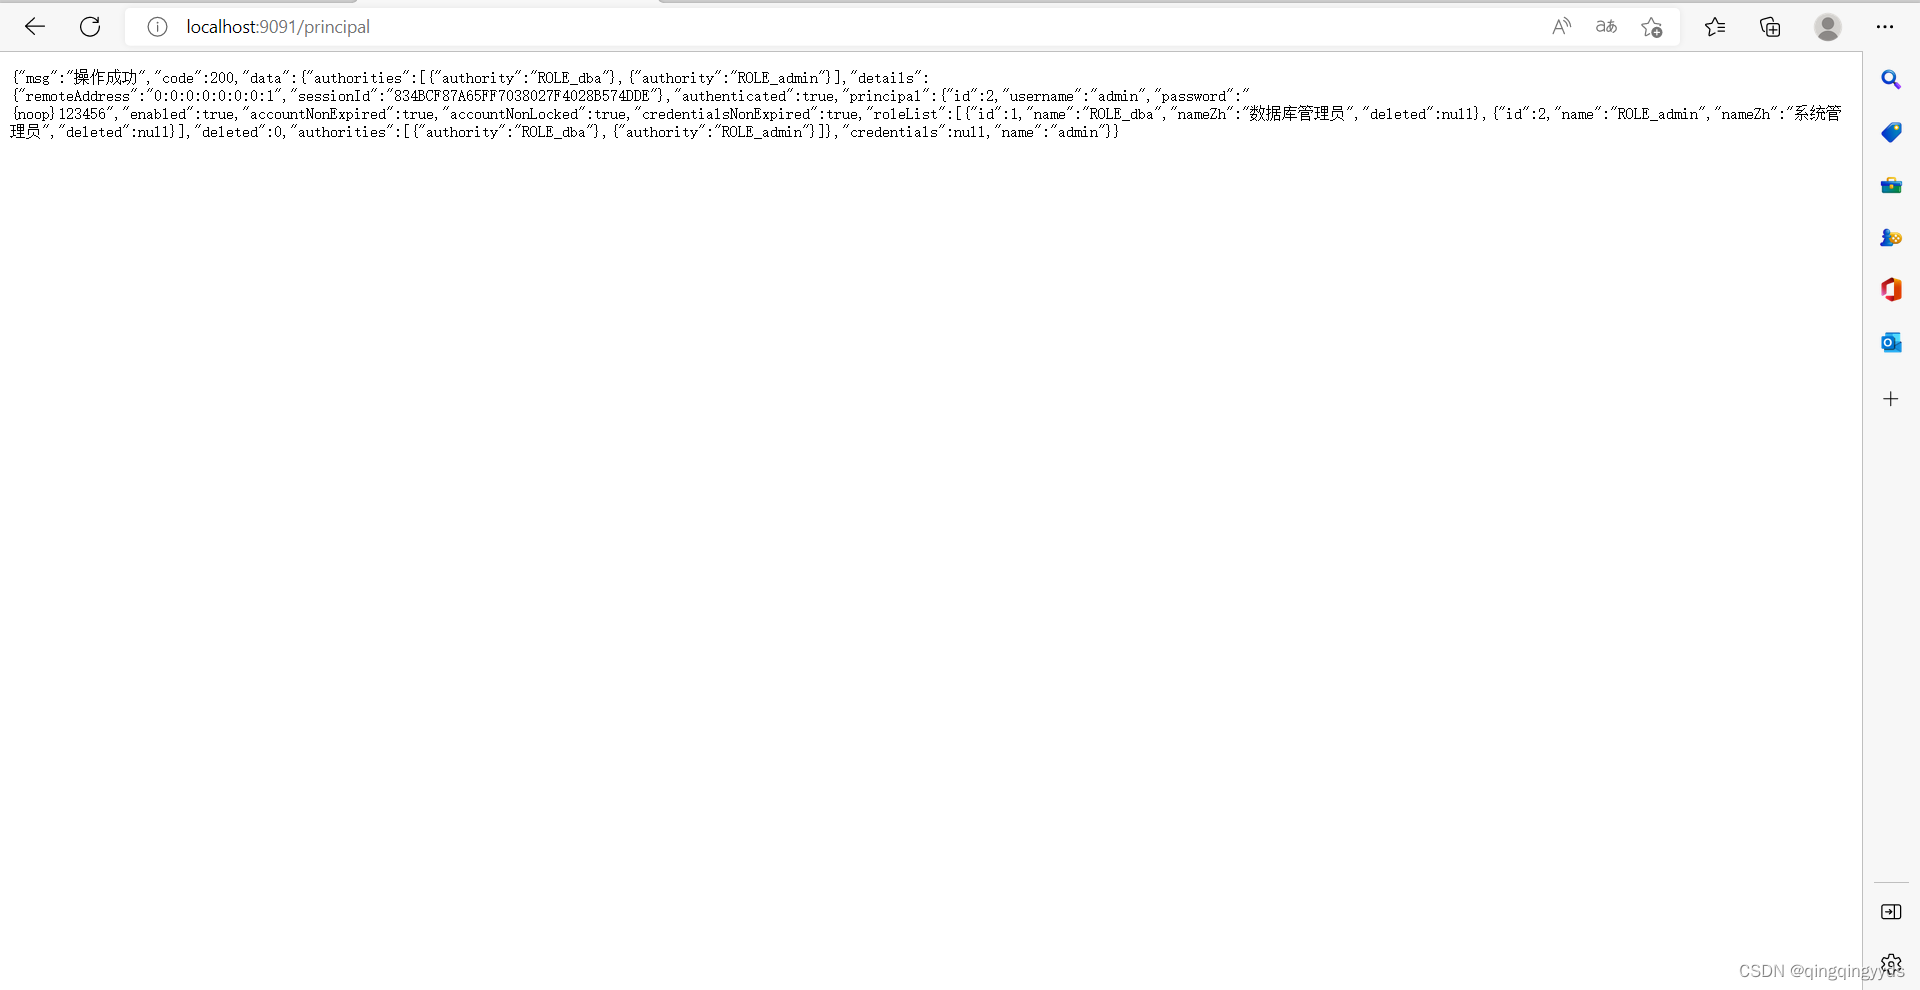
返回的其实差不多,因为authentication是继承principal的
2.6自定义认证用户信息
2.6.1基于内存
前面的案例都是基于内存的,只是我们没有将InMemoryUserDetailsManager
在刚才的security配置类里面,重写springSecurity认证方式的方法
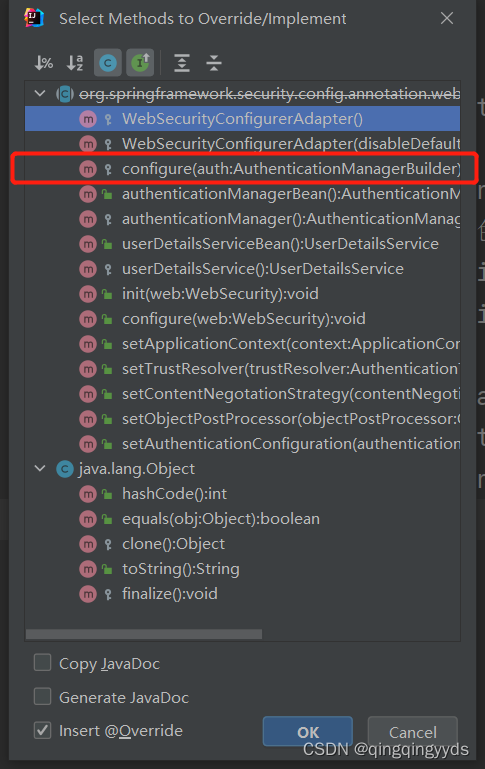
![]()
@Override
    protected void configure(AuthenticationManagerBuilder auth) throws Exception {
        //基于内存的用户
        InMemoryUserDetailsManager manager=new InMemoryUserDetailsManager();
        //创建用户,设置用户名,密码,角色
        manager.createUser(User.withUsername("admin").password("{noop}123").roles("admin").build());
        manager.createUser(User.withUsername("user").password("{noop}123").roles("user").build());
        //存储到authentication里面
        auth.userDetailsService(manager);
    }
{noop}前缀表示密码不加密
重写这个认证方式,就只能用设置的账号登录了,在实际项目中是不可能的这样配置的,都是用数据库的进行认证的
2.6.1基于Mybatis认证
(我用的是MyBatis-plus意义一样,可自行选择)****
(1)导入mybatis和MySQL-connector的依赖
<dependency>
<groupId>com.baomidou</groupId>
<artifactId>mybatis-plus-boot-starter</artifactId>
<version>3.5.2</version>
</dependency>
<dependency>
<groupId>mysql</groupId>
<artifactId>mysql-connector-java</artifactId>
<scope>runtime</scope>
</dependency>(2)配置数据库和myBatis
spring:
  datasource:
    url: jdbc:mysql://localhost:3306/test?serverTimezone=GMT%2B8&characterEncoding=utf-8
    username: root
    password: 123888
    driver-class-name: com.mysql.cj.jdbc.Driver
mybatis:
mapper-locations: classpath:mapper/*Mapper.xml
# ???????
typeAliasesPackage: com.frank.pojo
configuration:
# #????SQL??
log-impl: org.apache.ibatis.logging.stdout.StdOutImpl2.6.2创建数据库表
用户表
/*
Navicat Premium Data Transfer
Source Server : localhost_3306
Source Server Type : MySQL
Source Server Version : 80028
Source Host : localhost:3306
Source Schema : test
Target Server Type : MySQL
Target Server Version : 80028
File Encoding : 65001
Date: 14/10/2022 01:10:29
*/
SET NAMES utf8mb4;
SET FOREIGN_KEY_CHECKS = 0;
-- ----------------------------
-- Table structure for user_info
-- ----------------------------
DROP TABLE IF EXISTS `user_info`;
CREATE TABLE `user_info` (
`id` int(0) NOT NULL AUTO_INCREMENT COMMENT 'id',
`username` varchar(255) CHARACTER SET utf8 COLLATE utf8_general_ci NULL DEFAULT NULL COMMENT '用户名',
`password` varchar(255) CHARACTER SET utf8 COLLATE utf8_general_ci NULL DEFAULT NULL COMMENT '密码',
`create_time` datetime(0) NULL DEFAULT CURRENT_TIMESTAMP(0) COMMENT '创建时间',
`update_time` datetime(0) NULL DEFAULT NULL ON UPDATE CURRENT_TIMESTAMP(0) COMMENT '修改时间',
`deleted` int(0) NULL DEFAULT 0 COMMENT '逻辑删除',
PRIMARY KEY (`id`) USING BTREE
) ENGINE = InnoDB AUTO_INCREMENT = 5 CHARACTER SET = utf8 COLLATE = utf8_general_ci ROW_FORMAT = Dynamic;
-- ----------------------------
-- Records of user_info
-- ----------------------------
INSERT INTO `user_info` VALUES (1, 'user', '{noop}123456', '2022-10-02 10:33:46', '2022-10-12 00:40:19', 0);
INSERT INTO `user_info` VALUES (2, 'admin', '{noop}123456', '2022-10-02 10:33:46', '2022-10-12 00:40:21', 0);
INSERT INTO `user_info` VALUES (3, 'caixvkun', '{noop}123456', '2022-10-02 10:33:46', '2022-10-12 00:40:22', 0);
INSERT INTO `user_info` VALUES (4, 'wujinxiang', '{noop}123456', '2022-10-02 14:09:49', '2022-10-12 00:40:24', 0);
SET FOREIGN_KEY_CHECKS = 1;
角色表
/*
Navicat Premium Data Transfer
Source Server : localhost_3306
Source Server Type : MySQL
Source Server Version : 80028
Source Host : localhost:3306
Source Schema : test
Target Server Type : MySQL
Target Server Version : 80028
File Encoding : 65001
Date: 14/10/2022 01:10:40
*/
SET NAMES utf8mb4;
SET FOREIGN_KEY_CHECKS = 0;
-- ----------------------------
-- Table structure for role
-- ----------------------------
DROP TABLE IF EXISTS `role`;
CREATE TABLE `role` (
`id` int(0) NOT NULL AUTO_INCREMENT COMMENT 'ID',
`name` varchar(255) CHARACTER SET utf8 COLLATE utf8_general_ci NULL DEFAULT NULL COMMENT '角色',
`nameZh` varchar(255) CHARACTER SET utf8 COLLATE utf8_general_ci NULL DEFAULT NULL COMMENT '名称',
`create_time` datetime(0) NULL DEFAULT CURRENT_TIMESTAMP(0) COMMENT '创建时间',
`update_time` datetime(0) NULL DEFAULT NULL COMMENT '修改时间',
`deleted` int(0) NULL DEFAULT 0 COMMENT '删除标志',
PRIMARY KEY (`id`) USING BTREE
) ENGINE = InnoDB AUTO_INCREMENT = 4 CHARACTER SET = utf8 COLLATE = utf8_general_ci ROW_FORMAT = Dynamic;
-- ----------------------------
-- Records of role
-- ----------------------------
INSERT INTO `role` VALUES (1, 'ROLE_dba', '数据库管理员', '2022-10-02 10:32:06', NULL, 0);
INSERT INTO `role` VALUES (2, 'ROLE_admin', '系统管理员', '2022-10-02 10:32:06', NULL, 0);
INSERT INTO `role` VALUES (3, 'ROLE_user', '用户', '2022-10-02 10:32:06', NULL, 0);
SET FOREIGN_KEY_CHECKS = 1;
(用户关系表和角色表)
Navicat Premium Data Transfer
Source Server : localhost_3306
Source Server Type : MySQL
Source Server Version : 80028
Source Host : localhost:3306
Source Schema : test
Target Server Type : MySQL
Target Server Version : 80028
File Encoding : 65001
Date: 14/10/2022 01:10:48
*/
SET NAMES utf8mb4;
SET FOREIGN_KEY_CHECKS = 0;
-- ----------------------------
-- Table structure for user_role
-- ----------------------------
DROP TABLE IF EXISTS `user_role`;
CREATE TABLE `user_role` (
`id` int(0) NOT NULL AUTO_INCREMENT COMMENT 'id',
`uid` int(0) NULL DEFAULT NULL COMMENT '用户id',
`rid` int(0) NULL DEFAULT NULL COMMENT '角色id',
PRIMARY KEY (`id`) USING BTREE
) ENGINE = InnoDB AUTO_INCREMENT = 6 CHARACTER SET = utf8 COLLATE = utf8_general_ci ROW_FORMAT = Dynamic;
-- ----------------------------
-- Records of user_role
-- ----------------------------
INSERT INTO `user_role` VALUES (1, 2, 1);
INSERT INTO `user_role` VALUES (2, 2, 2);
INSERT INTO `user_role` VALUES (3, 1, 2);
INSERT INTO `user_role` VALUES (4, 3, 3);
INSERT INTO `user_role` VALUES (5, 4, 3);
SET FOREIGN_KEY_CHECKS = 1;2.6.3创建用户实体类
并且用户实体类继承UserDetails
@Data
public class UserInfo implements UserDetails {
private Long id;
private String username;
private String password;
@TableField(exist = false)
private Boolean enabled;
@TableField(exist = false)
private Boolean accountNonExpired;
@TableField(exist = false)
private Boolean accountNonLocked;
@TableField(exist = false)
private Boolean credentialsNonExpired;
@TableField(exist = false)
private List<Role> roleList;
@TableLogic//逻辑删除的注解
private Integer deleted;
//获取用户的权限
@Override
public Collection<? extends GrantedAuthority> getAuthorities() {
List<SimpleGrantedAuthority> authorities=new ArrayList<>();
for (Role role : roleList) {
authorities.add(new SimpleGrantedAuthority(role.getName()));
}
return authorities;
}
@Override
public boolean isAccountNonExpired() {
return accountNonExpired=true;
}
@Override
public boolean isAccountNonLocked() {
return accountNonLocked=true;
}
@Override
public boolean isCredentialsNonExpired() {
return credentialsNonExpired=true;
}
@Override
public boolean isEnabled() {
return enabled=true;
}
@Override
public String getUsername() {
return username;
}
public String getPassword() {
return password;
}
}role权限的实体类
package com.frank.pojo;
import com.baomidou.mybatisplus.annotation.IdType;
import com.baomidou.mybatisplus.annotation.TableId;
import com.baomidou.mybatisplus.annotation.TableLogic;
import lombok.Data;
import java.io.Serializable;
@Data
public class Role implements Serializable {
@TableId(type = IdType.AUTO)
private Long id;
private String name;
private String nameZh;
@TableLogic
private Integer deleted;
}
2.6.4重写UserDetailsService
@Service
public class UserDetailsServiceImpl implements UserDetailsService {
@Autowired
private UserMapper userMapper;
//自定义认证逻辑
@Override
public UserDetails loadUserByUsername(String username) throws UsernameNotFoundException {
QueryWrapper<UserInfo> queryWrapper=new QueryWrapper<>();
//根据username查询用户是否存在
queryWrapper.eq("username",username);
UserInfo userInfo = userMapper.selectOne(queryWrapper);
//判断用户是否存在,不存在就返回异常
if (userInfo==null){
throw new ServiceException(Constants.CODE_500,"用户不存在");
}else {
List<Role> roles = userMapper.queryByIdRole(userInfo.getId());
//用户存在,获取用户的角色,把角色存到用户校色里面
userInfo.setRoleList(roles);
}
return userInfo;
}
}userMapper.queryByIdRole(userInfo.getId());
@Mapper
public interface UserMapper extends BaseMapper<UserInfo> {
    //根据用户id获取用户的权限
    List<Role> queryByIdRole(Long id);
}
UserMapper.xml
<?xml version="1.0" encoding="UTF-8" ?>
<!DOCTYPE mapper
        PUBLIC "-//mybatis.org//DTD Mapper 3.0//EN"
        "http://mybatis.org/dtd/mybatis-3-mapper.dtd">
<mapper namespace="com.frank.mapper.UserMapper">


    <select id="queryByIdRole" resultType="com.frank.pojo.Role">
        select r.id, r.name, r.nameZh
        from role r
                 INNER JOIN user_role ur
                            ON ur.rid = r.id
                 INNER JOIN `user_info` u
                            ON ur.uid = u.id
        where u.id = #{id} and r.deleted=0
    </select>


</mapper>
2.6.5 修改security的认证配置
 //上面省略

	//注入UserDetailsServiceImpl的bean
  	@Autowired
    private UserDetailsServiceImpl userDetailsService;

    @Override
    protected void configure(AuthenticationManagerBuilder auth) throws Exception {
        auth.userDetailsService(userDetailsService);
    }