Android Studio基础工作流程-xml布局文件如何调用显示
说起安卓开发,很多小伙伴在刚开始入门的时候会有些云里雾里,觉得很混乱,这很正常,大多数是因为不太清楚安卓开发的基本流程,以及各个文件之间是怎样去相互作用的。我会在这篇文章里面向你介绍一下Android studio工作的基本流程,很基础很基础的那种。
1.两个重要的文件
一个完整的安卓开发工程,里面的文件有很多很多很多,但是为了说清楚基本的工作流程,我们先关注两个重要的文件。比如,当我们先创建一个empyt的工程,android会自动给我们生成已下的一些文件。
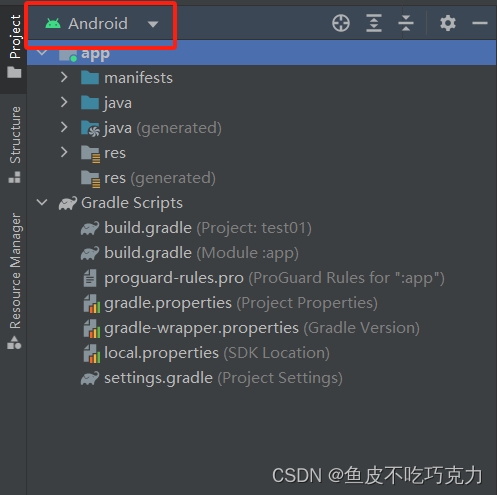
记住,左上角要选择android,才会出现以下的目录结构
而我们需要关注的,一个是layout文件下的.xml文件
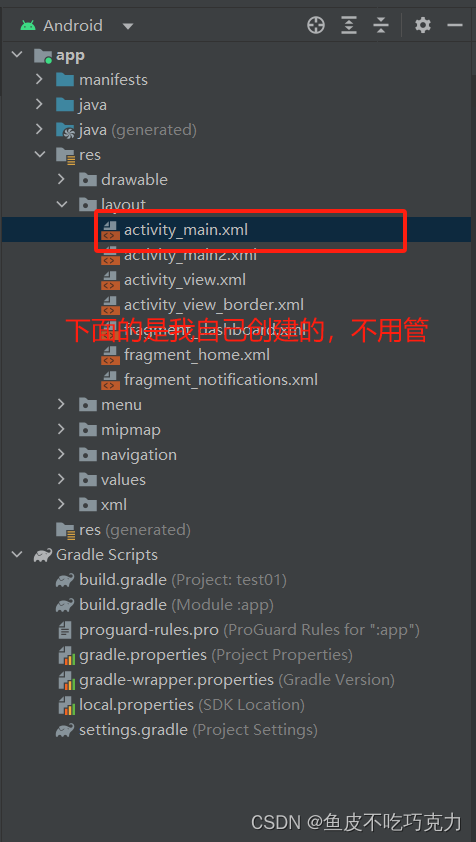
打开之后,可以看到这样的画面
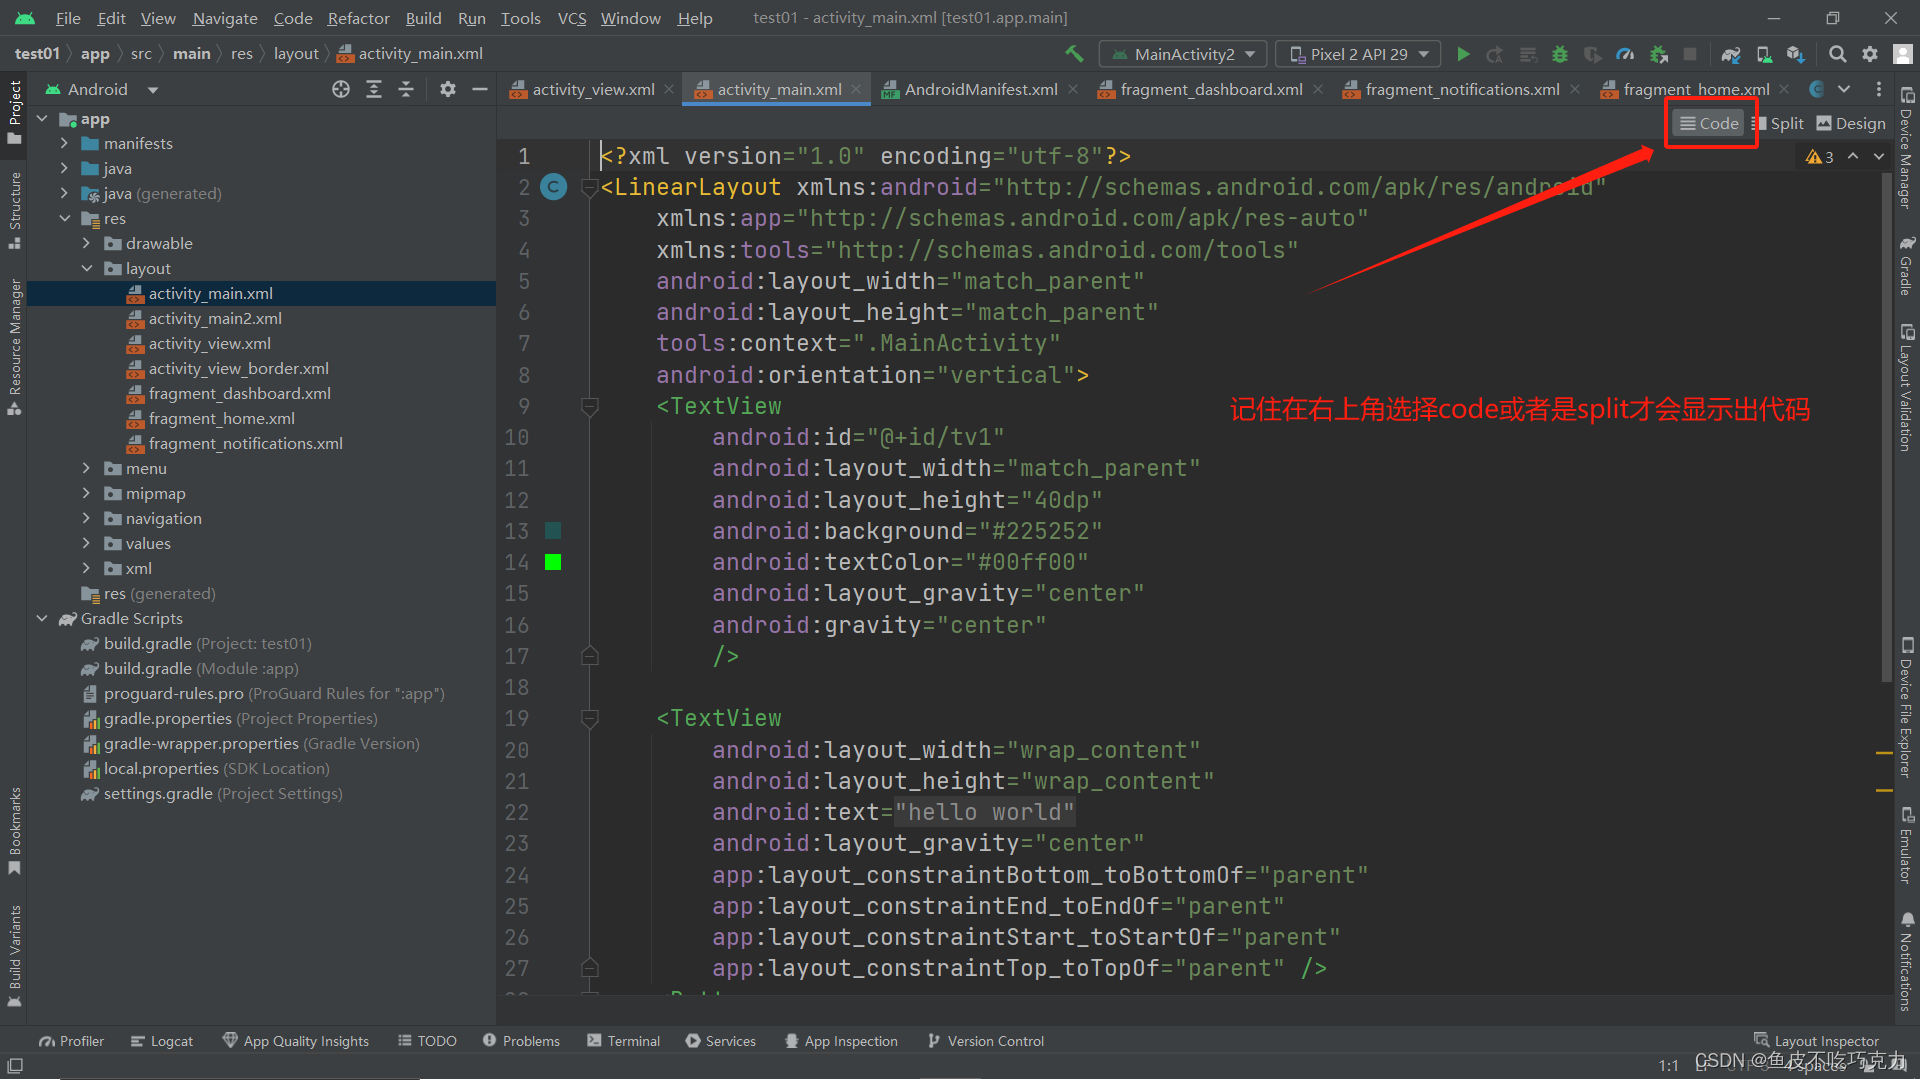
xml文件及其作用
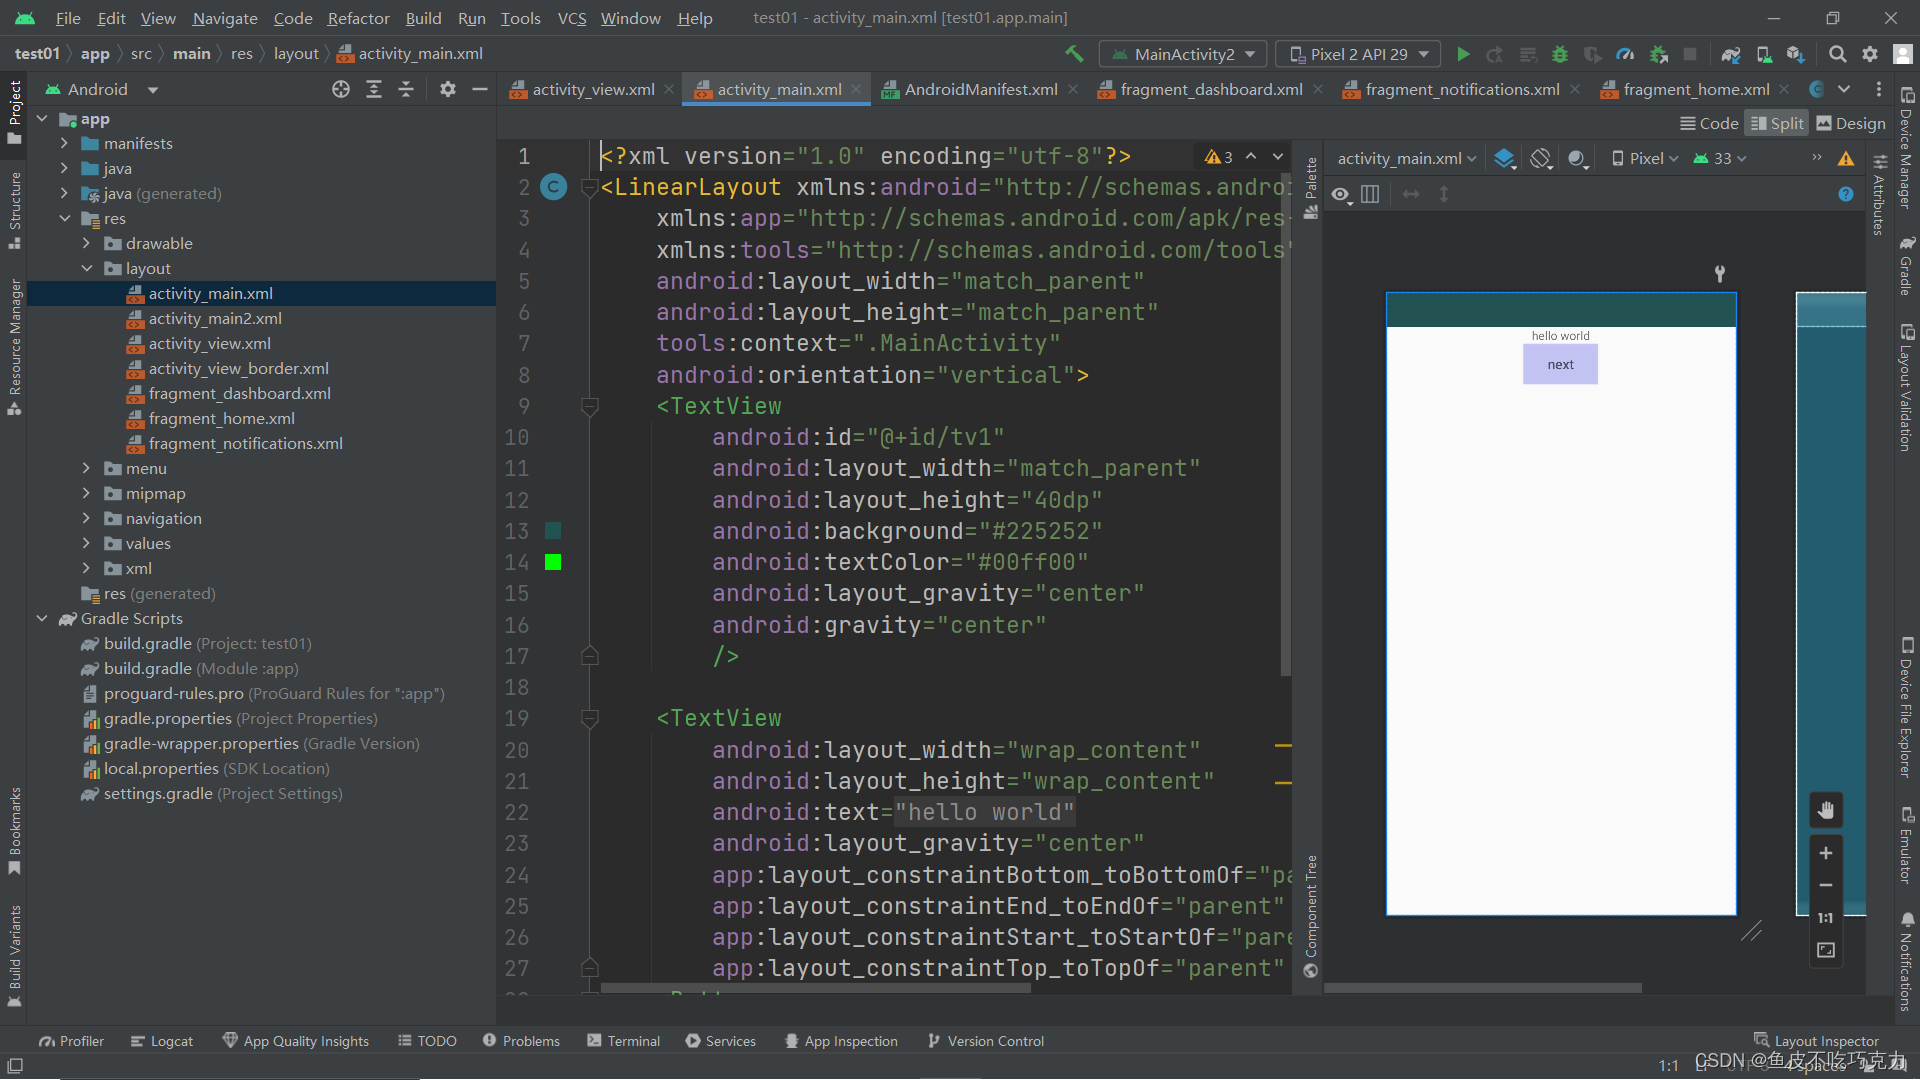
调整成split视图,我们不难看出,我们可以在这个xml文件里面来实现界面的布局。仔细观察,我们可以看到:
 <TextView
        android:id="@+id/tv1"
        android:layout_width="match_parent"
        android:layout_height="40dp"
        android:background="#225252"
        android:textColor="#00ff00"
        android:layout_gravity="center"
        android:gravity="center"
        />
 <Button
        android:id="@+id/main_bt01"
        android:layout_width="wrap_content"
        android:layout_height="wrap_content"
        android:hint="next"
        android:layout_gravity="center"
        android:textSize="16dp"
        android:background="#300000ff"
        />
类似于这种的代码,这个就代表了一个一个的组件。而这些组件具体的功能以及一些特性,我会在后面的博客中去介绍,这一次我们先关注如何跑起来一个安卓程序,并且从一个基础的角度去了解他的工作流程。
上面我们提到了组件,而组件是什么东西呢?我们打开一个应用程序:
比如这个计算器,我们可以看到计算器上面有很多按钮,还有输入框等等东西,这些东西我们叫他组件。比如按钮组件,输入框组件等等,我们稍作了解。
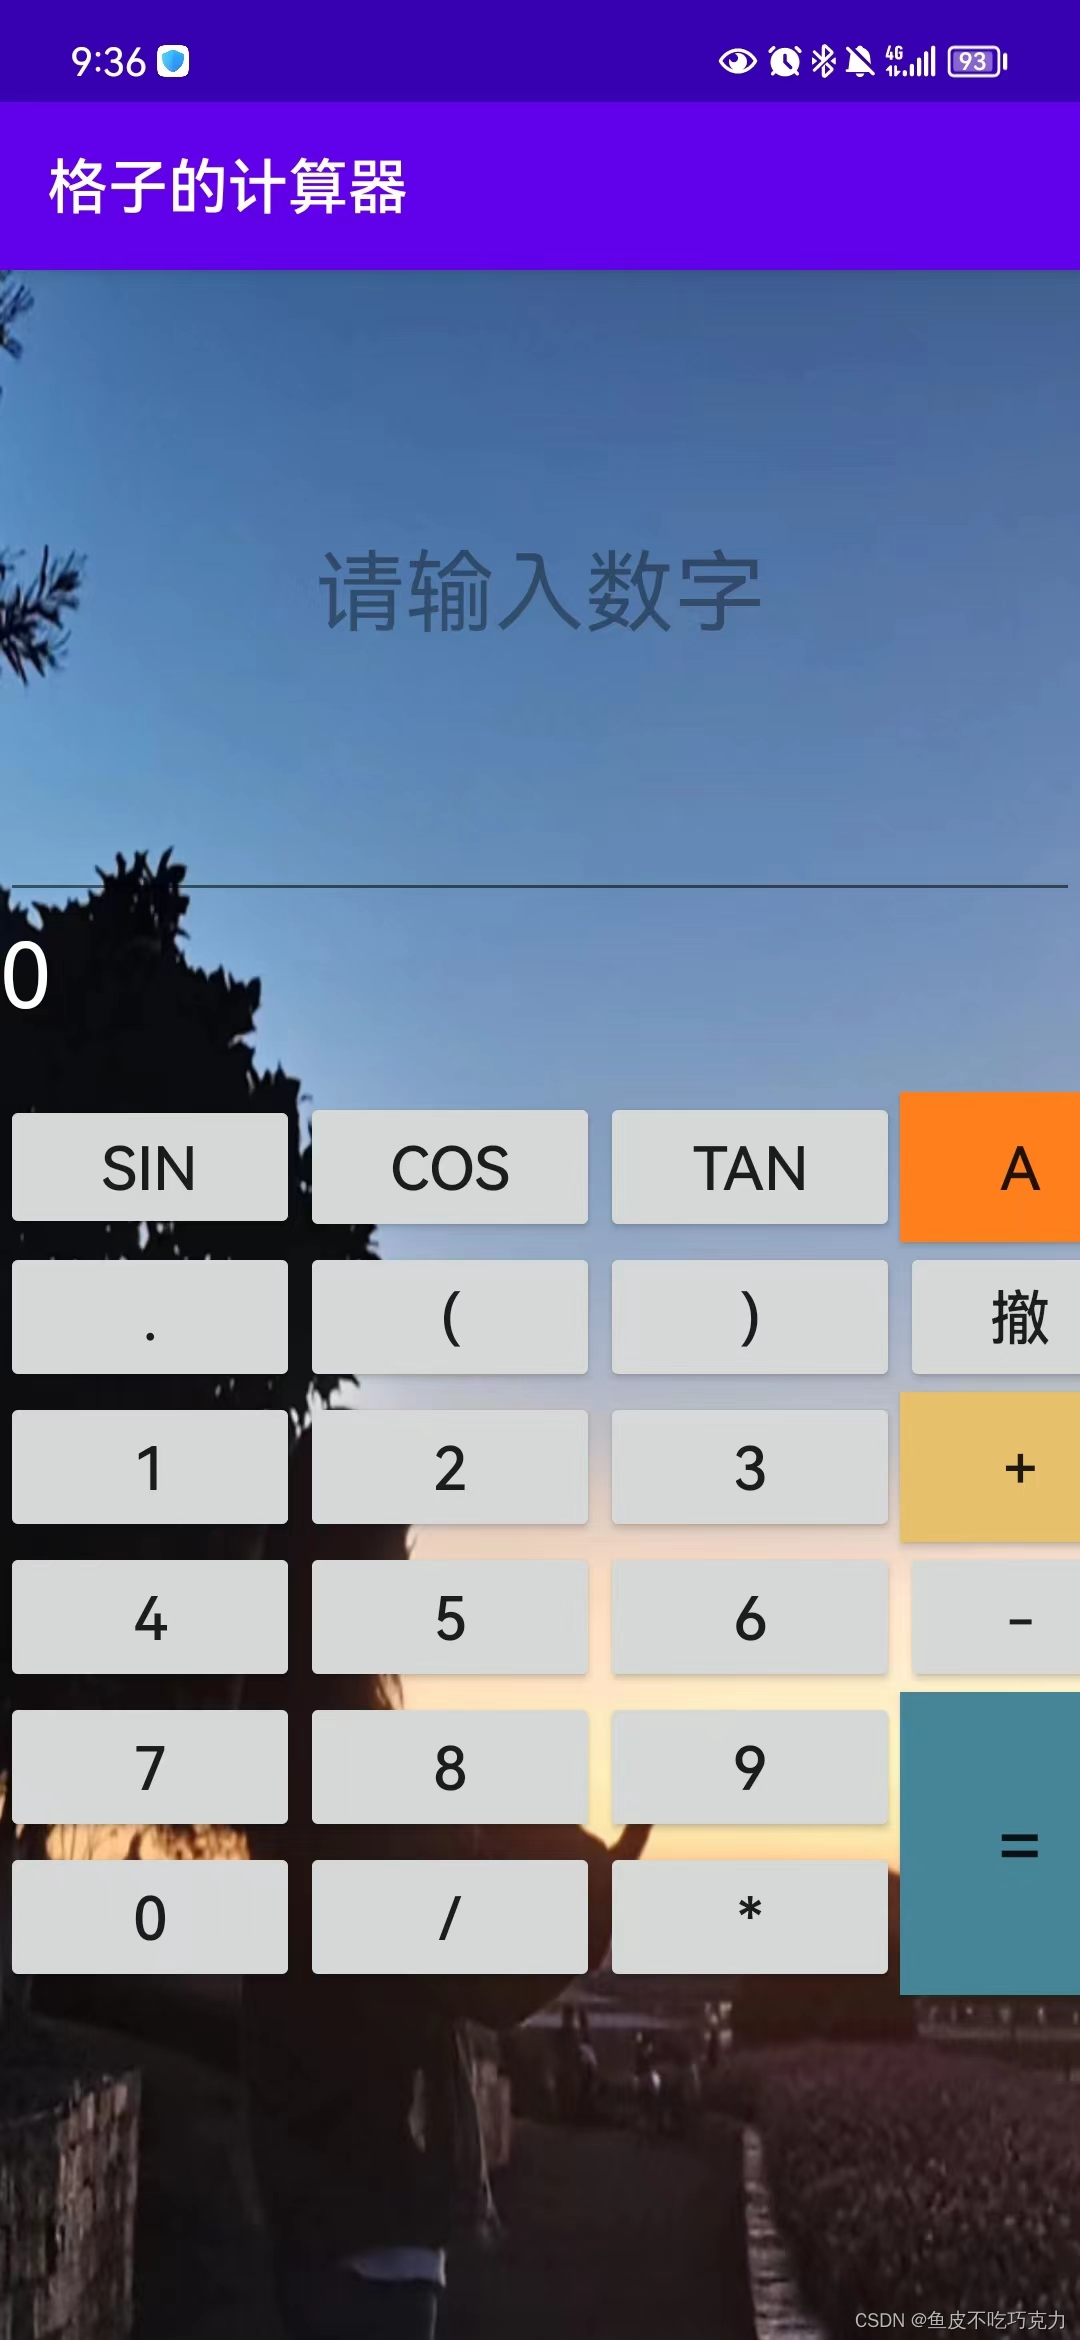
所以,这里的xml文件是用来实现界面的布局。你想让你的界面呈现成什么样的效果,可以在xml文件里面设置。如果你学过前端,可以发现xml文件类似于前端里面的html和css。
MainActivity文件
说完了xml布局文件,现在有一个很重要的问题。我们已经将我们的页面布局设置好了,并且也写成了xml文件,那么,我们的布局文件在哪里才能够调用显示出来呢?答案就在我们的MainActivity文件里面。文件目录如下:
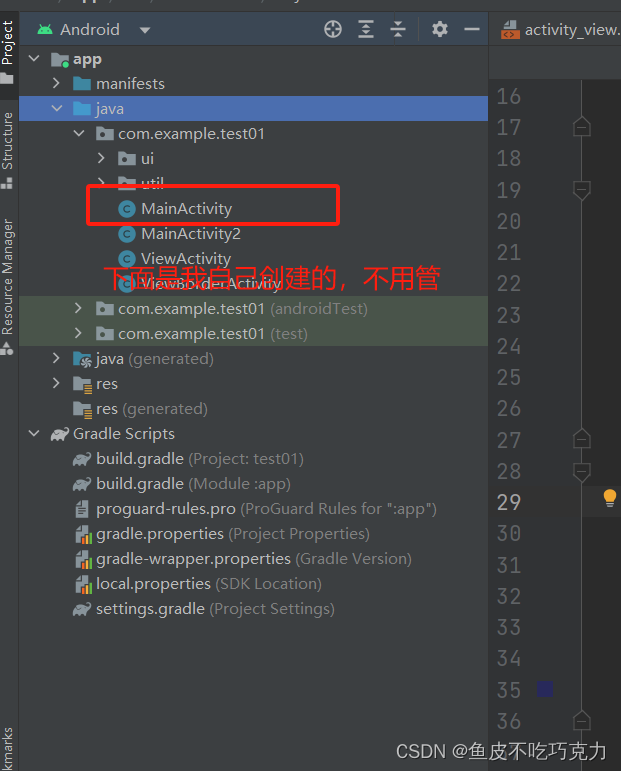
打开之后我们可以看到:(不同版本的Android Studio可能会有一些小小小小小的差异)
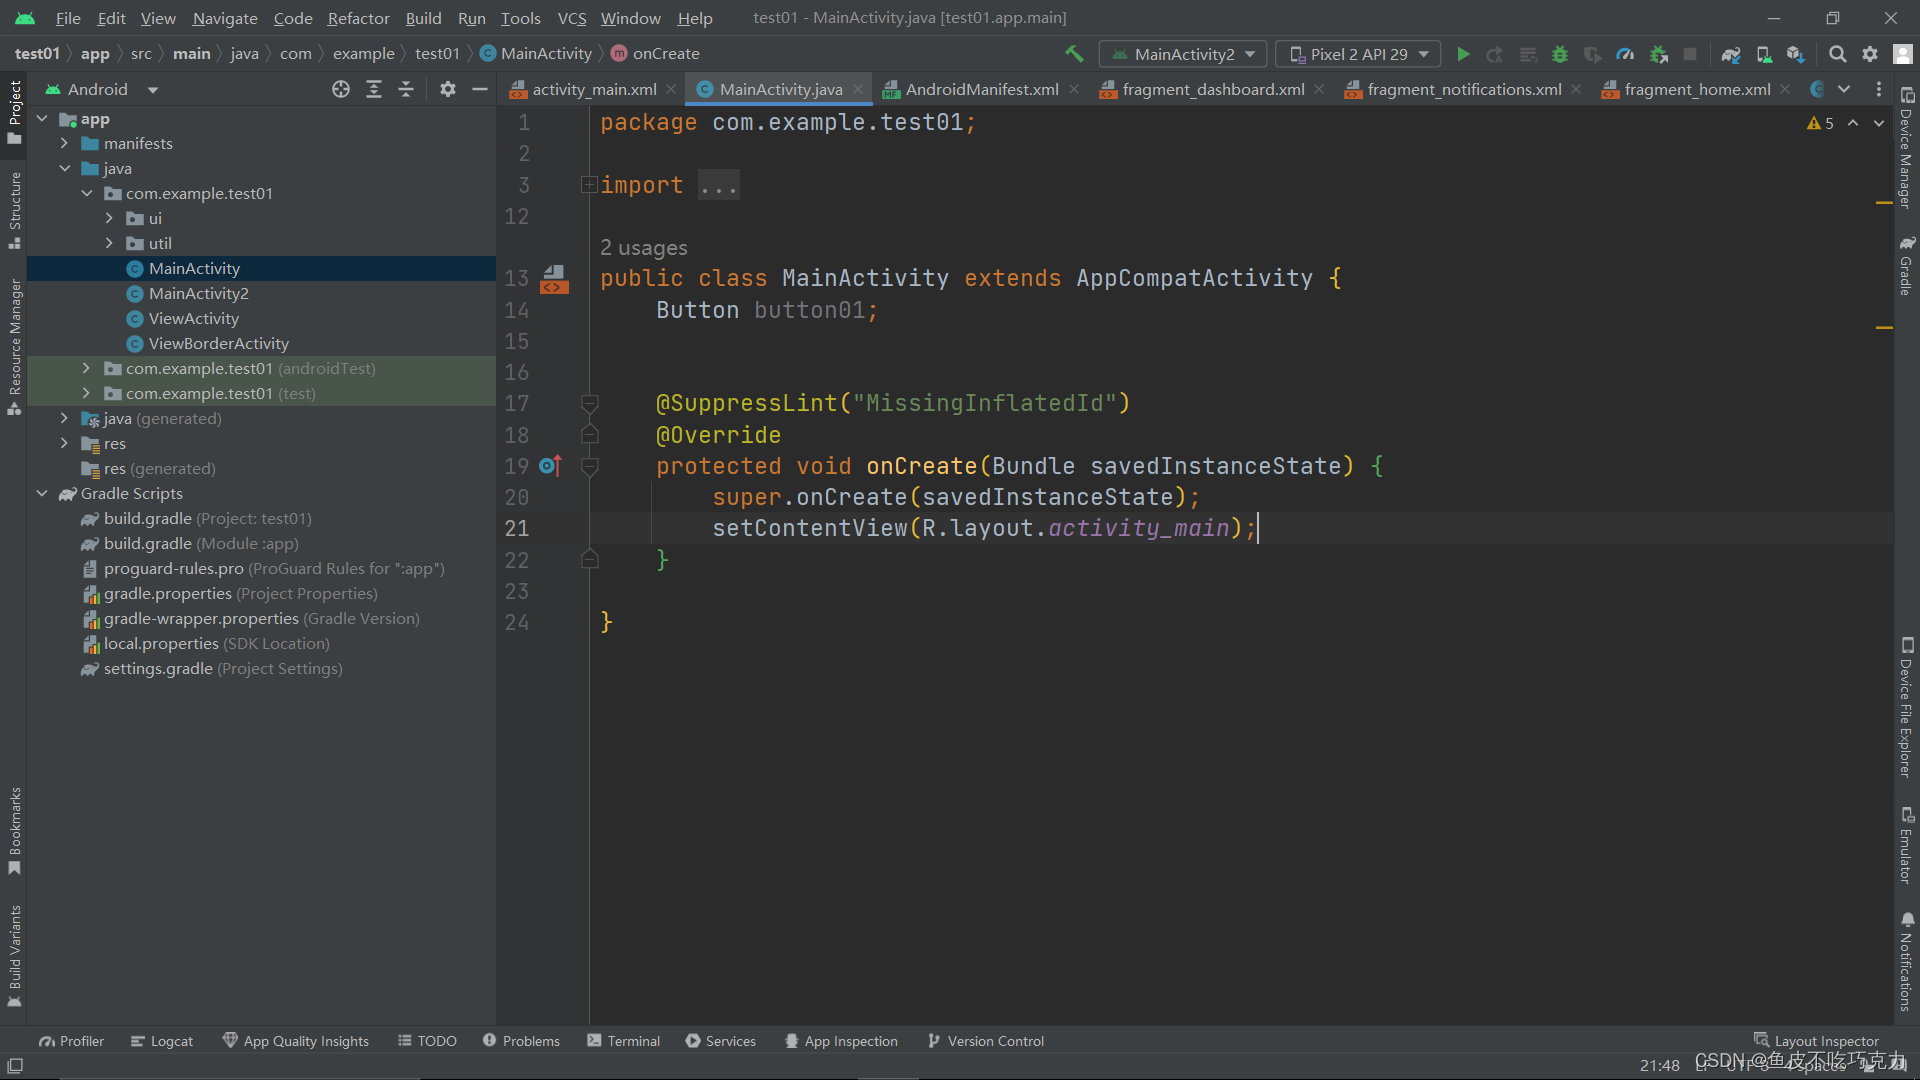
下面我就对这段代码进行一个简单的介绍
package com.example.test01;

import android.annotation.SuppressLint;
import android.os.Bundle;
import android.widget.Button;

import androidx.appcompat.app.AppCompatActivity;
public class MainActivity extends AppCompatActivity {//继承AppCompatActivity来调用安卓程序
    @SuppressLint("MissingInflatedId")
    @Override
    protected void onCreate(Bundle savedInstanceState) {
        super.onCreate(savedInstanceState);
        setContentView(R.layout.activity_main);//这里输入刚刚xml文件的路径。直接写R.layout.xxx
    }
}
可以看出来,我们是在
setContentView(R.layout.activity_main);//这里输入刚刚xml文件的路径。直接写R.layout.xxx
这行代码里面去调用我们刚刚创建的xml布局文件。代码其余的部分我们后面再详细介绍。通过这篇文章,我们可以了解到xml布局文件以及如何调用布局文件。那这里呢,我提供一个小小的代码,大家可以小试牛刀一下。
xml布局文件:
<?xml version="1.0" encoding="utf-8"?>
<LinearLayout xmlns:android="http://schemas.android.com/apk/res/android"
    xmlns:app="http://schemas.android.com/apk/res-auto"
    xmlns:tools="http://schemas.android.com/tools"
    android:layout_width="match_parent"
    android:layout_height="match_parent"
    tools:context=".MainActivity"
    android:orientation="vertical">
    <TextView
        android:id="@+id/tv1"
        android:layout_width="match_parent"
        android:layout_height="40dp"
        android:background="#225252"
        android:textColor="#00ff00"
        android:layout_gravity="center"
        android:gravity="center"
        />

    <TextView
        android:layout_width="wrap_content"
        android:layout_height="wrap_content"
        android:text="@string/txt_1"
        android:layout_gravity="center"
        app:layout_constraintBottom_toBottomOf="parent"
        app:layout_constraintEnd_toEndOf="parent"
        app:layout_constraintStart_toStartOf="parent"
        app:layout_constraintTop_toTopOf="parent" />
    <Button
        android:id="@+id/main_bt01"
        android:layout_width="wrap_content"
        android:layout_height="wrap_content"
        android:hint="next"
        android:layout_gravity="center"
        android:textSize="16dp"
        android:background="#300000ff"
        />


</LinearLayout>
MainActivity.java文件:
package com.example.test01;

import android.annotation.SuppressLint;
import android.content.Intent;
import android.graphics.Color;
import android.os.Bundle;
import android.view.View;
import android.widget.Button;
import android.widget.TextView;
import android.widget.Toast;

import androidx.appcompat.app.AppCompatActivity;

public class MainActivity extends AppCompatActivity {
    Button button01;


    @SuppressLint("MissingInflatedId")
    @Override
    protected void onCreate(Bundle savedInstanceState) {
        super.onCreate(savedInstanceState);
        setContentView(R.layout.activity_main);//表示这个activity要显示哪一个页面
        button01 = (Button) findViewById(R.id.main_bt01);
        TextView tv1 = findViewById(R.id.tv1);
        button01.setOnClickListener(new View.OnClickListener() {
            @Override
            public void onClick(View view) {
                tv1.setText("你好,鱼皮");
                Toast.makeText(MainActivity.this, "鱼皮不吃巧克力", Toast.LENGTH_SHORT).show();
            }
        });
    }

}
最后的效果嗯:
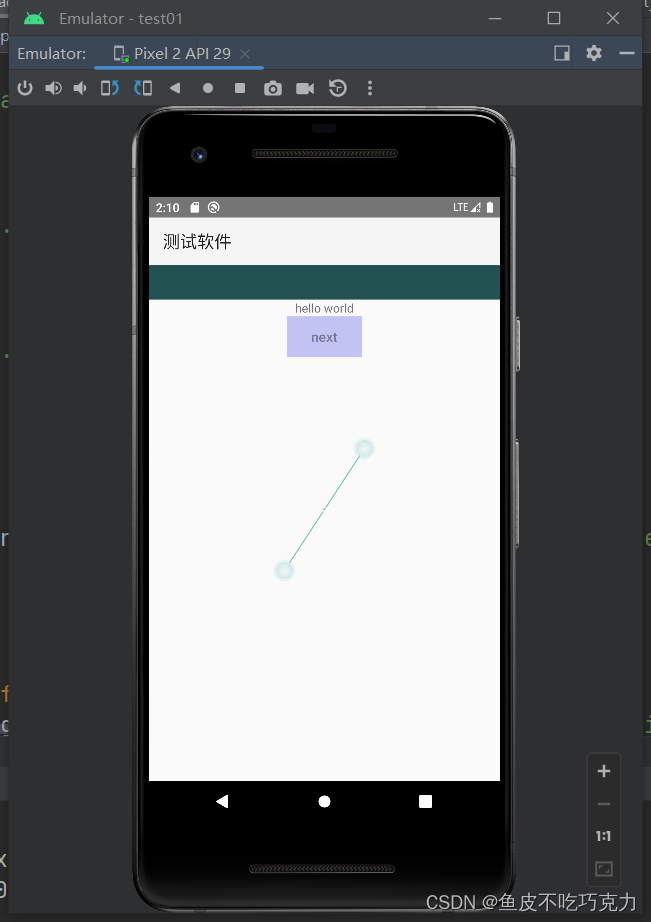
最后总结:最基本的工作流程其实很简单很简单。在xml布局文件里面写我们的布局,在java文件里面去调用。记住要填写正确的xml文件路径,以便于程序能够找到xml文件所在的位置。