springboot多模块在创建一个可以独立部署的模块时遇到的坑
springboot多模块在创建一个可以独立部署的模块时遇到的坑
要在现有的项目新增一个新的模块该模块可以独立部署
思路:首先肯定是复制已有的模块来进行修改,创建启动类pom文件要集成maven统一管理插件

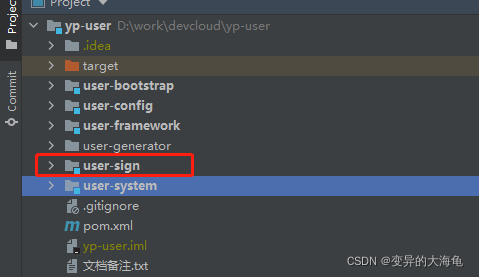
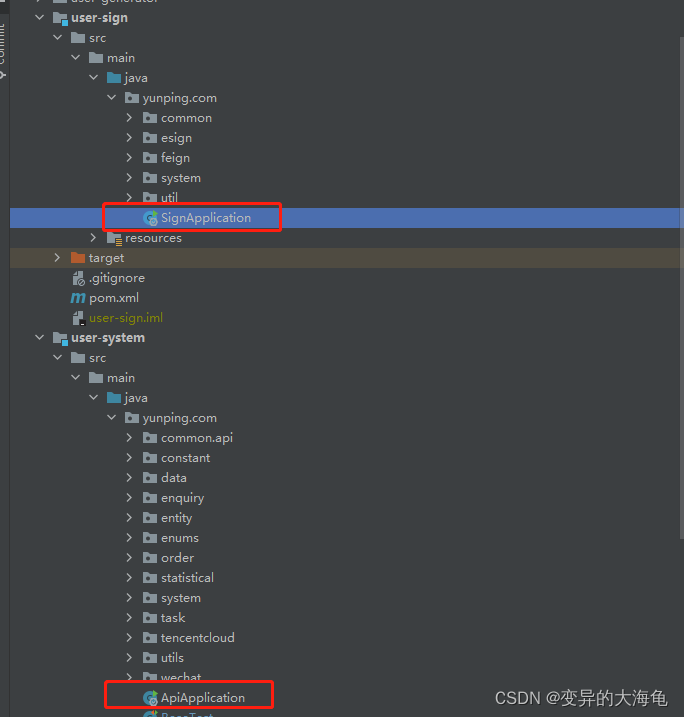
这个是我的模块,user-sign复制user-system模块,各自的启动类

接下来重点来了关于pom.xml文件
如果要让他自己能够运行则需要添加 特别是要引入配置模块和打包插件spring-boot-maven-plugin
<?xml version="1.0" encoding="UTF-8"?>
<!--
  ~ Copyright 2019-2029 geekidea(https://github.com/geekidea)
  ~
  ~ Licensed under the Apache License, Version 2.0 (the "License");
  ~ you may not use this file except in compliance with the License.
  ~ You may obtain a copy of the License at
  ~
  ~     http://www.apache.org/licenses/LICENSE-2.0
  ~
  ~ Unless required by applicable law or agreed to in writing, software
  ~ distributed under the License is distributed on an "AS IS" BASIS,
  ~ WITHOUT WARRANTIES OR CONDITIONS OF ANY KIND, either express or implied.
  ~ See the License for the specific language governing permissions and
  ~ limitations under the License.
  -->

<project xmlns="http://maven.apache.org/POM/4.0.0"
         xmlns:xsi="http://www.w3.org/2001/XMLSchema-instance"
         xsi:schemaLocation="http://maven.apache.org/POM/4.0.0 http://maven.apache.org/xsd/maven-4.0.0.xsd">
    <modelVersion>4.0.0</modelVersion>

    <parent>
        <groupId>com.yunping</groupId>
        <artifactId>yp-user</artifactId>
        <version>2.0</version>
    </parent>
    <artifactId>user-sign</artifactId>
    <name>user-sign</name>
    <description>签章模块</description>

    <dependencies>
    <!--引入配置的模块-->
        <dependency>
            <groupId>com.yunping</groupId>
            <artifactId>user-bootstrap</artifactId>
            <version>2.0</version>
        </dependency>
        <!--nacos-discovery-->
        <dependency>
            <groupId>com.alibaba.cloud</groupId>
            <artifactId>spring-cloud-starter-alibaba-nacos-discovery</artifactId>
        </dependency>
        <!--feign的配置-->
        <dependency>
            <groupId>org.springframework.cloud</groupId>
            <artifactId>spring-cloud-starter-openfeign</artifactId>
            <version>2.1.0.RELEASE</version>
        </dependency>
    </dependencies>
    <!--打包插件-->
    <build>
        <plugins>
            <plugin>
                <groupId>org.springframework.boot</groupId>
                <artifactId>spring-boot-maven-plugin</artifactId>
                <version>${spring-boot.version}</version>
                <executions>
                    <execution>
                        <goals>
                            <goal>repackage</goal>
                        </goals>
                    </execution>
                </executions>
            </plugin>

        </plugins>
    </build>
</project>
这样子就能mvn install了
遇到的问题一
因为我这个模块里面也有调用user_system的一些方法
我在pom.xml里面直接引用
        <dependency>
            <groupId>com.yunping</groupId>
            <artifactId>user-system</artifactId>
            <version>2.0</version>
            <scope>compile</scope>
        </dependency>
发现mvn打包不了,所以我上面的包引入了nacos和feign配置。
虽然他们同属于一个项目但由于都有各自的启动类,打包方式也是独立的,所以其实是两个项目调用
需要在配置文件里面配置nacos
spring:
  application:
    name: user-sign  #服务名称
  cloud:
    nacos:
      config:
      #      server-addr: 192.168.0.x:8848 # nacos配置中心的地址
      #file-extension: yml #指定yaml格式配置
      #namespace: ${nacos.namespace} #命名空间
      #group: test
      discovery:
        server-addr:  127.0.0.1:8848 #nacos注册中心的地址
        #prefix: ${spring.application.name}
        #namespace: ${nacos.namespace}
        #group: test
#要调用的那个系统
visit:
  userCenterPath: user-center
调用feign
@FeignClient(
        name = "${visit.userCenterPath}",configuration = FeignSupportConfig.class
)
public interface FeignUserService {


    //房产登录根据账号查询公司信息接口
    //根据机构id查询
    @RequestMapping(value = "/api/userCenter/xx", method = RequestMethod.POST,
            consumes = "application/json;charset=UTF-8"
    )
    SysOrg getSysOrgById(@RequestParam("id") String id);
    }
不要忘了在启动类里面配置
@EnableDiscoveryClient//注册发现
@EnableFeignClients//服务调用feign
如果不了解nacos可以百度入门
遇到的问题二
现在是不是大功告成了,别急我还碰到一个问题
我要把代码提交到git上面,我发现怎么那么多的class文件
发现是少传了一个文件.gitignore的作用
在git中如果想忽略掉某个文件
/target/
/classes
!.mvn/wrapper/maven-wrapper.jar

### STS ###
.apt_generated
.classpath
.factorypath
.project
.settings
.springBeans
.sts4-cache

### IntelliJ IDEA ###
.idea
*.iws
*.iml
*.ipr

### NetBeans ###
/nbproject/private/
/build/
/nbbuild/
/dist/
/nbdist/
/.nb-gradle/

.DS_Store

*.log
logs

*.rdb
把多余提交的class文件进行删除执行一下命令就好了
git rm -r --cached .
git add . 重新提交(注意如果有改动其他代码这个也会提交)这一步可以用idea手动需要上传的东西
#注意: "update .gitignore" Linux是单引号,windows是双引号
git commit -m "update .gitignore"
git push -u origin master